|
|
Capturing Skype calls
When you record audio or video calls using Skype or a similar program, it is important that you record both ends of the conversation. To do that, you will need to record input from your microphone or webcam, as well as the audio from your speakers. Follow the steps below to record Skype calls with audio.
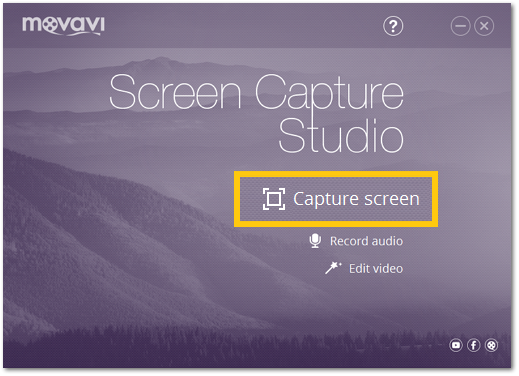
Step 1: Launch the Screen Capture module
Open Movavi Screen Capture Studio and click Capture Screen to launch the screen capture module.
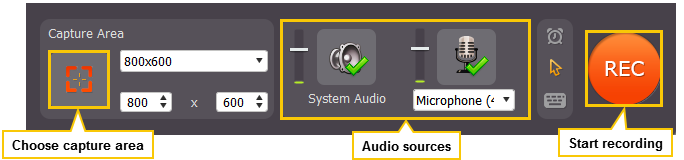
Step 2: Select audio sources
-
Click the System Sound button to enable capturing the sounds that you hear in your speakers, including your Skype interlocutor.
-
Click the microphone icon to enable capturing audio from external devices.
-
Open the list beneath the microphone icon and select your microphone or another device that will capture your voice.

Step 3: Set up the capture area
Adjust the size of the Capture Area to the call window. To do that, click the crosshair button in the left part of the window, and then click and drag your mouse from one corner of the Skype call area to another. When you release the mouse button, the Capture Area will have the same size and position as your Skype window.
You can find more information on how to set the size and position of the Capture Area in the Defining the Capture Area section.

Step 4: Call and record
Now that everything is set it's time to make that call!
Click the orange REC button to begin recording your call. You will be given a five-second countdown to prepare. If you want, you can disable the countdown window in General Preferences.

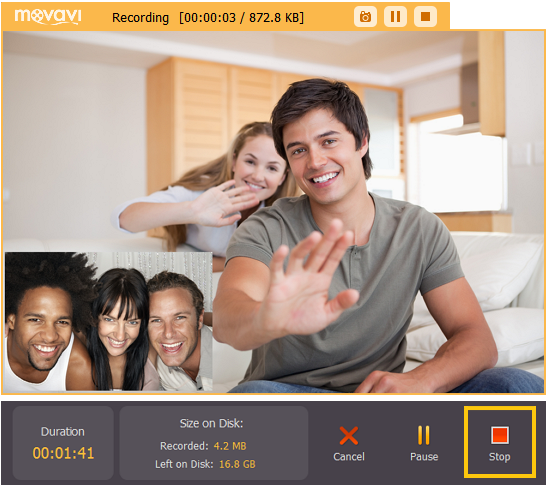
Step 5: End call and save
When you're done, click Stop in the main Movavi Screen Capture window or press F10 to finish capturing and proceed to saving the video. You can change the Stop Capture hotkey in Preferences under Keyboard Shortcuts.