|
|
Recording and saving audio
Movavi Screen Capture can help you not only record any screen activity, but it can also function as a sound recorder to record online music, radio broadcasts, and voice input.
Step 1: Launch the Screen Capture module
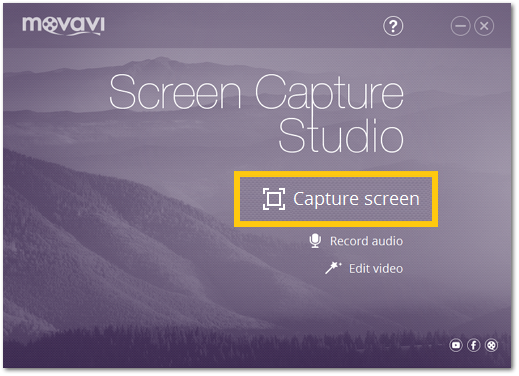
Open Movavi Screen Capture Studio and click Capture Screen to launch the screen capture module.
Step 2: Set up Audio
Naturally, if you want to record an audio file, you'll need to enable audio recording.
-
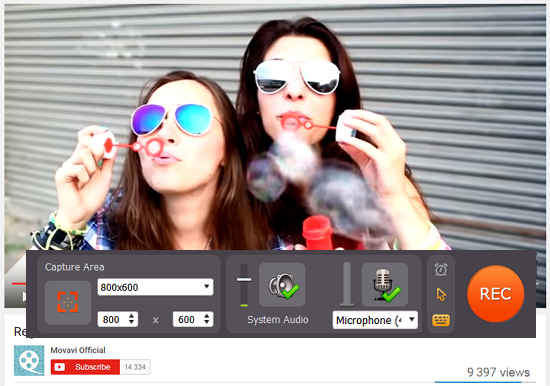
To capture audio from your computer, make sure that the System Audio option is enabled.
-
To capture audio from a microphone or an external device, click the microphone icon and choose the device you will be using for recording.
-
To capture Skype audio, you'll need both options enabled in order to capture the audio from the other end of the call as well your own microphone input.

Here, both System Audio and device recording are enabled
Troubleshooting audio:
If you don't see the device you want to use in the list, it may be disconnected or disabled in system settings.
1. Right-click the sound icon in the Windows notification area and choose Recording Devices from the pop-up menu. The Sound settings window will open.
2. In the Recording Devices window, look for the necessary device in the list. If it is detected and enabled in your system, there should be a green checkmark beside it.
3. If you cannot find the device in the list, right-click anywhere in the list and make sure that the options Show Disabled Devices and Show Disconnected Devices are selected.
4. If the device is listed as Not Plugged In, try plugging in the device again.
5. If the device is listed as Disabled, right-click the device and choose Enable.
Step 3: Set up Video
No video:
If you'll only be recording the audio, or if there's no video at all, we recommend that you make the capture area smaller, so that video recording does not unnecessarily take up your disk space. To do that, you can resize the capture area with your mouse, or enter smaller dimensions in the Movavi Screen Capture window. You can set the capture area to as small as 16x16 pixels.
With video:
If you'll also be recording video, move the capture area over the video:
-
Drag at the orange square in the center of the capture area to move the frame
-
Drag at the corners of the frame to resize the capture area.
Step 4: Record
Click the REC button to begin recording. You will be given a 5-second countdown to start the audio playback (don't worry you will be able to trim the file later if you accidentally record some silence). When you're done recording, click the Stop button.

Step 5: Save Audio
When the recording is finished, you will see a player window, where you can preview and save the recording as an audio file.
Trim the file:
If you've accidentally recorded some unwanted parts, like silence at the beginning or at the end of the file, you can easily trim them before saving the file. At both ends of the progress bar, you will find a pair of triangular trimming markers. These markers control which part of the recording is saved in the output file. Move the triangle markers so that the unwanted parts are outside of them.
Trimming markers
Save the file:
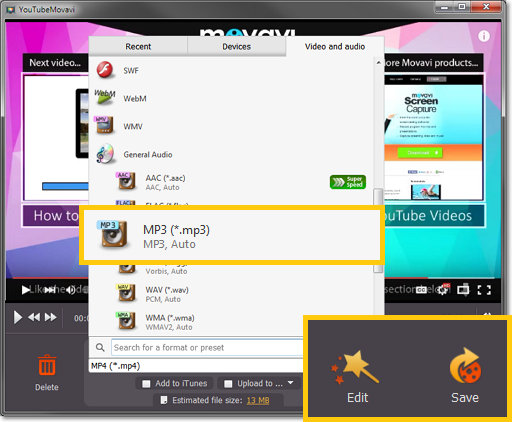
1. If you're ready to save the audio file, open the Save as list and click the Video and audio tab at the top of the list.
2. Scroll to the very bottom of the list to find audio formats and choose the format you like. If you're unsure, you can use *.mp3, as it is the most widely supported format.
3. Click the Save button to start saving the video.