
|
|
Adding overlays
Overlays are video or image clips that are shown over the main video. You can use these to create a split screen or picture in picture effect, add a logo or watermark, or insert a short clip without cutting the main video. Also, you can use overlays with the Chroma key tool.
Before you start:
You'll need to add both the main video (the video that will be the bottom layer) and the overlay video or image to your project. You can use images in PNG format to add transparent logos.
Step 1: Place the overlay clip
1. Select the clip that you want to make an overlay and drag it up, towards the top of the Timeline.
2. Drop the clip onto the overlay track, where you want it to be shown relative to the main video track.
Note that a blue line now connects the overlay clip to the main clip. This means that the overlay clip is linked to the main clip: if you move, cut, or delete the main clip, the overlay clip will also be edited.

Step 2: Edit the overlay
1. Double-click the overlay clip to set it up. An options panel will appear in the player.
2. Open the drop-down box on the overlay panel and choose how you want it to appear on the video: Picture in picture, Side by side, or Cover.
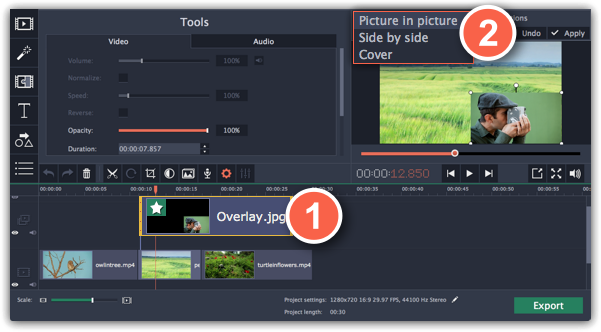
Picture in picture
This is the default overlay mode. Using picture in picture mode, you can show the overlay video over any part of the screen.
1. Choose Picture in picture mode from the drop-down box.
2. In the player, move the overlay to where you want it to appear in the frame.
3. To resize the overlay, drag at its corners.
4. Deselecting the Constrain proportions option will allow you to resize the overlay to any proportions, but a drastic change in proportions may make the overlay look distorted.

Picture in picture overlay
Side by side
1. Choose Side by side mode from the drop-down box.
2. Use the buttons on the panel to choose how you want to align the two videos: 

Side by side overlay
Cover
Cover mode can be used for a short insert into the main video without having to cut it. While the main video (and audio!) is playing, the overlay clip will appear on screen for the duration of the overlay clip.
If you want to replace a video's background using the Chroma key effect, use Cover mode to place the foreground on top of the new background. Learn how to use Chroma key.


Cover overlay: left - the main clip is hidden; right - Cover with the Chroma Key effect
Step 3: Apply the changes
After you've set up the overlay, click the Apply button on the overlay options panel.
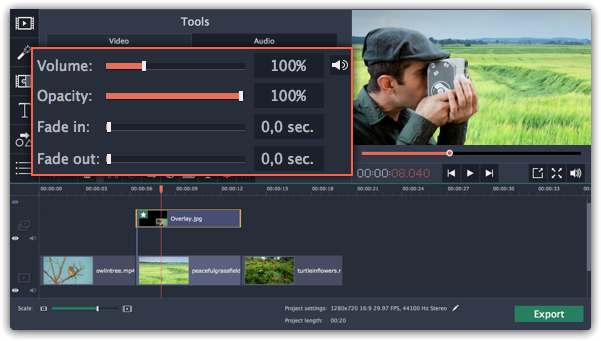
Step 4: Overlay clip properties
In the Tools panel on the left, set up the overlay's properties:
Volume: if you have several video clips playing simultaneously, you might want to mute one of the clips. To do that, click the mute  button, or use the slider to lower the volume.
Opacity: if you want to make the overlay more transparent, lower its opacity, and the main video track will be seen through it.
Fade in / Fade out: while you can't use transitions on the overlay track, you can fade in the clip to make it appear smoothly. Set the slider to the time it should take for the clip to appear.
See also:
