
|
|
Scheduling
Any recording can be scheduled for a later time. You can use this to automate your recordings or capture late-night webinars.
Step 1: Set up your recording
Scheduled recordings will start with the currently selected options (system sound, webcam, etc.) Before scheduling the recording:
1. (optional) Default capture area for scheduled recordings is full screen, so if you want to change it, click the camera button  on the control panel and select the part of the screen you want to see on your scheduled recording.
2. To enable system sound recording, click the speaker button  on the recording panel and make sure it is enabled and highlighted green.
Step 2: Schedule recording
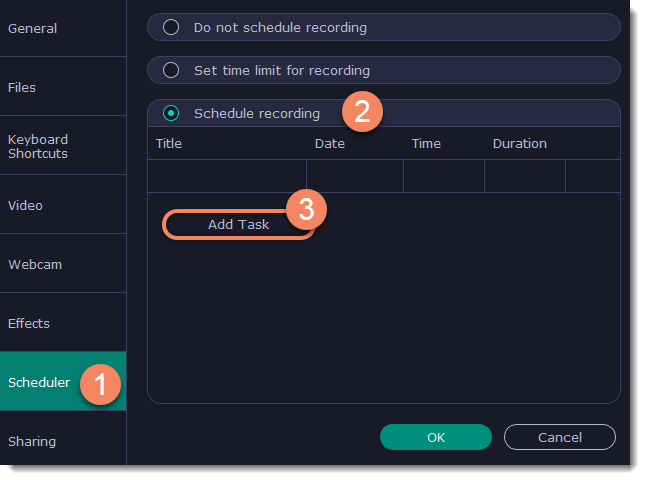
1. On the control panel, click the cogwheel button  to open Preferences. Switch to the Scheduler tab.
2. Select Schedule recording.
3. Click the Add Task button.
4. A task template will appear. Fill in the details for the task:
-
Title - the name of your recording
-
Date and time - the moment recording should start
-
Duration - how long the recording should last (e.g if you want to record an hour long webinar, set this at 01:00:00)
-
Capture area - by default, the program will record full screen. However, if you'd like to avoid recording extra parts of the screen, you can select Current area. Be careful: the program will capture the area selected on screen at the moment your recording starts! If you don't select the new area, last recorded area will be used.
-
After capture - you can set your computer to automatically sleep or shut down when the recording is over.
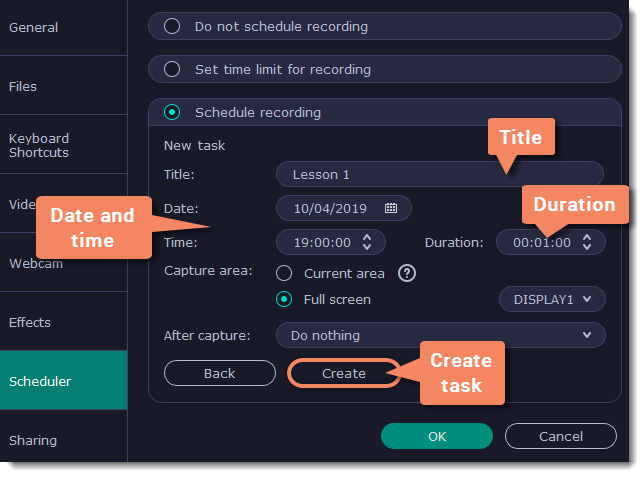
5. Click Create to add the task to your recording schedule.
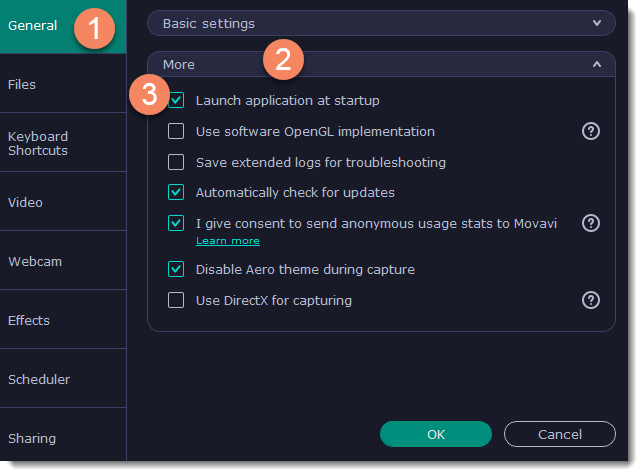
Step 3: Enable launching at startup (optional)
The screen recorder needs to be running at the scheduled start time to begin the recording. If you've scheduled the recording for a later date, enable the program to start with your computer so that you don't miss the recording. To do that, open the General section of the Preferences, click More and enable the Launch application at startup option.
Finally, click OK in the Preferences window to save the changes. After the recording is finished, the recording file will be stored in *.mkv format in the output folder with your other screen recordings.
If you are starting a lengthy recording, make sure that you have enough free disk space for saving the temporary recording files.
