
|
|
Adding audio
You can add audio files in much the same way as you add photos and video files.
Add files from your hard drive
1. On the Import tab, click Add Media Files to browse for audio files on your computer.
2. A Finder dialog box will open. Choose the files that you want to use.
3. Click Open. The files will be added onto the audio track of the Timeline.

Use sample audio clips
If you don't have any suitable audio files, you can use free music tracks and sounds from the Movavi Academic audio collection.
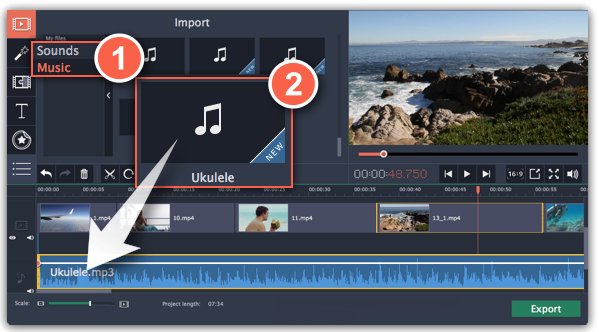
1. On the Import tab, click Music if you need a background music track, or click Sounds if you need short audio samples.
2. Click on a clip to play it. When you've picked a clip, drag it onto the audio track of the Timeline.
Record audio
1. Connect a microphone to your computer.
2. On the Timeline, place the position marker to where you want the recording to start.
3. Click the microphone button on the toolbar to open recording options.
4. Set up your recording device and volume.
5. Click Start Recording and record the audio. When you're finished, click Stop Recording. You'll find your new recording on the Timeline.

Set start time for audio clips
After you've added the audio files, they will appear on the audio track of the Timeline as blue ribbons. To change when the audio clip starts playing, drag it along the Timeline, using the ruler at the top for time reference.

