
|
|
Adding media
To begin working on your video project, you will first need to add some media files to the Editor.
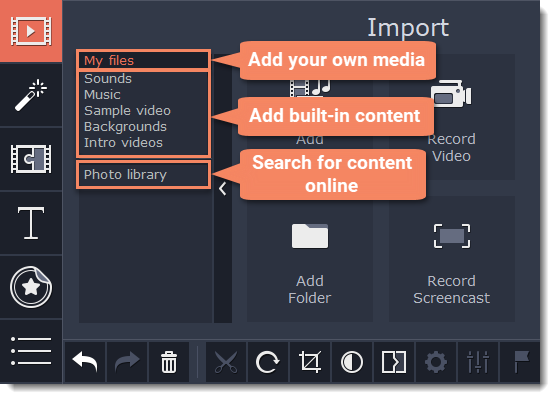
Step 1: Open the Import tab
The Import tab is the first one you see when you start a new project. To open the Import tab, click the very first button in the upper left-hand corner of the window.
Step 2: Go to the My files section
In the left part of the Import tab, you can switch between adding your own media files or using built-in clips. Click on My files to show file import options.
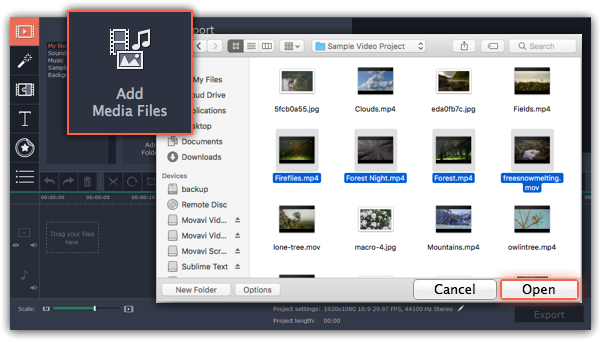
Step 3: Open files
1. Click Add Media Files.
2. A Finder dialog box will open. Locate your files or folders and click Open.
If you want to add the entire contents of one or several folders, click Add Folder, select the folder(s) you want to use and then click Select Folder to add the files.
Step 4: Arrange the files
Once you've added the files, they will appear on the Timeline at the bottom of the window. The Timeline allows you to arrange the clips in the order you want. The clips' position relative to the time ruler at the top of the Timeline determines when it will appear in the finished video. To reorder the clips, select the clips you want to move and then drag them to the new position on the Timeline.
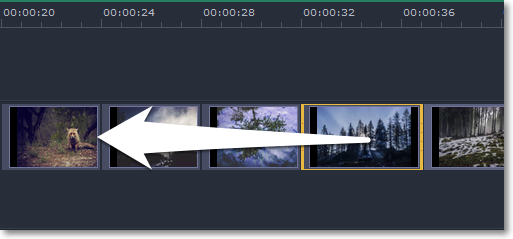
Moving a clip on the Timeline
See also:
