|
|
Adding a watermark
Adding a watermark to your videos will protect your ownership even if it's shared all over the Internet. You can add an image overlay with your watermark or logo, or make a new one using text. We recommend using PNG images that have a transparent background. That way, a watermark will fit in the video more naturally.
Image watermark
1. Click the Import icon on the left-hand sidebar. On the File import tab, click Add Files and add the image or video that you want to use as a watermark. For the best look, use images with transparent areas.
-
Drag the watermark clip up to the overlay track to make it appear on top of other videos.
-
Double-click the watermark clip. Change the overlay setting to picture in picture to edit the move and resize the watermark.

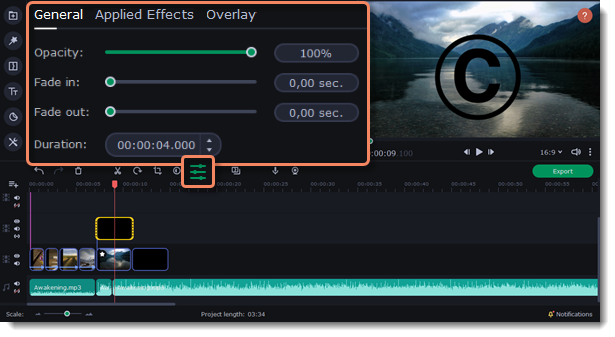
You can change the opacity or duration of the watermark:
-
Select the clip and open the Clip Properties.
-
Move the Opacity slider on the top of the list.
-
In the Duration box enter your project length to make the watermark show for the entire time of the video, or simply drag the edges of the overlay clip.

Quick logo
-
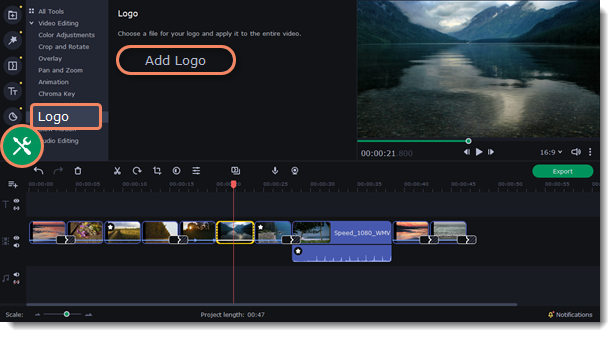
Click More tools on the left sidebar and open the Logo tab.

-
Click Add Logo.
-
Select an image that you would like to use as a logo or a watermark. It will be added over the entire video.
Text watermark
-
Click the Titles button on the left and pick a nice title style for your watermark.
-
Drag the titles you like onto the beginning of the titles track at the top of the Timeline.

-
Double-click the titles and enter your watermark text. Pick a font and color. Click Apply when you're done.

If your video is long, zoom out on the Timeline to make changing clip length easier.


