|
|
Rename Tab
In the Rename tab, you can choose a template for renaming all of the currently open images. You can change the original name, number your photos, or add a date or free text to the photos.
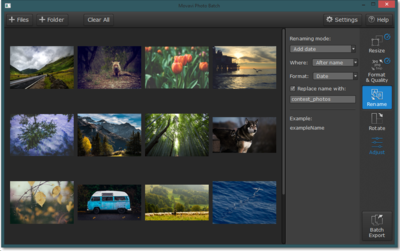
Rename tab
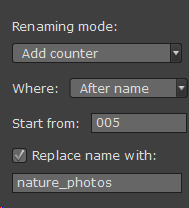
Numbering your photos:
1. Switch to the Rename tab.
2. Open the Renaming Mode list and choose Add index or Add counter:
Add index – adds a simple number to each photo in the following format: 1, 2, 3, 4, 5, 6... Most file managers do not sort such sequences correctly, listing 10 after 1.
Add counter – adds a number with leading zeroes to each photo in the following format: 001, 002, 003, 004... This format allows file managers to correctly sort the photo series.
3. In the Where option, choose whether you want to add the number before or after the original file name.
4. If your photo series does not start from the beginning, you can set the first number in the Start from field.
5. If you also want to change the main part of the file name that comes before or after the number, select the Replace name with option, and enter the new file name into the corresponding field. This is especially helpful if the old filename already contains numbering, but it is incorrect, or if you've deleted some photos but want the numbering to stay intact.
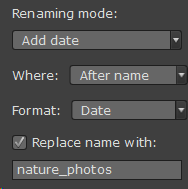
Adding date and time:
1. Switch to the Rename tab.
2. Open the Renaming mode list and choose Add date. The date is extracted from the photo's EXIF data and shows the date the picture was taken or created.
3. In the Where option, choose whether you want the date to be appended before or after the original file name.
4. In the Format list, choose whether you want to add the date, time, or both.
5. If you also want to change the main part of the filename, select the Replace name with option, and enter the new name into the corresponding field. This way, you can name the photos after the location where they were taken.
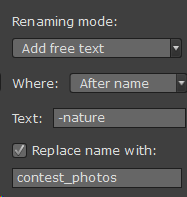
Adding text to the file name:
1. Switch to the Rename tab.
2. Open the Renaming mode list and choose Add free text.
3. In the Where option, choose whether you want the text to be appended before or after the original file name.
4. In the Text field, nter the text you want to append to the file name.
5. If you need to completely replace the old file name, select the Replace name with option and enter the new name.