
|
|
Crop
Cropping an image allows you to save it with a different aspect ratio, remove unwanted parts from the edges, and zoom in on objects inside the image. We recommend that you save a backup copy of the image before cropping, in case you need the original image later. Click the Crop button on the right-hand side of the window to open the Crop tab.
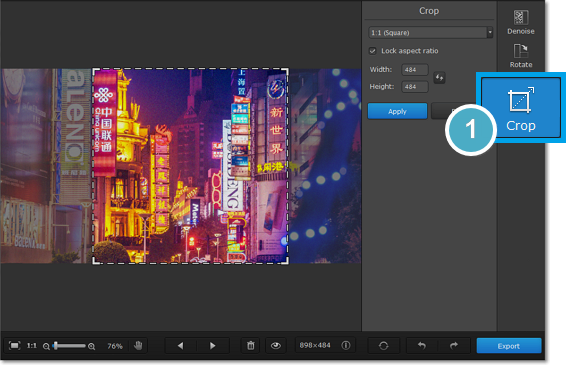
Step 1: Open the Crop tab
Click the Crop button on the right to open cropping options.
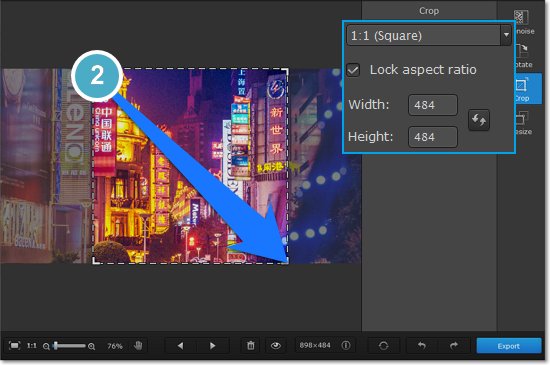
Step 2: Define size
Next, specify the size and proportions that you want. There are several ways to set the size:
Crop frame
A crop frame will be visible over the image. Drag inside the image to draw the cropping rectangle, or move the edges of the crop frame with your mouse.
Pre-defined sizes
Open the drop-down box and select a suitable size from the list. Here, you can find some commonly used sizes and presets for quickly changing the proportions of the image.
Manual input
If you need a specific size in pixels, you can manually enter the width and height into the corresponding boxes. To switch the width and height, click the Invert Proportions icon.
Lock aspect ratio
Selecting this option will maintain the selected width to height proportions. This way, when you change one dimension of the cropping rectangle (whether by drawing the cropping area or by entering a number for width or height), the other dimension will change accordingly to keep the selected aspect ratio.
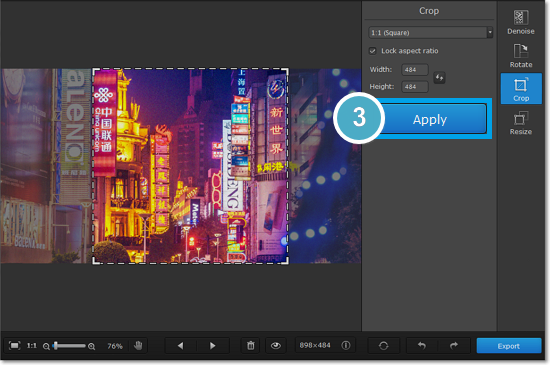
Step 3: Apply changes
Click the Apply button to accept the cropping changes. To discard the changes, click Reset.
Don't forget to save your image!
