
|
|
Erasing backgrounds
How to erase and change photo background
Movavi Photo Editor can help you quickly and easily cut out people and objects from any background. You can use it to create product photos, funny collages and more.

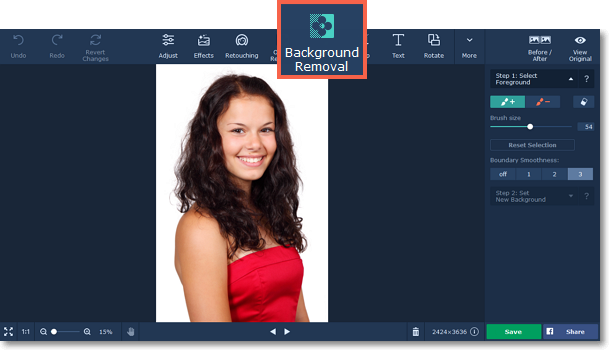
Step 1: Open the Background Removal tab
On the top side of the window, click Background Removal.
Step 2: Mark the foreground and background
1.  Click the Brush + icon and roughly mark the foreground objects that you want to keep. There is no need to color the entire object, but if the objects has a lot of small details, you may need to add a few extra strokes.
2.  Click the Brush - icon and roughly mark the background that you want to remove. Pay closer attention to parts of the background that have similar color or pattern to that of the foreground.
3.  If you've made a mistake, click the Eraser button and remove the selection.
Once you've marked the foreground and background areas, Photo Editor will outline the foreground object with a yellow line. Sometimes, you may need to correct this outline by adding a few strokes of the green or red brush. For higher precision, use a smaller brush size or zoom in on the details.
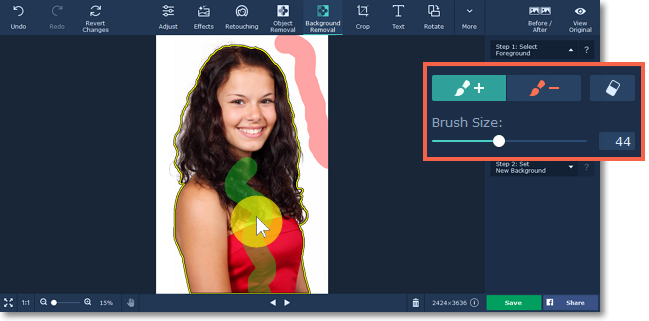
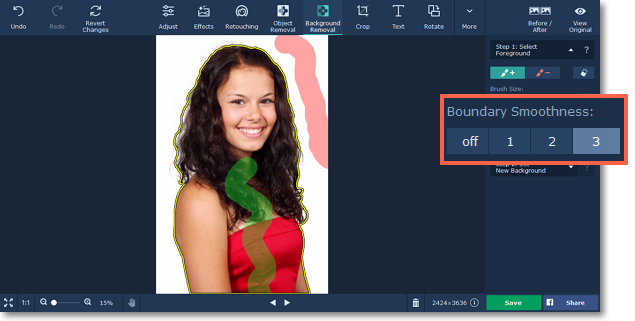
4. Depending on the amount of detail around the edges of the foreground object, you may want to change how the edges are detected. Try different Boundary Smoothness values to find which works best for your image.
Copying and pasting objects
If you want to clone the selected object, righ-click on it and choose Copy or press Ctrl+C on your keyboard. Then finish erasing the background and press Apply (steps 3-5). After that right-click on it and choose Paste or press Ctrl+V to paste the selected object.
Step 3: Cut out the background
1. Click 'Step 2: Set New Background' on the Background Removal tab. The background will be cut out and you can proceed to choosing the new background.
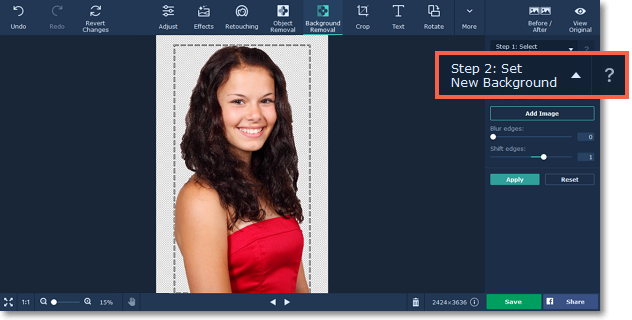
2. Now, you can choose to leave the background transparent or choose a new background color or image.
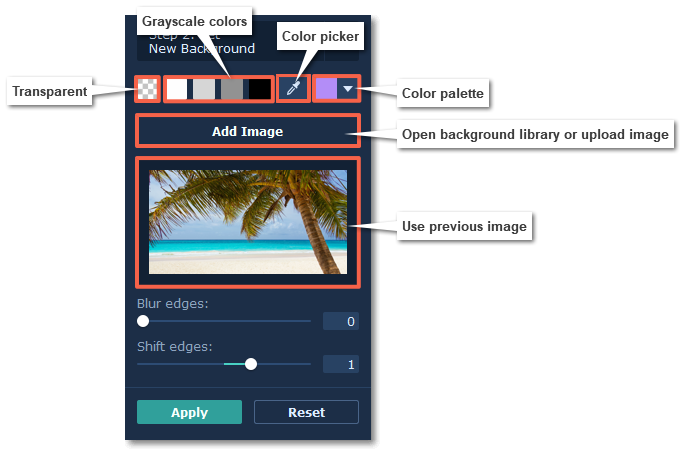
Transparent:
If you want to keep a transparent background, click the 'transparency' icon to the left of the color palettes  .
.
Grayscale colors:
To use a standard white, grey, or black background, choose one of the color icons.
Color picker:
Use the Color Picker tool to select a color on any image opened on your screen. By clicking a point on an image, you can change the active color to that which is located under the pointer.
Custom color:
To choose a different color, click the arrow on the rightmost color sample to open the palette. Click More in the palette to open the standard color selection dialog box where you can mix a custom color.
Image:
To open an image to use as the background, click the Add Image button and select the background you want to use from the library or upload your image. It will then be added as the new background. After that, you can move and resize the foreground objects on the new background. If you switch to a color or transparent background, you can later return to using the image by clicking the preview under to the Add Image button.
3. If the edges of the foreground object look too sharp, use the Blur Edges slider to blend them with the background.
4. Use the Shift edges slider if you need to shrink or expand the entire selection. This can be useful for objects with a lot of details around the edges.
Step 4: Move and resize the object
Click and drag your object to move it anywhere you want in the image. Drag the blue circle icon  to change the object's size or rotate it.
If the object is much smaller than the original image size, you can later crop the image.
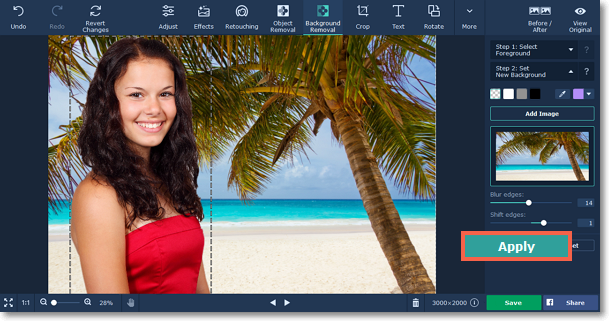
Step 5: Apply changes
Finally, click Apply to accept the changes. Please note that if you switch to another tab while removing a background, your selection will be lost.
If you want to cancel cutting out the background and discard the selection, click Reset.
Don't forget to save your changes! If you've left the background transparent, make sure to save the image in a format that supports transparency, such as PNG, BMP or TIFF.
