
|
|
Movavi Photo Editor
Saving images
How to save an image in Movavi Photo Editor
Step 1: Click the Save button in the bottom right-hand corner or open the File menu and click Save to rewrite the previous image, or click Save As to save the image under a different name.
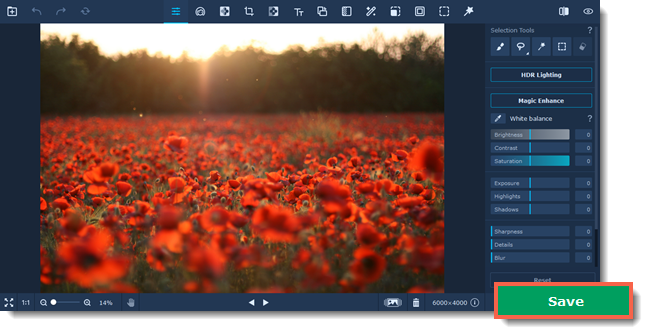
Step 2: You will see the saving window.
-
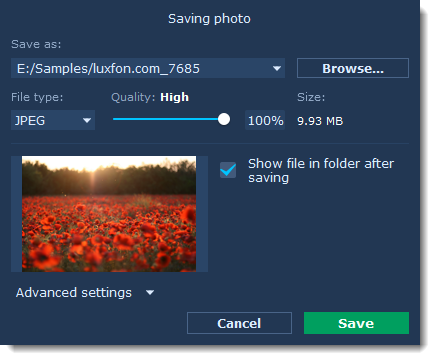
You can choose where the file will be stored in the Save as field. Click Browse to open the Windows Explorer.
-
Choose the File type from the list.
-
The Show file in folder after saving option automatically opens the output folder in Windows Explorer after saving.
Step 3: Advanced settings (optional)
Click on the Advanced settings in the saving window to open the additional settings.
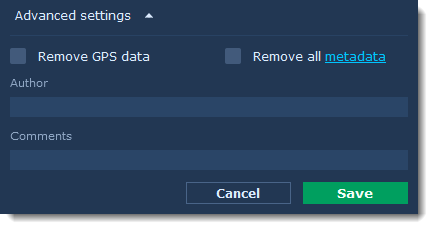
Here you can:
-
Add an author and a comment to your photo.
-
Select the Remove all metadata checkbox If you don't want the file to store any additional information
-
Select the Remove GPS data checkbox if you don't want the photo to store any location information.
Step 4: Finally, click Save.
