|
|
Movavi Photo Editor
Image adjustments
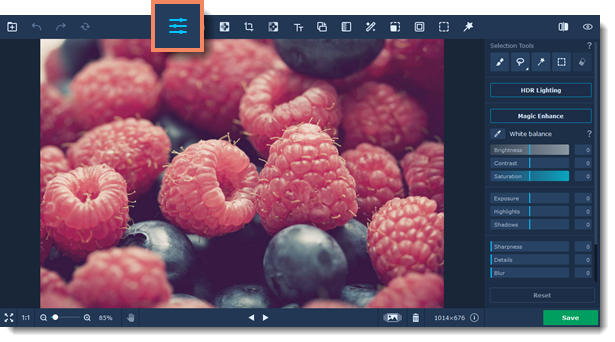
The Adjust tab allows you to improve the photo's brightness, contrast, color, and other properties. Click the Adjust button on the top to open the image adjustments.

Automatic adjustments
For an instant fix, use the buttons:
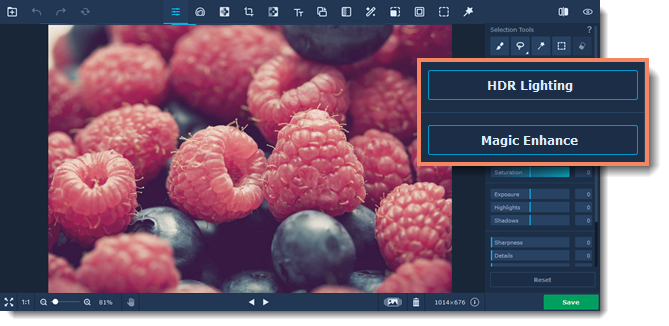
The Magic Enhance button sets the best value for each color correction setting. You can tweak the results using the sliders below.
The HDR Lighting button automatically adjusts the brightness and contrast, highlighting both dark and light parts of the image. You can adjust the intensity of the effect using the slider that appears after you click the HDR Lighting button.

White balance
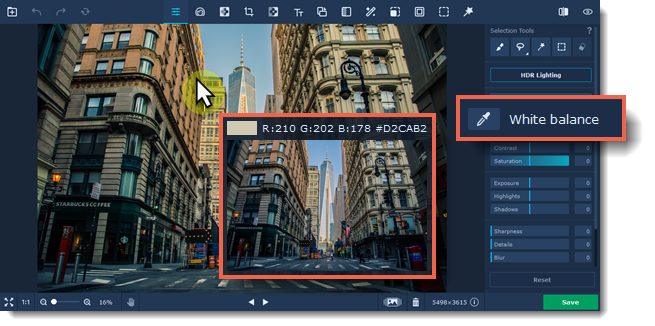
White balance tool lets you remove unrealistic color casts, so that objects which appear white in person are rendered white in your photo.
To use it, click the color picker icon on the right-hand panel. Find a white or closest to white spot on your photo and click on it. White balance will be adjusted automatically.

Manual adjustments
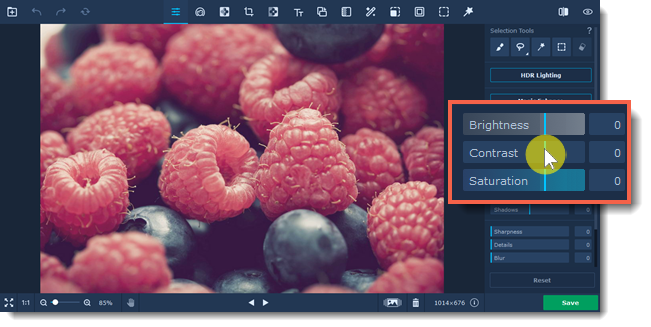
If you need more specific adjustments, use the sliders on the Adjust tab to achieve the necessary result.
To reset a slider adjustment, simply double-click it. If you've changed a few values and want to cancel all the adjustments, click the Reset button underneath the sliders.

Brightness
Allows you to change the overall amount of light in the whole image, without changing any other parameters.
Contrast
Allows you to change the difference between the lightest and darkest parts of the image. This can help you make the image more vivid, but too much contrast can cause unwanted posterization.
Saturation
Allows you to make the colors richer (positive values) or more subdued (negative values). Settings Saturation to -100 will make the image grayscale.
Exposure
In photography, exposure is the amount of light that is allowed to reach the camera's sensor, which is usually achieved using a combination of shutter speed, aperture, and lighting. If there is too much light on average, you may lose some details in the dark parts, while the light areas may become 'washed-out', and vice versa. This allows you to imitate a higher or lower exposure, as if you set it on your camera when taking the shot.
Highlights and Shadows
These two sliders allow you to make each component more prominent in the image, and thus make the image darker or brighter.
Sharpness
Allows you to sharpen the image. Please be aware that oversharpening an image can add noise.
Details
Allows you to bring out more details in an image.
Blur
Allows you to slightly blur the image to reduce noise or smoothen out defects.
Temperature
Allows you to make the image feel warmer or colder, by adding orange or blue color respectively.
Tint
Allows you to add a red or green tone to the image, either for color correction, or for an artistic feeling.
Hue
Allows you to change an image's overall color. Unlike tinting or color temperature (see below), changing an image's hue will not color the picture in shades of one color, rather, it will shift all the image's colors in a given direction.
Adjusting a specific part of an image
If you want to change the color setting only of a specific part of your photo, use the Selection Tools on the right-hand panel.
Select the area you want to work on and make the necessary adjustments. The changes will be applied only to the selected area.


