|
|
Movavi Photo Editor
Zoom and navigation
How to use the navigation controls

Zoom
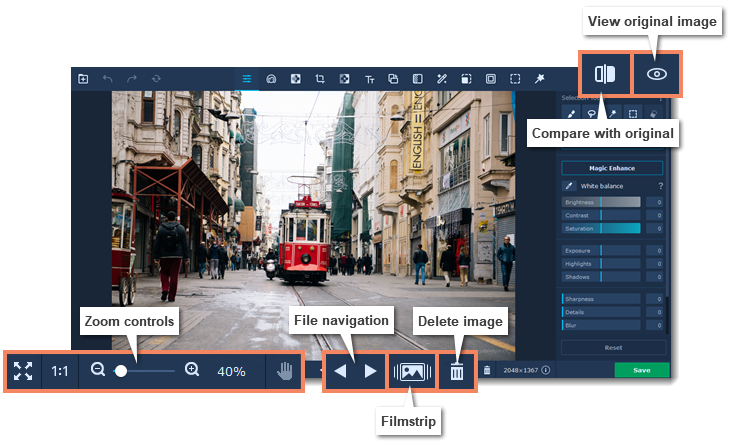
When you open an image, it will be fitted to the window size. Use the zoom and navigation tools at the bottom of the window to set a comfortable view.
|
|
Fit to screen – adjusts the zoom level so that the entire image can fit in the window.
|
|
|
Actual size – sets the zoom level to 100%, displaying the image as it is.
|
|
|
Hand tool – to move an image around while zoomed in, click the hand icon and hold the left mouse button to move the image. Then, click the hand icon again to go back into editing mode. You can also move the image at any time by holding the left mouse button and Space on your keyboard or by clicking both mouse buttons at the same time.
|
To magnify an image, use the zoom slider at the bottom of the window. You can also zoom in and out using the mouse wheel. When you zoom in or out, the current zoom level will be displayed to the right of the navigation controls.
Navigation
Now you can sort through entire photo folders and edit their contents on the fly. Use the file navigation buttons at the bottom of the window:
|
|
Go to the previous image in the folder.
|
|
|
Go to the next image in the folder.
|
|
|
Delete the current image.
|
|
|
Click and hold to view the original before editing.
|
|
|
Click to compare your working copy with the original image.
|
|
|
Click to view all the images in the folder.
|
If you have made changes to the file before switching to the previous or next file, you will be asked to save or discard the changes.


