Step 1:
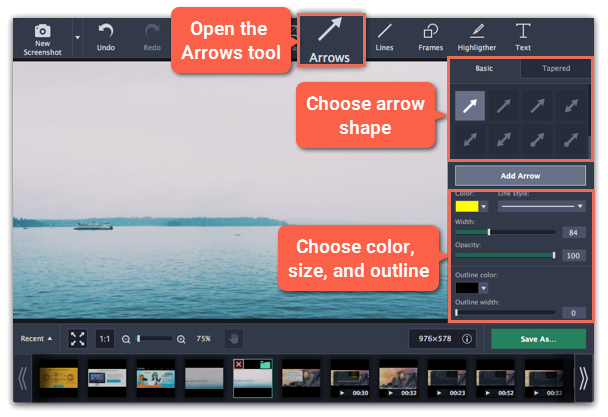
At the top of the screenshot editor window, click the Arrows button.
Step 2:
On the right, choose the style of the arrow:
-
Choose an arrow shape. The Basic group contains straight arrows, and the Tapered group contains arrows that are wider towards the head.
-
Under the shape styles, set the color, width, and outline for the arrow. You can also change these after you've added the arrow.
Step 3:
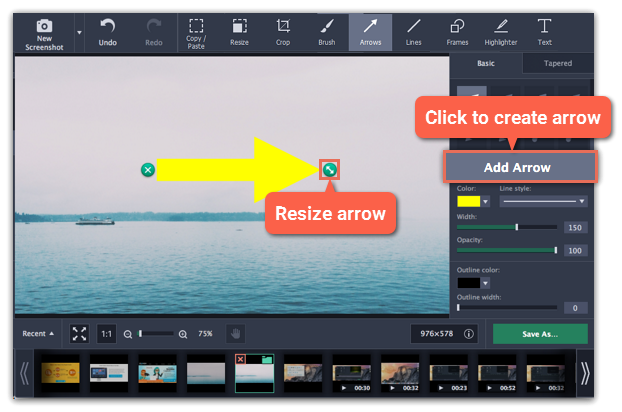
Click Add Arrow to place the arrow onto the image.
Step 4:
Move and resize the arrow on the image:
-
Drag by the green arrow circle  to resize and rotate the arrow.
-
Drag by the arrow shape to move it.
-
To delete the arrow, click the green circle with the cross  .
.

 to resize and rotate the arrow.
 .
. 


