|
|
Recording Skype calls
When you record audio or video calls using Skype™, FaceTime or a similar program, it is important that you record both ends of the conversation. To do that, you will need to record input from your microphone or webcam, as well as the audio from your speakers. Follow the steps below to record Skype calls with audio.
Step 1: Select capture area
1. Launch the Skype application and make sure it is on screen.
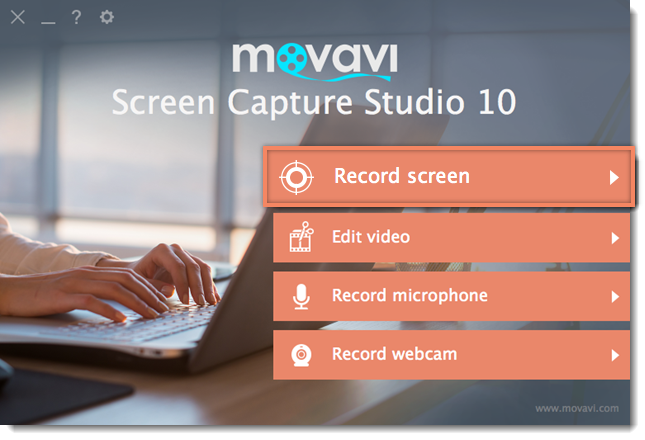
2. On the Movavi Screen Capture Studio launcher, click Record screen.
3. On the recording panel, click the Select capture area button.
4. Your cursor will turn into a crosshair. Draw a rectangle inside the Skype window where your call video will be.

Step 2: Set up the sound
Once the capture area is selected, the recording panel will appear. Here, you can choose which sound sources can be heard on your recording.
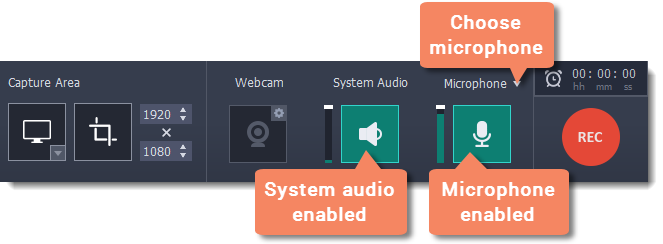
1. Click the speaker button under System Audio to enable recording sounds on your computer, including the call from the other end. The button appears green when enabled.
2. Click the Microphone button to enable recording from a microphone. If you have more than one microphone, click Microphone and choose the one you want to use for the recording.
3. Use the sliders to the left of each button to set the necessary volume levels for the call and for your microphone.
Tip: if you're recording a video call, you do not need to enable webcam recording in Movavi Screen Capture Studio, because Skype is already recording your webcam.
Step 3: Record your call
1. Start your call in the Skype window.
2. Click REC on the Movavi Screen Capture Studio panel to begin recording.

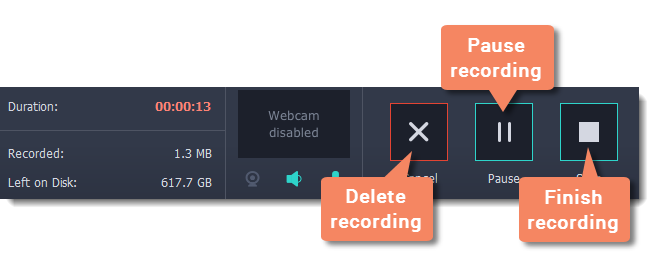
3. When you finish your call, press  or click the Stop button on the recording panel to finish recording. The capture editor will appear, where you can play the finished video, cut the recording, or save it in a different format.
Step 4: Edit and convert (optional)
If your recording started before the call, you can trim off the extra bits using the scissors and trash can buttons.
1. Place the position marker to where you want the video to start and click the scissors button.
2. Select the unwanted fragment and click the trash can button to delete it.
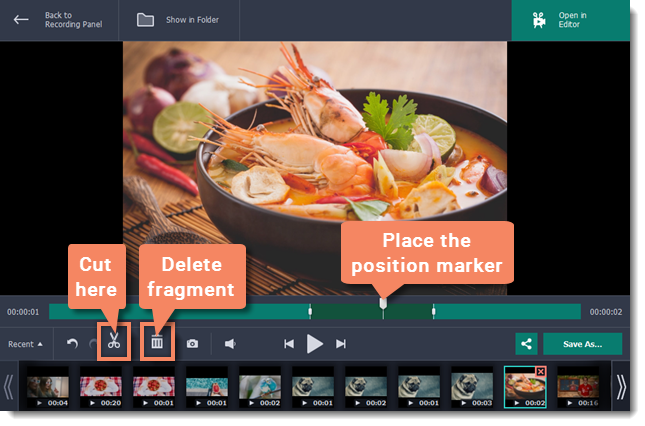
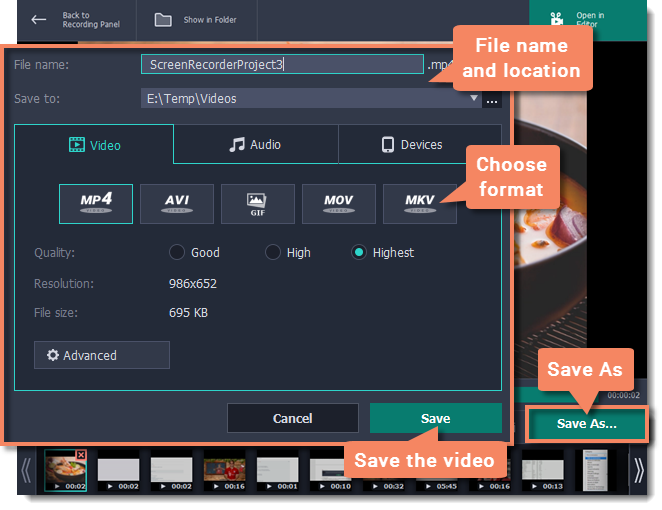
3. Now that you've cut the video, you need to save the trimmed copy. To do that, click the Save As button.
4. The export options will open in a new window. There, select the format you want to use, name the file and choose where you want to save it, and click Save to start processing the video.
Tip: If you want to save just the audio of the call without the video, go to the Audio tab and select MP3.
