|
|
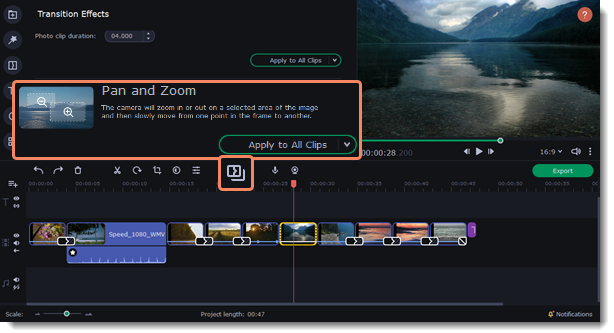
Pan and zoom
You can control the camera movement using two keyframes and smoothly move from one frame to another.
Add the Pan and Zoom tool
-
On the Timeline, select the clip that you want to zoom.
-
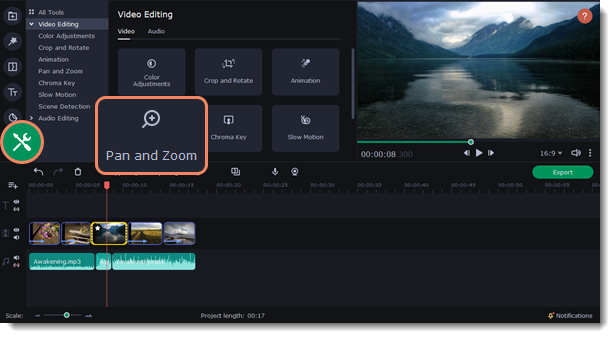
To open the Pan and Zoom, select More on the left sidebar and find the Pan and Zoom tool in the Video Editing.
-
Select one of the presets and drop it on a clip. This will add two keyframes to the clip. The camera will move between these two keyframes and you can set up camera movements from one point to another.
-
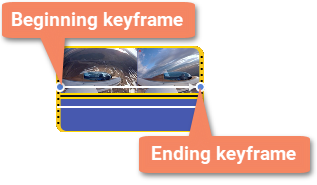
To change the beginning keyframe, double-click the first point of the clip and to change the ending keyframe, double-click the second point of the clip. Then use the frame in the player to set the zoom level for each point of the camera movement.
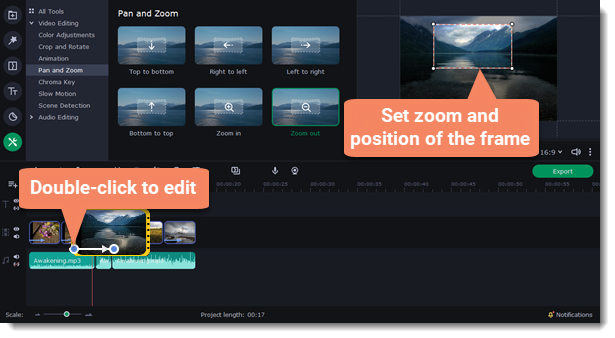
To change the length of the zoom effect, move a keyframe left or right. To move the zooming effect on the clip without changing its length or other settings, move it along the clip. Repeat steps 2-4 to combine other camera movements in one clip. For example, you can zoom in on an object, pan across the frame with the same zoom level, and then zoom back out to 100%.
Add the Pan and Zoom effect to all the image clips automatically
-
Click the Transition Wizard button on the panel above the Timeline.
-
Scroll down and find the Pan and Zoom tool.
-
Click Apply to All Clips to apply the effect to all clips in the project.
If you want to apply the effect only to several clips in the project
-
Select the clips you want to add Pan and Zoom to. If the clips are placed far away from each other, hold the ⌘ key and click the clips one by one.
-
Click the arrow on the button in the Pan and Zoom tool area. Then click Apply to Selected.
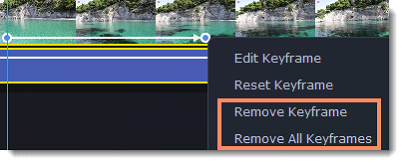
Remove zoom
To remove a pan or zoom effect, right-click a keyframe and select Remove All Keyframes to clear all zoom effects from the clip. To remove only the selected keyframe, select Remove Keyframe.