|
|
Recording with webcam
How to add a simultaneous webcam overlay to your videos
Step 1: Select capture area
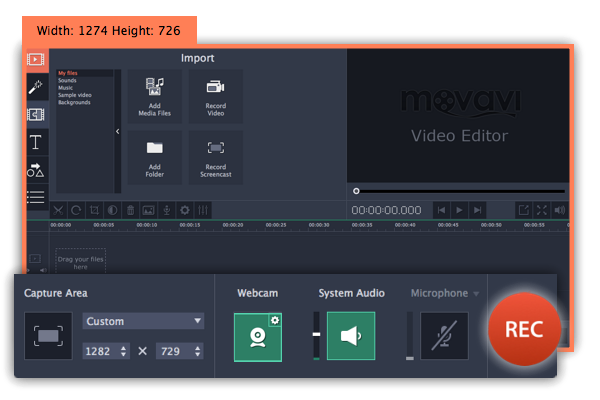
1. On the recording panel, click the Select capture area button.
2. With the crosshair, select the part of the screen that you want to record.

Step 2: Set up the webcam
1. Connect the webcam to your computer and wait until the system installs the necessary drivers.
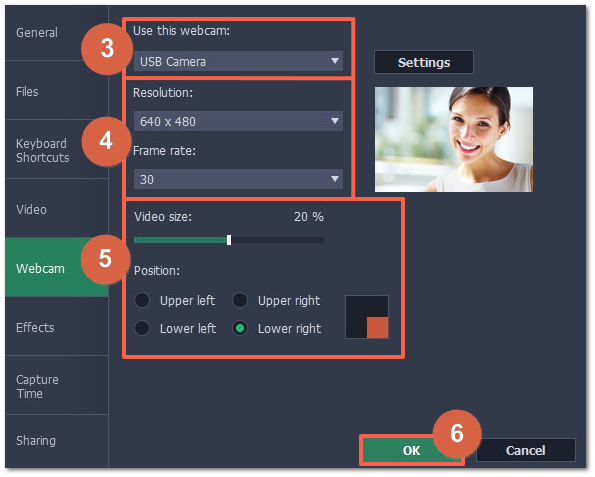
2. Click the cogwheel icon on top of the Webcam button. The webcam preferences will open.

3. Under Use this webcam, choose the webcam device that you want to use and check that its preview appears on the right.
4. Set up the video options for this webcam:
-
Click the Settings button to set up your webcam's options such as brightness, contrast, and exposure. Note: webcam settings are different for each model.
-
Choose the resolution that you would like to use. The higher the resolution, the higher the webcam video quality will be. However, if the webcam video is small, you may not need a very large resolution.
-
For the best quality, use the highest frame rate that your webcam can provide for the best quality. If your webcam is mostly static or if you want a smaller file size, you may want to use a lower frame rate.
5. Set up the size and position for your webcam:
-
Use the Video size slider to set the size of the webcam picture relative to the entire video.
-
Choose one of the Position options to place your webcam picture inside the frame.
6. Click OK to save the webcam preferences.

Now that you've set up the webcam, the next time you want to use it, simply click the Webcam button once to enable webcam recording.
Step 3: Set up sound
Next, choose the audio sources that you want to hear on your recording:
System sounds
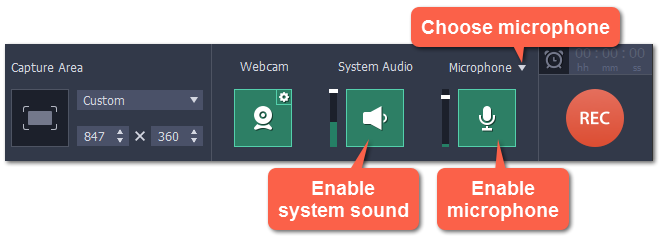
To record music and other sounds playing on your computer, click the System Audio button. The button appears green when enabled.
Microphone
You can record audio from your webcam's built-in microphone, or use an external microphone for better sound quality:
1. Click the Microphone button to enable recording from external devices.
2. Click the arrow above and choose the microphone you want to use from the list.

Step 4: Record your video
When you're ready to begin, click REC to start recording. The recording panel will be minimized during recording.

To finish the recording, press F10 or click Stop on the recording panel.
Step 5: Edit and save
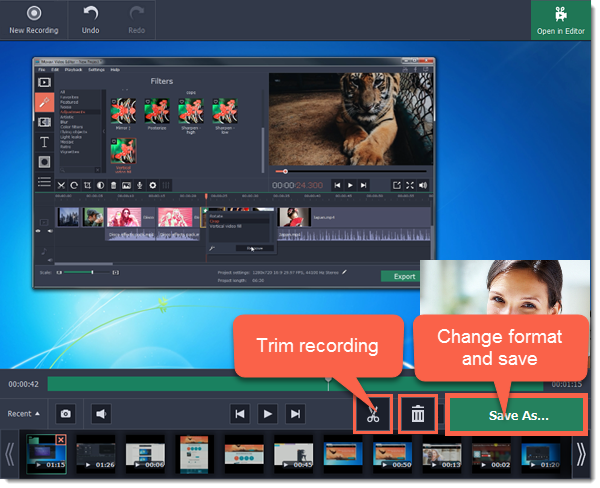
When the recording is finished, it will open in the capture editor, where you can play or trim the result.

To cut or trim the video, use the scissors and trash can buttons on the toolbar. If you've trimmed the file or if you want to save your recording in a different format, click Save As.


