|
|
Animation
With Movavi Video Editor, animating objects is simple and doesn't need any additional software. You can move or spin objects any way you want, and make creative appearances.
Before you start:
-
Add the background onto the main video track.
-
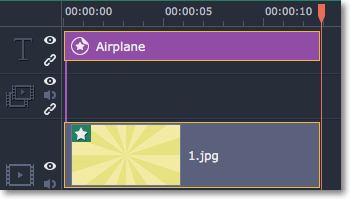
Add the object you want to animate. This can be a video or image, text titles, callouts, or stickers. Place the videos or images to the overlay track, and add the titles, callouts, and stickers onto the title track of the Timeline. Make the clip as long as you want the animation to last.
Step 1: Open the Animation tool
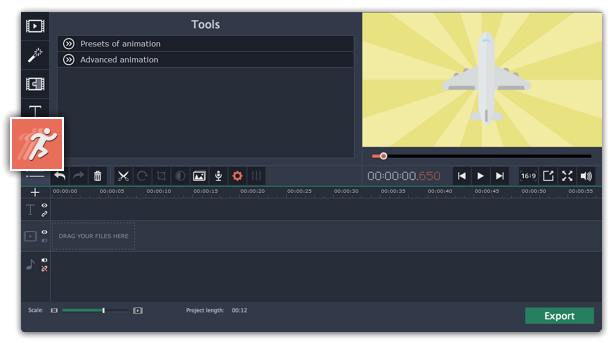
In the left sidebar, click the Animation button. If you don't see it there, click the More button, and choose Animation from the pop-up list.
Step 2: Select animation type
-
Select Presets of animation if you want to add a quick and simple animation, or if it's your first time using the animation and you want to understand how it works.
-
Select Advanced animation to add your own unique animation.
Step 3: Add Animation
Add animation preset
-
Click the Presets of Animation tab.
-
Choose a preset and drag it on the clip.
-
Adjust the keyframes, if needed.
Add advanced animation
-
Click the Advanced Animation tab.
-
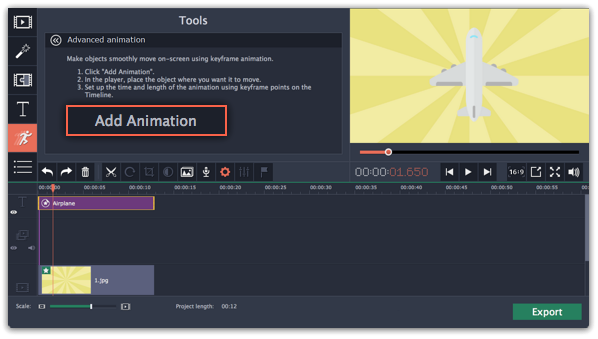
Select the clip you want to animate and place the position marker to where you want the animation to begin.
-
In the Animation panel, click Add Animation.
-
In the player, you will see a frame appear around the object. You'll be using this frame to set the position of the object.
-
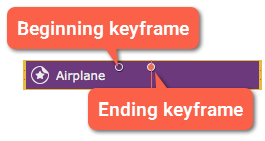
On the Timeline, two points will appear on the clip. These are called keyframes. The first point is the original position of the object. The second point will be its end position after the animation. The distance between the two points determines how fast the object needs to travel between these two positions.
Step 4: Edit the keyframes
-
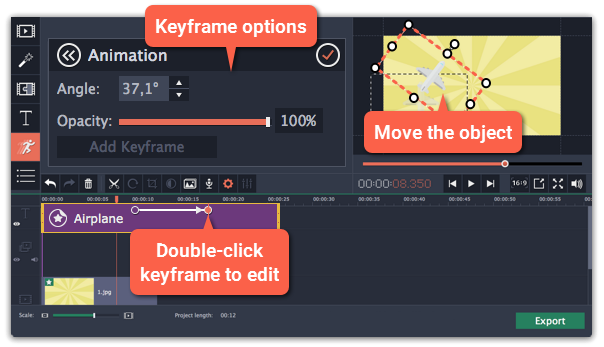
On the Timeline, double-click a keyframe to edit it.
-
In the player, use the frame to move the object to where you want it to go.
-
To change the object's size, drag by the corners of the frame.
-
To rotate the object, drag by the white dot at the top of the frame or use the Angle box in the Animation panel. Note that if you want to make the object spin, you can rotate it to a maximum of 180 degrees in a single keyframe.
-
To make the object fade in or out, use the Opacity slider in the Animation panel.3. To change how fast the object moves, move the keyframe point on the clip:
-
Move the points closer together to make the animation go faster.
-
Move the points farther away from each other to make it go slower.
Step 5: Add more keyframes (optional)
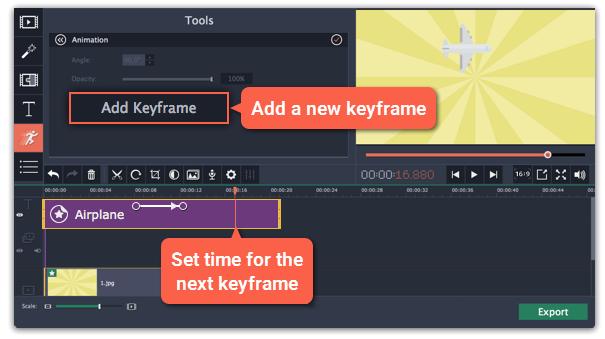
To add another keyframe, move the position marker to where you want to place it in the clip and click Add Keyframe on the Animation panel.
If you add it between two existing keyframes, it will create an intermediate position.
Resetting a keyframe
To make a keyframe go back to its original position, right-click the keyframe point on the clip and choose Reset Keyframe in the pop-up menu.
Removing keyframes
-
To remove one keyframe, right-click the keyframe point on the clip and choose Remove Keyframe in the pop-up menu.
-
To remove all keyframes and delete the animation, right-click any of the keyframe points and choose Remove All Keyframes.


