|
|
Color adjustments
If the original videos look bleak and not vibrant enough, you can use the automatic adjustments to make the colors look more vivid. If that isn't enough, you can always use manual adjustments to correct the colors.
Step 1: Select a clip
On the Timeline, select the clip that you want to adjust.
Step 2: Open color adjustments
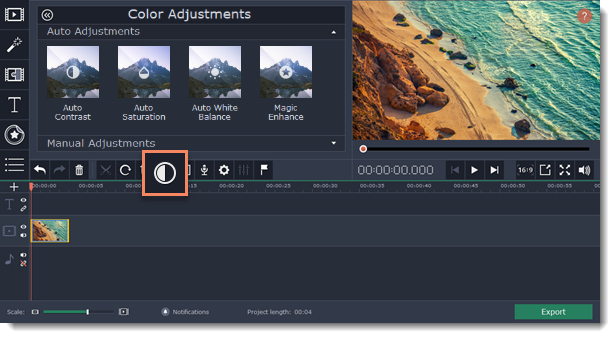
On the toolbar, click the color adjustments button to open the adjustments tool.

Step 3: Change and apply adjustments
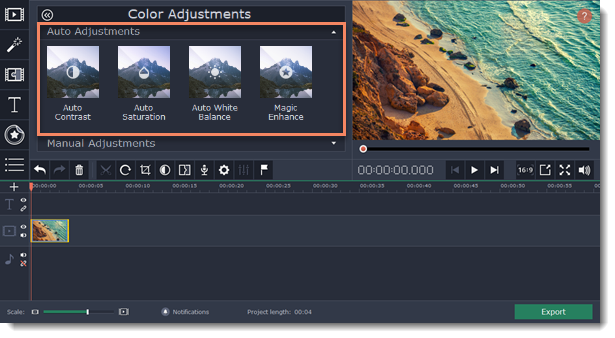
Auto Adjustment presets can fix contrast, saturation, and white balance of your image. The Magic Enhance preset will automatically determine the best brightness and contrast balance. To apply a preset to the image, drag and drop it to the clip on the Timeline.

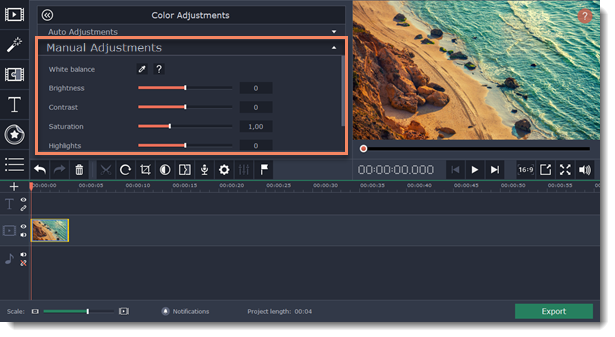
The Manual Adjustments tab contains additional adjustment options. Drag the sliders to change brightness, saturation, hue, and other properties.

Step 4 (optional): Save your adjustments
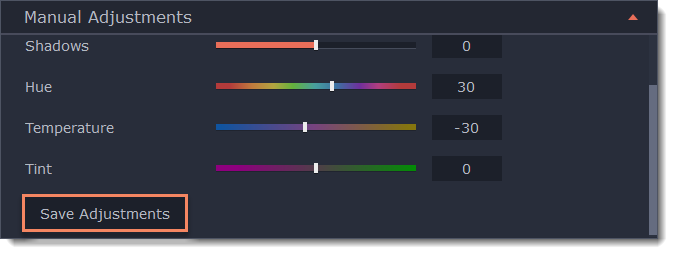
If made your own adjustments to the image and want to save them for future use, click Save Adjustments and name your preset. The new preset will appear on the Auto Adjustments tab.

Once you have used the adjustments, the clip will be marked with a star icon, denoting applied tools or filters: 


