
|
|
Watch Folder
The Watch Folder option can monitor a folder for changes and convert any new files to the format of your choice. If you frequently convert videos to one format, you will only need to set it up once and then simply take the converted videos whenever you need them.
Setting up automatic conversion:
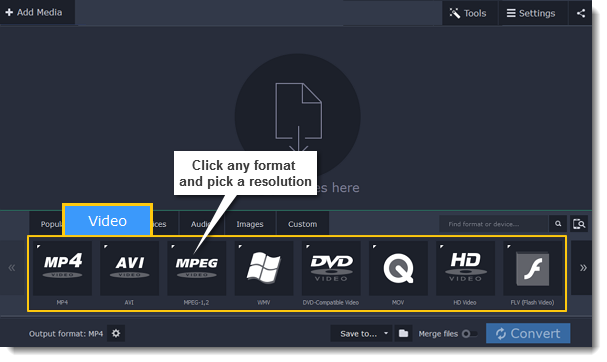
Step 1: Choose a format
Before you set up a Watch Folder, select the format that you want to convert the files to.
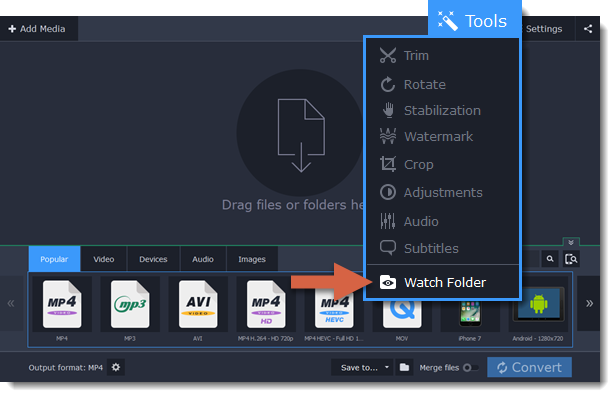
Step 2: Open Watch Folder options
Click the Tools button at the top of the window and select Watch Folder to see folder monitoring options.
Step 3: Choose a folder
In the Watch Folder window, click the Browse button next to the 'Monitor folder' box and choose the folder you want to monitor and convert files from.
For example, this can be your downloads folder if you want to convert any new videos you download.
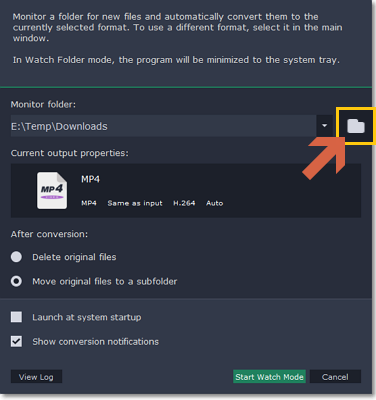
Step 4: Set up conversion options
In the After conversion option, choose what you want to happen to the original files after they've been converted:
Delete original files: the files will be deleted as soon as they are finished converting.
Move original files to a subfolder: the original files will be moved to the 'Originals' folder inside the monitored folder. These files will not be converted a second time.
Launch at system startup: enable this option if you want the folder monitoring to resume after you restart the computer.
Show conversion notifications: select this option if you want to be notified every time a file has finished conversion or if there's an error.
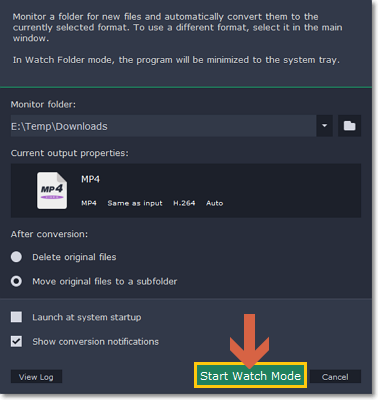
Step 5: Start monitoring
Finally, click Start Watch Mode to begin monitoring the selected folder. The converter window will be minimized to tray and keep working in background mode.
Conversion log:
If you've already used Watch Folder, you can see a detailed list of all conversion events that occurred in Watch Folder mode. To do that, open the Watch Folder window and click View Log at the bottom. Here, you can see whether all files were converted correctly.
If you want to keep this log as a text file for future reference, click Save Log and choose a location for saving the log file. To delete all previous entries, click Clear Log.
