|
|
Choosing an audio format
Open audio
-
Click Add Media.
-
Select Add Audio.
-
Choose the audio files you want to convert. Also, you can drag and drop your files or folders onto the Movavi Video Converter main window.
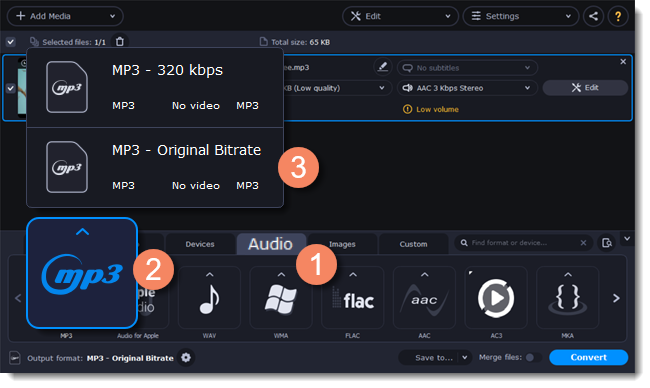
Choose an audio format
-
Go to the Audio tab.
-
Select the format you want to convert your audio to.
-
Choose the bitrate that you want to use. To convert without changing the bitrate, choose the preset marked with "Original bitrate ".
The bitrate is the amount of data (in kilobits) played back each second (measured in kbps). Higher bitrate usually means higher audio quality and larger file size, as extra data needs to be stored within the file. For audio presets, the bitrate is shown next to the format. When you convert a file to lower bitrate, the extra bits of data are irretrievably lost, meaning that you cannot increase quality by converting audio to a higher bitrate, because the file no longer contains the data that can be used to restore higher quality.
Edit audio (optional)
Rename file
Renaming media files helps keep the music library in order.
-
Click the pencil
 next to the file you want to rename.
 -
Enter the file's new name.
-
Click OK.
Normalize and manage volume
If some of your music files are quieter than others, you can normalize their sound so you don't have to adjust the volume every time you listen to them.
-
Click the Edit button next to the file you want to normalize.
-
Go to the Audio tab.
-
Adjust the volume level or select the Normalize volume option.
-
Click Save and Close.
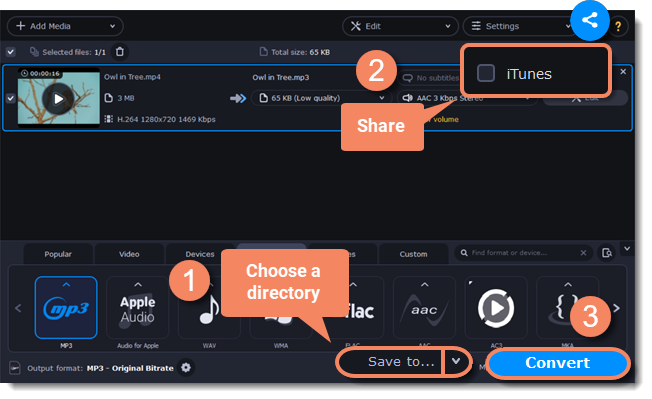
Convert and upload
-
Click Save to... and choose a folder to save converted files to. You can select one of your previous folders by clicking
 next to the Save to... button.
 -
If you want to upload the music to iTunes after converting, click the sharing button
 at the top of the window and select iTunes from the pop-up window.
 -
When you're ready, click Convert to start the audio processing.