|
|
Converting media files
Open files
-
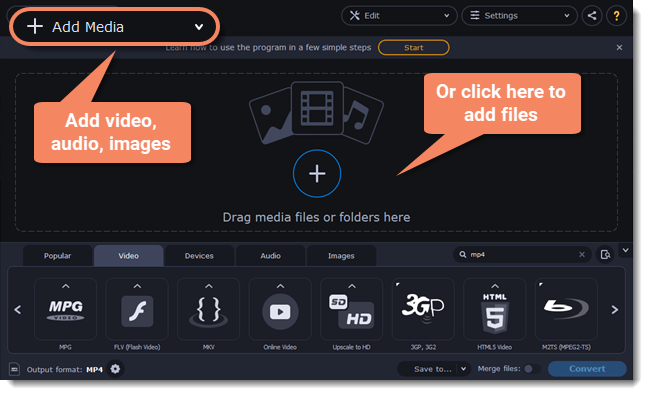
Click the Add Media button at the top and choose the desired type of file.
-
A Finder dialog box will open. Select the files you want to convert.
-
Click Open. The files will now be added to the file list.
-
Or drag and drop files into the program or click in the center of the main window.
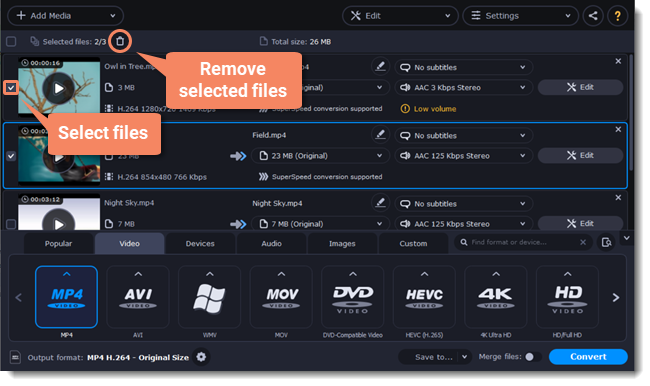
Select files
Check the files you want to convert. You can remove converted files after they're done. To do it, click a trash can near to Selected files.
Choose output format
In the lower half of the window, you will find tabs for any type of files and devices — Video, Audio, Images, Devices.
Popular is a tab with popular conversion formats. The used presets will be put into this tab the next time you start the program.
-
Click the desired tab.
-
Click the format you want to use. You can also type format or device name into the search field.

-
For video, choose the preset with the codec and resolution that you want to use.
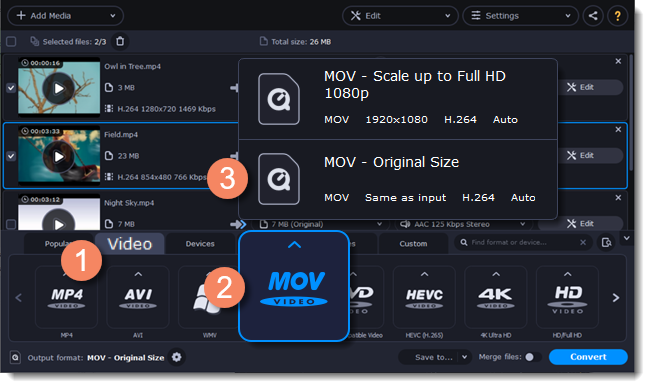
Each preset displays information about the video, audio, and other output parameters that can help you choose the right one.
Learn more about file media streams and customizing presets.

Edit and rename the file
-
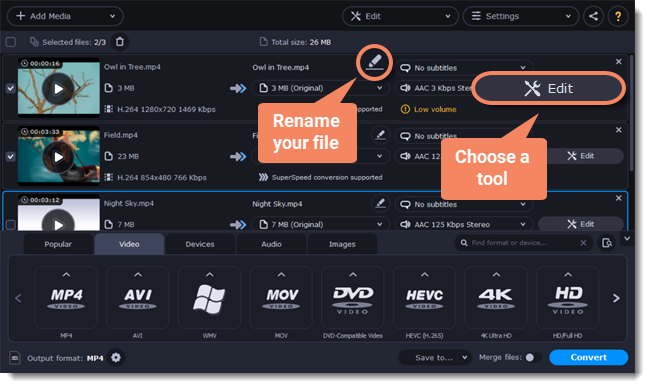
If you want to edit one of the videos, click the Edit button next to it to open the Editor window.
-
To rename the file, click the pencil icon next to the output file name and enter the new one into the Output file name box. Then, click OK to accept.
Check output folder
-
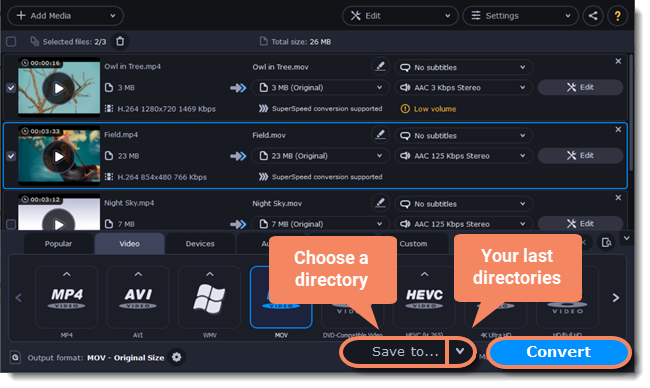
At the bottom of the window, click Save to... and choose a folder you to save converted files to. You can select one of your previous folders by clicking the check near the Save to... button.
-
Finally, click the Convert button to start processing the videos. This may take anywhere from a few seconds to several hours, depending on the size and number of video files.
