|
|
How to remove black bars
Sometimes, when you use videos of different aspect ratios, or if the project is set up incorrectly, some videos may have black bars around them. This can be fixed by adjusting the project settings, so that they fill up the whole frame.
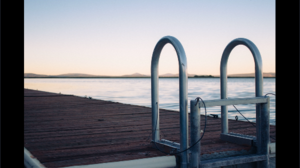
Some clips have black bars around them
If some videos or photos have black bars around them, it is most likely that they have a different aspect ratio from that defined in the project settings. For example, even videos and photos shot with the same camera may differ in width and height, so that when you place them side by side, one of them may end up with black bars. To fix this, you can crop away the edges of those clips, so that they fill the entire frame:
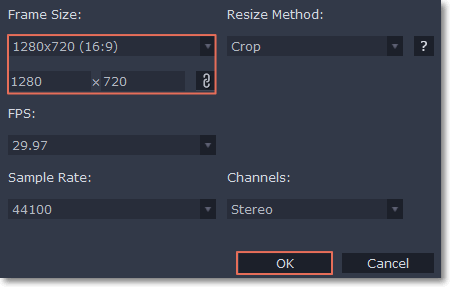
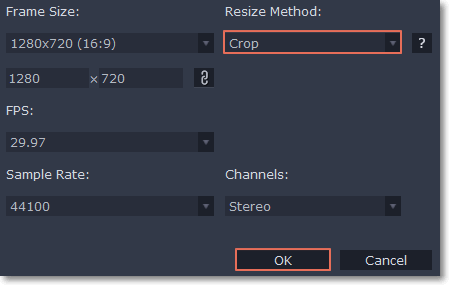
1. Beneath the Timeline, find the Project settings information and click the pencil icon next to it to open the project settings window.
2. Open the Resize Method box and select Crop from the list.
3. Click OK.
All clips have black bars around them
If all of the clips have black bars around them, then it's a good idea to change the aspect ratio of the project to match that of the clips you are using.
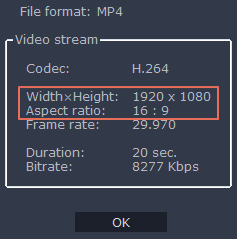
1. First, you'll need to find out the size of the videos you are using, so that you can match it in project settings. To do that, right-click a clip on the Timeline and choose File Information from the pop-up menu. Here, note the width x height size of the frame (e.g. 1920x1080) and the aspect ratio (e.g. 16:9).

Now we'll need to set the project settings to the same frame size.
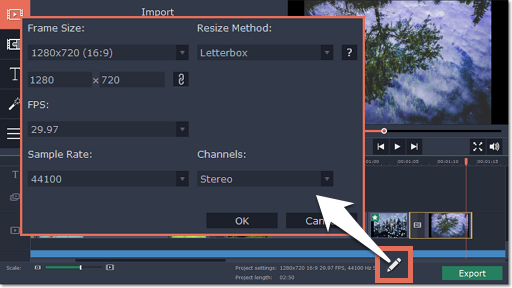
2. Beneath the Timeline, find the Project settings information and click the pencil icon next to it to open the project settings window.
3. Under Frame Size, choose the frame size with the same aspect ratio as your videos. If you can't find it in the list, you can manually input the frame size into the boxes below.
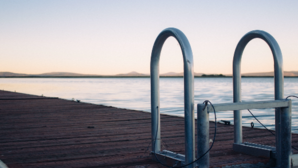
4. Click OK to accept the changes. The clips should now nicely fit inside the frame without any black bars.