
|
|
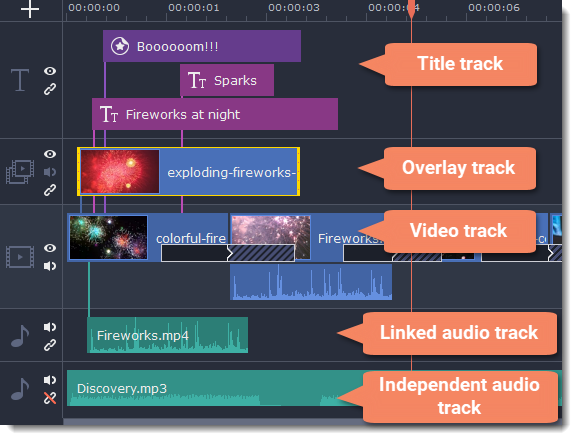
Timeline tracks
The Timeline at the bottom of the window is your working area where you can organize and edit the clips that make up your video project. The Timeline consists of several tracks for different types of media, that are all synchronized against the time scale at the top. You can imagine the tracks as layers: the uppermost layer appears on top of all others. With the exception of the video track, you can layer several clips on each of the tracks to make your video more dynamic.
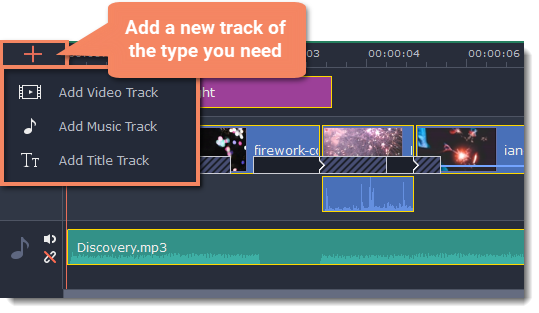
Adding tracks
With the Timeline that allow work with multiple tracks, you have only three tracks available at the start. To work with several video, audio and title tracks at the same time:
1. Find a Plus button at the upper left-hand corner of the Timeline.
2. Select the track you want to add and click it.
3. (optional) Customize the Timeline: change the order of the tracks, hide the content of a track and link tracks to the video track or detach them.
Note: In Movavi Video Editor you can only have 1 additional track of each type. If you need more tracks to work with, you can do it in Movavi Video Editor Plus.
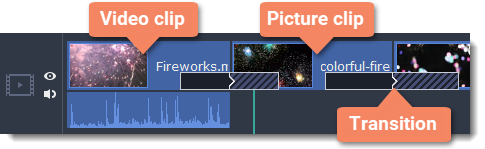
Video track
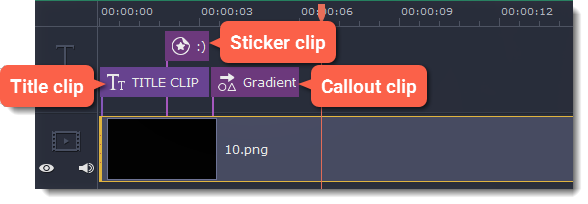
The video track holds videos, pictures, and the transitions between them. You can also place titles, callouts and stickers on the video track if you want them to appear against a black background.
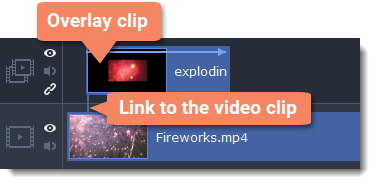
Overlay track
You can use the overlay track to show videos and images on top of the main video track. Simply drag the clips from the main video track up onto the overlay track. Overlay clips are linked to a corresponding clip on the main video track. This way, they will stay in sync even of you move or cut the video clip.
Learn more: Creating overlays
Title track
The title track holds all of your text clips, as well as callouts and stickers. Clips on this track are linked to a corresponding clip on the main video track. You can't use transitions or effects on any of these clips.
Independent audio track
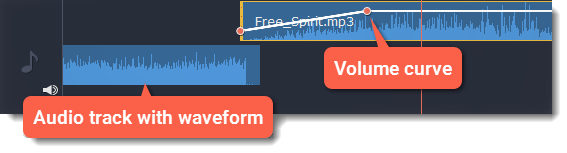
The independent audio track is the very last track of the Timeline and it contains audio that is not linked to any clips on the video track. This track is most suitable for background music and clips that don't need to be synchronized to videos. Both audio tracks show waveforms that visualize the volume throughout the clip, so that you can easily find the quietest and loudest parts. You can also fine-tune the volume using volume curves.
Learn more: Volume curves
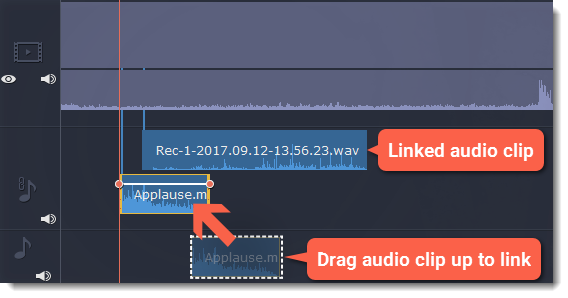
The linked audio track allows you to link audio clips to videos and images on the video track so that the audio clips stay in sync as you edit your project. The linked audio clip is hidden by default, but you can link clips by dragging them a little but up, towards the video track until a blue line appears, connecting the audio and video tracks. If you record audio, the audio clip will also appear on this track.
Problem: My audio clip appears on the video track
Solution: Some audio files contain album art, which may sometimes be recognized as the video stream. Therefore, these files may be placed on the video track. In that case, drag the audio clip down onto the audio track, and delete the album art from the video track if you do not need it.
