|
|
Recording audio
After you've added some videos and photos to the Timeline, you can record audio from a microphone or any other recording device.
Step 1: Open audio recording options
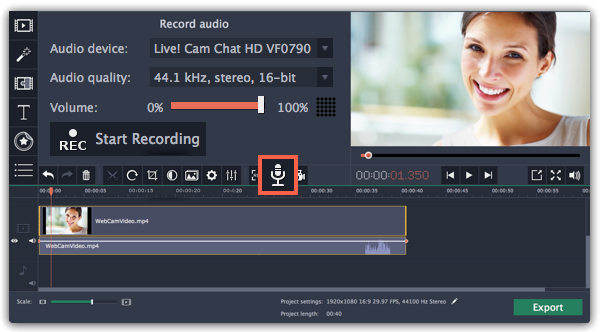
On the toolbar, click the microphone button to open audio recording options.
* There must be at least one clip on the video track.
Step 2: Set up recording
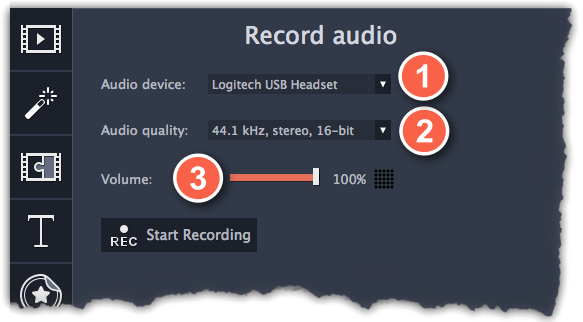
1. In the Audio device box, choose the device you want to use.
To record from a microphone: choose your preferred microphone or webcam microphone. If you don't see the device in the list, try reconnecting it to your computer.
To record audio from the computer: select Stereo Mix from the list. This will allow you to record any music, alerts, or other sounds playing on your computer. If you don't see "Stereo Mix" in the list, it may be disabled on your computer.
2. (Advanced) In the Audio quality box, choose the sample rate and number of channels that you need.
3. Set the volume level you want to use in your project.
4. On the Timeline, place the progress marker to where you want the recording to begin. You will be able to move the clip later.
Step 3: Record sound
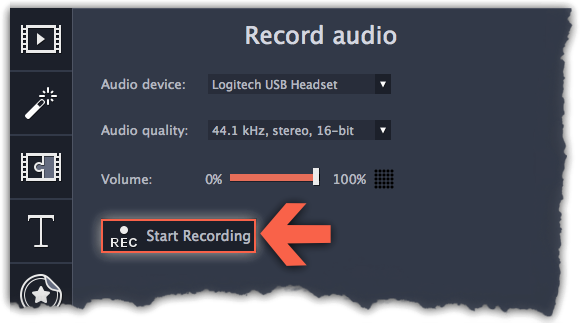
1. When you're ready, click Start Recording. You will be given a three-second countdown.
2. The video will start playing simultaneously with the recording. This way, if you're recording a voice-over, you will be able to use the video as a visual aid as you speak.
3. When you're done, click Stop Recording. The recorded audio clip will already be on the Timeline, as a linked audio clip.
* The recording will stop automatically if it reaches the end of the video track.