|
|
Recording online video
This manual describes how to capture videos from YouTube. You can also follow the same steps to capture video from other video sharing websites (webinars, sports broadcasts and any other online video).
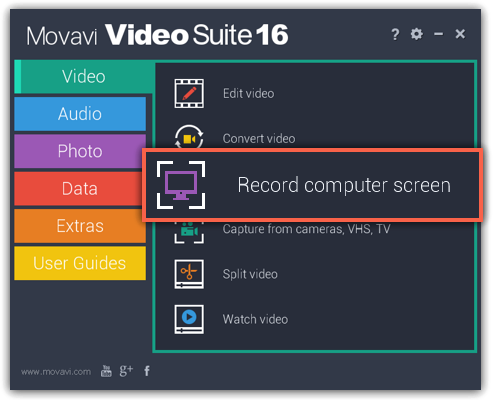
Step 1: Launch the Screen Capture module
Open Movavi Video Suite and click Record computer screen on the Video tab to launch the screen capture module.
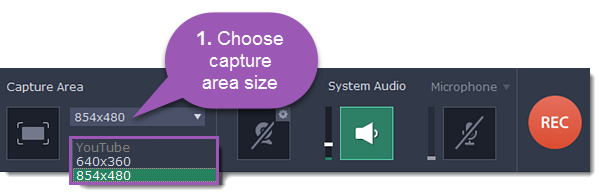
Step 2: Define the capture area
In the Capture Area section, open the list of pre-defined capture area sizes and choose one from the YouTube section:
640х360 – default YouTube player size
854х480 – extended theatrical mode size. You can toggle sizes by clicking the Theatrical mode  button in the YouTube player.
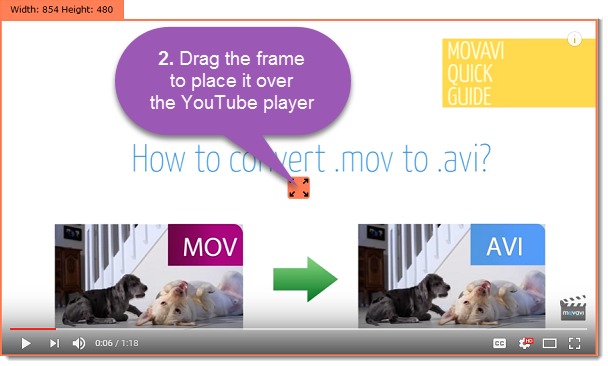
The capture area frame will be set to the selected size.
2. Place the frame over the YouTube player so that the player's control panel is outside the frame by dragging the frame by the orange position icon  .
.
If you want to capture a fullscreen video, open the list of pre-defined sizes and choose the option under Fullscreen. If you have more than one monitor, you will be able to choose which one to use for capturing video.
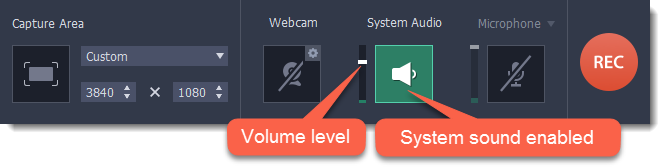
Step 3: Enable system sound
1. Click the System Audio button to enable sound recording.
2. Use the slider to the left to set the necessary system audio volume.
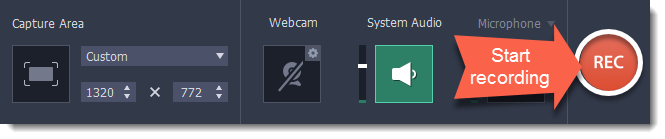
Step 4: Record the video
1. To ensure the best recording quality, set the online video player to the highest quality and wait for the video to load.
2. Click the REC button to begin recording.
3. You will be given a 5-second countdown before recording starts. Use this time to enable full screen mode and click Play to start the video.
4. When the video ends, use the F10 keyboard shortcut to finish recording, or click Stop on the recording panel.
Step 5: Cut and convert the video (optional)
Your video is now ready. When you end the recording, you can play the finished video, cut out unwanted parts, or save it in a different format.
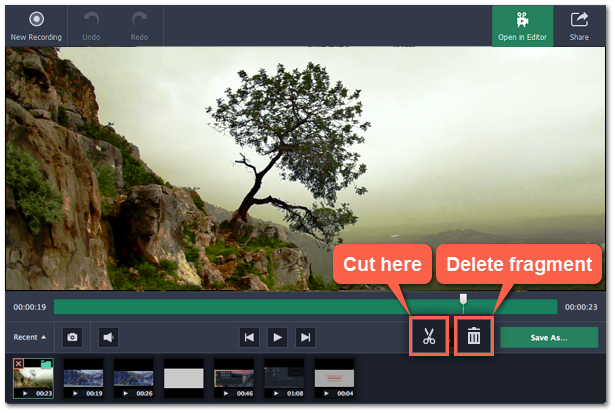
Trimming the video
If you've recorded extra bits at the beginning or at the end of the video:
1. Place the position marker to where you want to cut the video.
2. Click the scissors button to cut at the selected time.
3. Select the fragment you've cut and click the trash can icon to delete it.
Saving the edited video
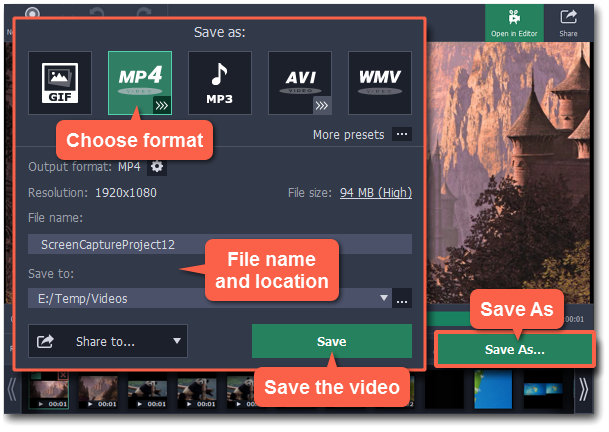
After you finish capture, your recording is already saved in MKV format. If you've cut the video or want to change the format, you will need to save a copy of the video.
1. Click the Save As button in the editing window. The output options will appear.
2. At the top, choose the format for saving the new video. If you can't find the format you want, click the button next to More presets  and search for the format or device preset that you need.
3. Name your file and click the button in the Save to  box to choose where to save the video.
4. Click Save to begin processing your recording.