
|
|
Scheduling
Any recording can be scheduled for a later time. You can use this to automate your recordings or capture late-night webinars.
Step 1: Set up your recording
Scheduled recordings will start with the currently selected capture area, sound, and other options. Before scheduling the recording:
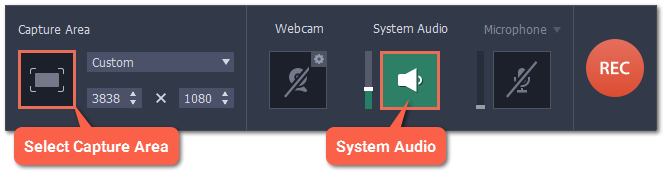
1. Click the Select Capture Area button on the recording panel or Record screen on the launcher and select the part of the screen you want to see on your scheduled recording.
2. To enable system sound recording, click the speaker button on the recording panel and make sure it is enabled and highlighted green.
Step 2: Schedule recording
1. Open the Settings menu and choose Preferences.
2. In the Preferences window, switch to the Capture Time tab.
3. Under "Capture time options" select Start and end on schedule.
4. Next to Start time, enter the time and date when you want to start the recording.
5. Next to End after, enter the length of the recording.

The recording is now set to automatically start and end at the given time.
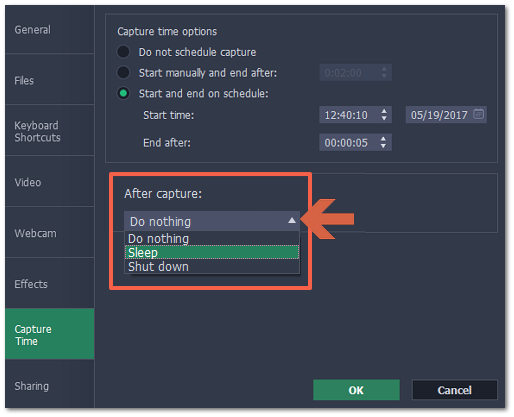
Step 3: Schedule sleep or shut down (optional)
After a scheduled recording, you can set your computer to automatically sleep or shut down to conserve energy.
1. In the Capture Time preferences, open the After capture box.
2. Select Sleep or Shut down.
Step 4: Enable launching at startup (optional)
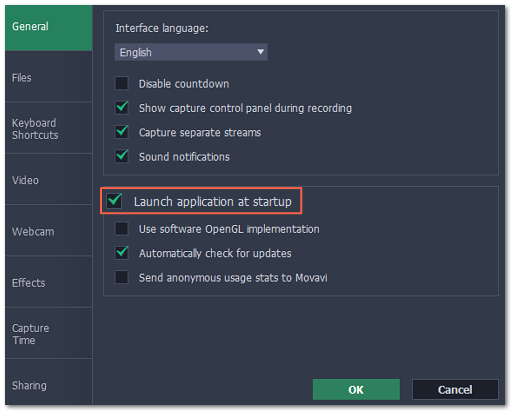
The screen recorder needs to be running at the scheduled start time to begin the recording. If you've scheduled the recording for a later date, enable the program to start with your computer so that you don't miss the recording. To do that, open the General section of the Preferences and enable the Launch application at startup option.
Finally, click OK in the Preferences window to save the changes. After the recording is finished, the recording file will be stored in MKV format in the output folder with your other screen recordings.
Please note that if you haven't yet activated the program, the maximum capture time is two minutes for each video. To learn more about activating Movavi Screen Capture, see the Activating Software section.
If you are starting a lengthy recording, make sure that you have enough free disk space for saving the temporary recording files.
