|
|
Converting images
Most applications and web services are limited to just a few image formats, and working with rare formats usually requires expensive software. Convert images to be able to use them wherever you like!
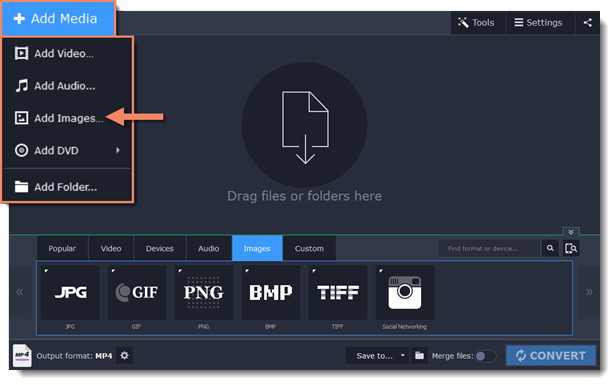
Step 1: Open images
1. Click Add Media in the upper left-hand corner of the window.
2. Click Add Images in the pop-up menu.
3. Choose the images you want to convert and click Open.
Step 2: Choose format
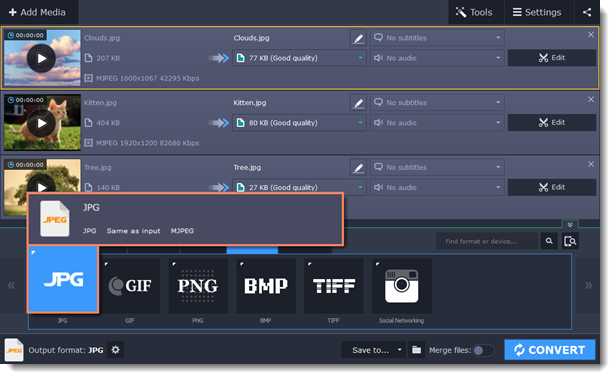
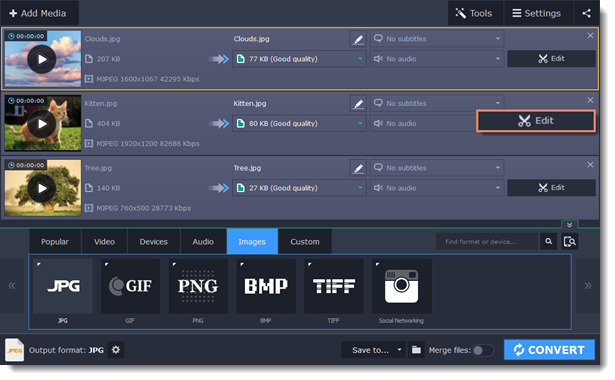
1. In the lower half of the window, click the Images tab to see a list of image formats.
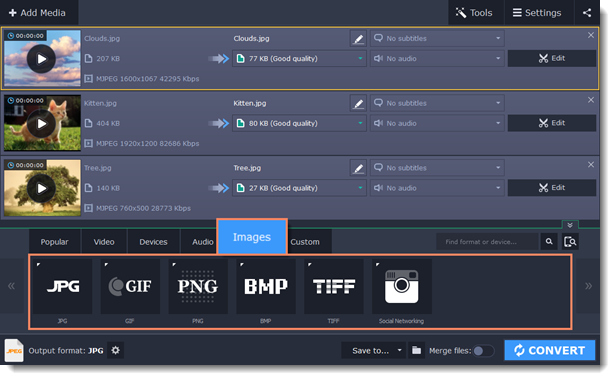
2. Click the format you want to use.
Hint: not all formats support transparency. If the images have transparent areas, choose the PNG or BMP format.
Step 3: Edit image (optional)
You can quickly fix or improve any images before converting. To do that, click the Edit button next to the image you want to adjust.
Step 4: Resize images (optional)
To batch resize the images:
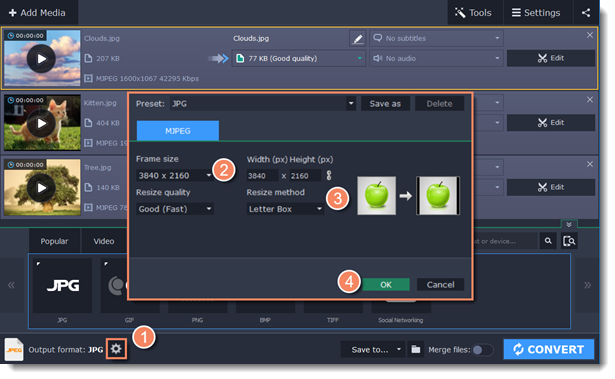
1. At the bottom of the window, click the cogwheel icon  next to Output format.
2. Click the box under Frame size and choose a size that you want to use for all images, or choose any of the following and enter the size into the width and height boxes on the right:
Custom: scales the images to exactly the size you specify.
Smart fit: scales the images up or down as close as possible to the specified size without changing the proportions.
Up to size: scales the images down as close as possible to the specified size without changing the proportions. Images smaller than this size will remain unchanged.
To allow changing the image proportions, click the link icon next to the width and height boxes:  – locked,
  – unlocked.
3. If the new size is different from the original image proportions, choose a resize method for your images:
Letter box – unused space will be filled with black.
Stretch – the image will stretch to fill the entire area.
Crop – the image will be resized to fill the entire area, and overflowing edges will be cut off.
4. Click OK to accept the changes. If you want to preview the result, click the Edit button next to an image.
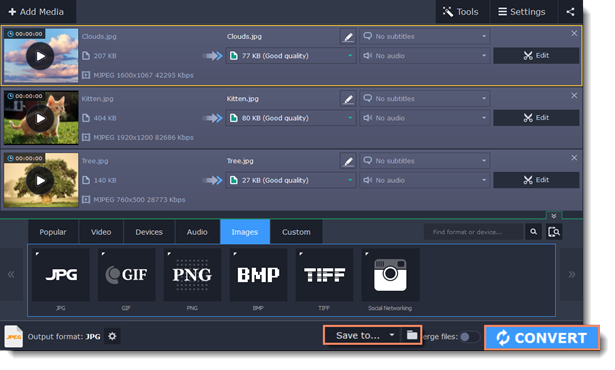
Step 5: Convert
1. Check the output folder in the Save to box. To change where the files are saved, click the folder icon  next to it.
2. Click CONVERT to start processing the images.