
|
|
Recording video from screen
Launch Screen Recorder
-
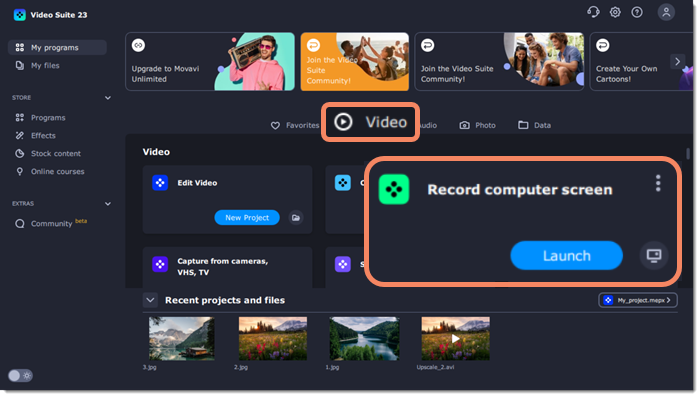
Open Movavi Video Suite and go to the Video tab.
-
Then click Launch on the Record computer screen tile to launch the screen capture module. Here you can set up the capture area.
-
If you want to start recording right away, click Start Recording on the Record computer screen tile.
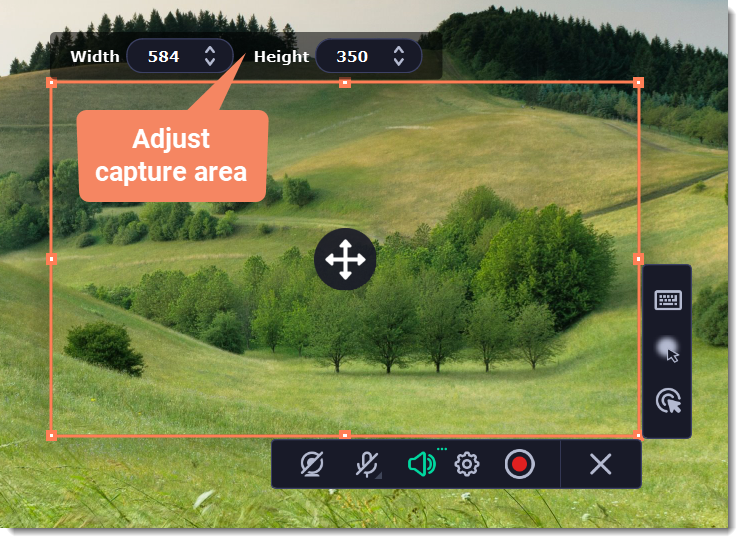
Step 1: Set up the capture area
1. Click the camera  button on the control panel or press ⌥⌘2. The area selection tool will start.

2. Select the part of the screen that you want to record:
-
Click and drag on the screen to select the capture area.
-
To record a window or a window panel, hover your mouse pointer over it and click once a frame appears around it.
-
To record the full screen, press Space or click in any part of your screen (make sure no windows are selected!).To adjust the area, use the orange markers on the frame to drag it or put the exact size in pixels on the panel above.
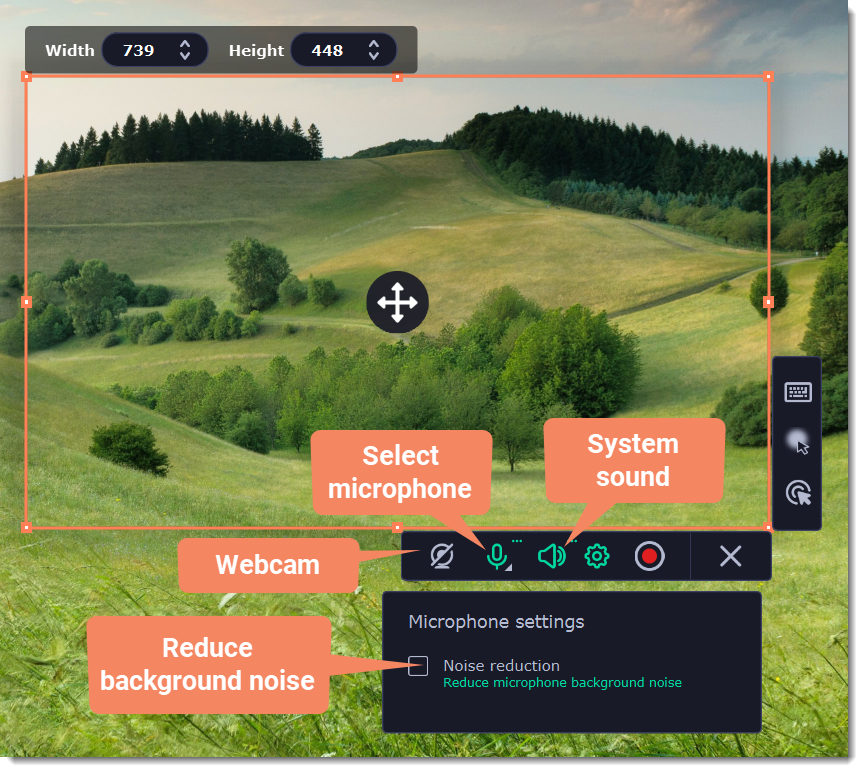
Step 2: Set up the sound and webcam
By default, only the system sound recording is on. To enable webcam and microphone recording, click the corresponding icons:
If you have more than one microphone connected, select the one you need from a list next to the mic icon.
To remove extraneous sounds, click the cogwheel button  and enable the noise reduction feature. It's handy if you're recording audio in a noisy place.
Step 3: Start recording
When you're ready to begin, click the REC button. You will be given a 3-second countdown before the recording begins.

Use these keyboard shortcuts to control the recording process:
⌥⌘1 - pause the recording
⌥⌘2 - end capture and save the recording
⌥⌘3 - take a snapshot of the capture area
Tip: these are the default hotkeys. You can change them in the Keyboard Shortcuts section of the Preferences.
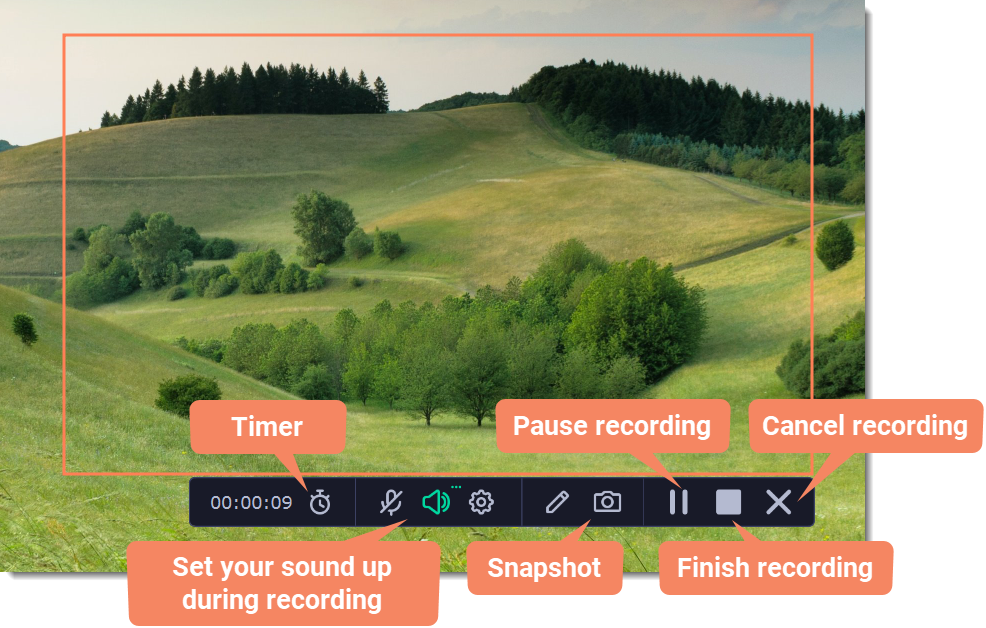
Timer
Set time limit for recording and it will stop automatically once the time is up. This way, you don't have to wait around for the video to end.
1. Click the timer button  .
.
2. Set duration by entering the time limit as hours:minutes:seconds.
3. Choose what happens after capture.
Learn more: Timer
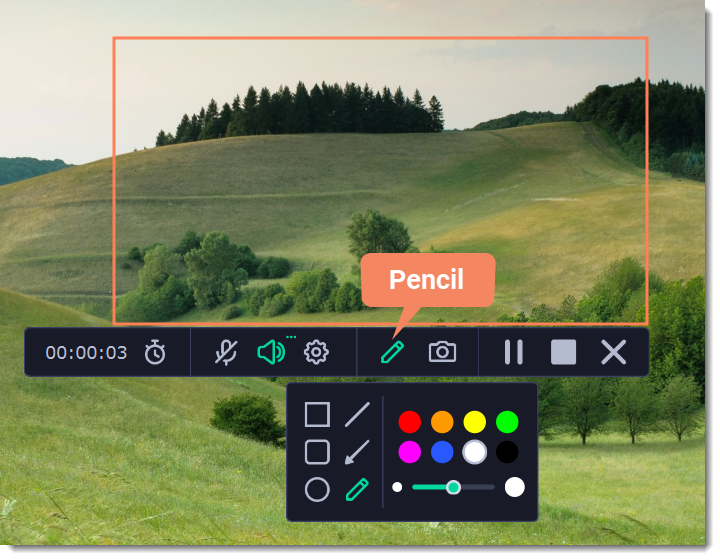
Making notes and drawing shapes on video
Mark important parts during recording — use the Pencil tool to draw or add tidy-looking pointers and other shapes in the middle of your recordings.
1. Click the pencil button  , select the tool, line color and width and draw or add shapes using your mouse cursor. The marks will disappear 5 seconds after you stop drawing and will remain on the finished video.
2. Note that when in pencil mode, all other actions are blocked. Clicking anywhere on the screen will put a dot in the spot. To exit the pencil mode, click the pencil button again.
When you're ready to finish your recording, click Stop on the recording panel or use the ⌥⌘2 keyboard shortcut .
Step 4: Edit the recording (optional)
When you finish recording, the capture editing window will open. Your video is ready and saved in MKV format, but you can preview it, edit, or export it to a different format.
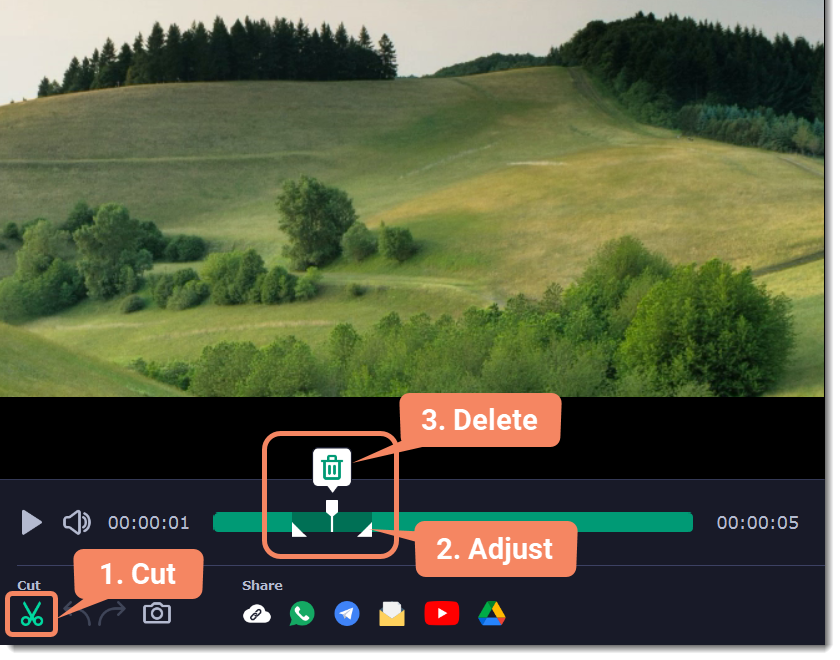
Cutting the recording
To cut out a fragment:
1. Place the position marker around the unwanted fragment and click the scissors icon.
2. Move the cut markers to adjust the fragment exactly as you want.
3. Click the trash can button.
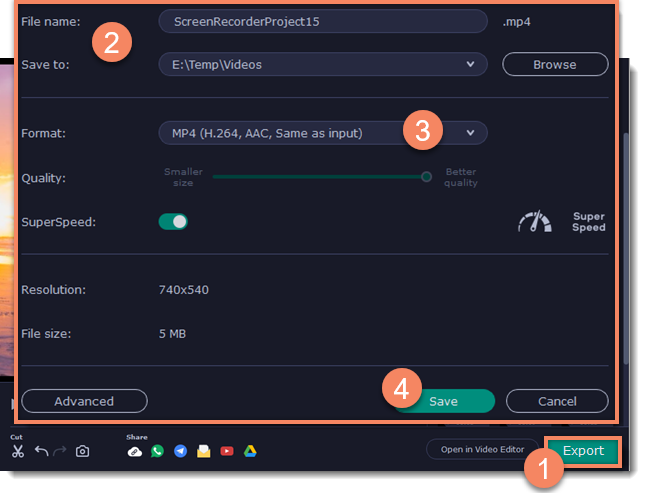
Saving the edited recording
To save the trimmed version, or to change the format of your recording:
1. Click the Export button. The output options will open.
2. Choose a name and location for saving the video.
3. Choose a format for saving your video.
4. Click Save to start processing your recording.
 nal information.