
|
|
Stabilizing video
If you're filming with a handheld camera, it's likely that there might be some unwanted camera shake visible on the video, especially if you walk or move while filming.
Step 1:
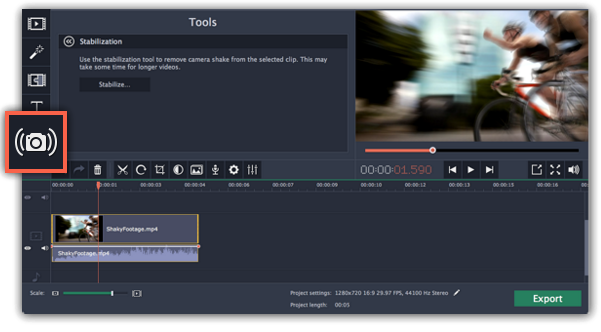
On the Timeline, select the clip you need to stabilize. Longer videos take more time to stabilize, so you may want to first cut the video into smaller segments.Step 2:
On the left sidebar, click the Stabilization button.Tip: if you don't see the Stabilization button, click the More button and select Stabilization from the pop-up list.
Step 3:
Click Stabilize to open stabilization options. The Stabilization window will open.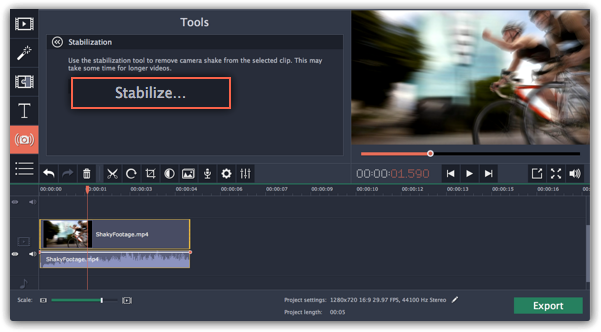
Step 4:
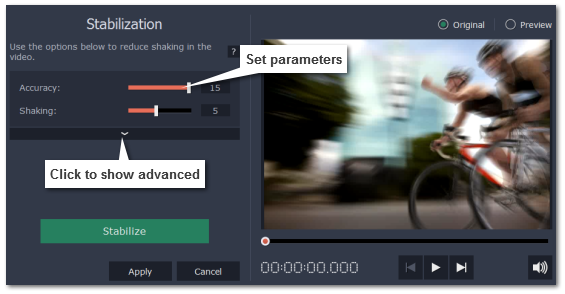
Set up stabilization with the following parameters depending on the video and the amount of shaking:Accuracy: affects the analysis precision of the video. Higher accuracy yields the best results, but also takes more time.
Shaking: set how strongly the shaking is visible on the video.
If you need more advanced settings, click the arrow under the sliders.
Radius: when a video is stabilized, each object is adjusted using the pixels from the surrounding area. The radius affects how large that area will be. Use a smaller value for more dynamic videos to avoid mixing objects together and to preserve more detail.
Smoothing: limits camera acceleration. Higher values work best for more or less static videos. Excessive smoothing may limit panning.
Edge Cropping: after compensating for motion, some distortion artefacts like blurred areas may appear around the edges.
-
None: the edges will remain as they are. Best results if there is little shaking on the video.
-
Fixed: the video is cropped to one size to cut off some of the edges.
-
Adaptive: whenever there is a lot of shaking, the video will zoom in so that the distorted edges are not shown.
Step 5:
Click Stabilize to start processing the video. This may take a while depending on the length of your video and the selected parameters.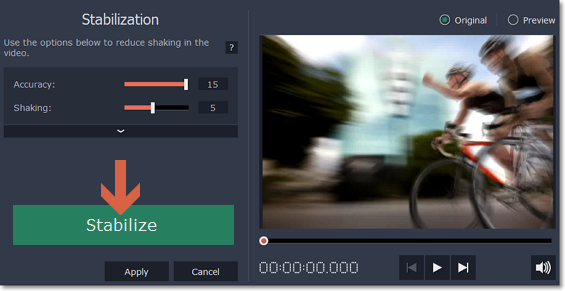
Step 6:
After the video has been stabilized, you will see its preview in the player. If you're satisfied with the result, click Apply to replace the clip on the Timeline with the stabilized video. If you didn't like the results, repeat steps 4 and 5.Stabilized copies
A stabilized copy of the file will be created under \My Videos\Movavi Video Editor\Stabilized. This copy will be used in the project instead of the original video. If you delete the stabilized copy, it will be replaced with the original video, and you will need to stabilize the clip again.
Filming tips
-
When shooting videos, try to rest the camera on something.
-
If possible, use a tripod. Some tripods are really small and can fit into your bag.
-
If you can't put down the camera, hold it with both hands and close to your body. This will minimize the shaking.
-
Try to move around less. If you have to move the camera, do it slowly.
-
Check your camera's settings to see if it has built-in stabilization.
Troubleshooting
Not enough disk space error
When a video is stabilized, Movavi Video Editor creates a stabilized copy of the video in a folder on your disk. By default, this folder is \My Videos\Movavi Video Editor\Stabilized on your main disk drive. If you are running out of space on that drive, you can either free more space and try again, or tell the program to save stabilized copies on another disk:
1. Open the Settings menu and choose Preferences.
2. Switch to the Files tab.
3. Find the "Store stabilized videos in" box and click the button  on the right to choose a different folder on a drive where you have more space.
4. Click OK to accept the changes. Now, try stabilizing the video again.
Cannot access folder error
This error means that you've changed the folder where stabilized files are stored, and that folder's permissions prevent Movavi Video Editor from creating files inside it. Try using a different folder for storing stabilized videos.
