|
|
Adding files
To begin working on your video project, you will first need to add some media files to the Editor.

Step 1: Copy files to your computer
Connect your camera to the computer with a data cable and transfer the files you want to use onto your hard drive. This will let you achieve faster performance while editing than working with files located on the camera storage, because accessing large 360° files over a data cable may be very slow.
Step 2: Convert 360° files
Some cameras shoot video in a proprietary 360° video format that can only be opened with its own software. Use the software that came with the camera to convert the 360° files into a standard video format. Consult the camera's user manual if you're having problems. If the videos are already in a standard format, skip to the next step.

Step 3: Add your 360° videos
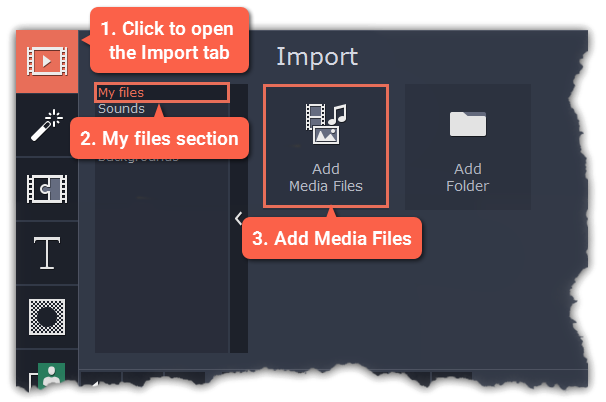
Open Movavi 360 Video Editor and click Add Media Files on the Import tab. Choose the files you want in the pop-up dialog box and click Open. Or simply drag the files from Windows Explorer onto the bottom part of the window to add them to your project. You can add 360° videos, regular videos, images, and audio files.

Step 4: Arrange files
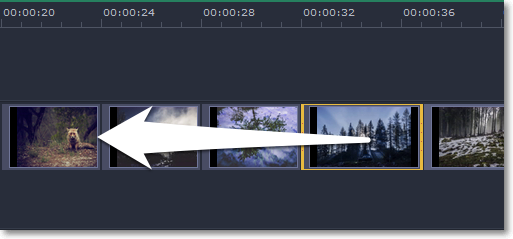
Once you've added the files, they will appear on the Timeline at the bottom of the window. The Timeline allows you to arrange the clips in the order you want. The clips' position relative to the time ruler at the top of the Timeline determines when it will appear in the finished video. To reorder the clips, select the clips you want to move and then drag them to the new position on the Timeline.

Moving a clip on the Timeline


