|
|
Exporting videos
When you're done with your project, you'll need to export it as a media file to be able to play it back in media players, mobile devices, and so on. This section will guide you through the process of exporting your project to a popular video format. If you want to find out more about other ways of saving videos, see the following guides:
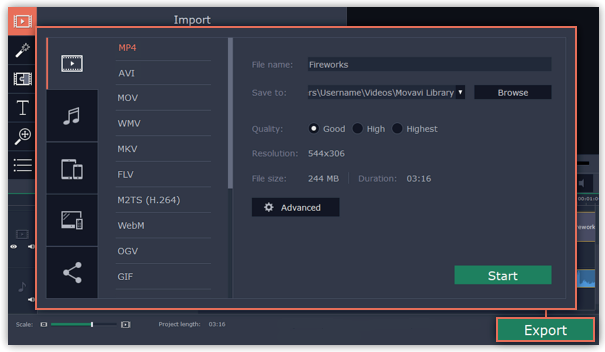
Step 1: Open the Export window
To start saving the video, click the Export button in the bottom right-hand corner of the Editor. The export settings window will open.
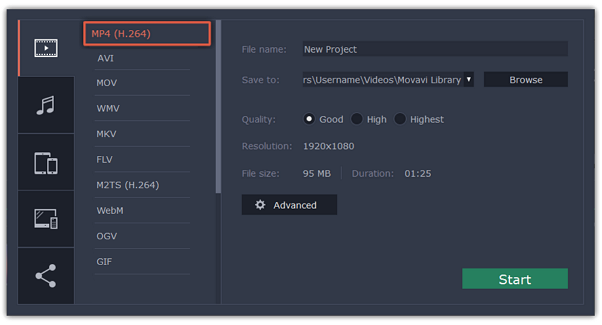
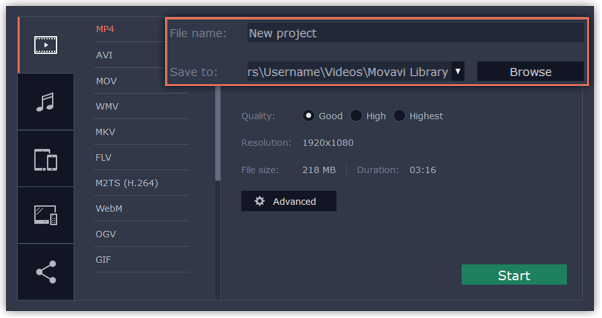
Step 2: Choose a format
In the new window choose a format for saving the video in. Some formats allow you to choose between video codecs. If you don't know which format to choose, try using MP4 with the H.264 codec. The MP4 format is supported by most platforms and operating systems.
The Estimated File Size field shows how much disc space your file will require after saving. If the file size is too large, you can set a lower resolution in the Project Settings. At lower resolutions, the file will be significantly smaller, however, the video will lose some quality due to the limitations of digital data compression. When changing resolutions, we recommend that you keep the same aspect ratio to avoid black bars around the video or other unwanted distortions.
The GIF format is different from other formats in the list. It allows saving video as a mute animated image, which can then be played in some image viewing programs or in any web browser.
Step 3: Choose a destination folder
Name your file and choose a destination folder.
In the 'Save to' field, enter the folder where you would like to store the file. By default, this will be the directory for saving output videos specified in the preferences. To set a different folder, click the Browse button and choose the folder in the Finder window, or enter the path manually into the box. Name your video in the File Name field: the project's name will be filled in for you by default.
*The video file will have a frame rate of 60 FPS only if the original video files used in the projects had a frame rate of 60 FPS and above.
*The video file will have a frame rate of 60 FPS only if the original video files used in the projects had a frame rate of 60 FPS and above.
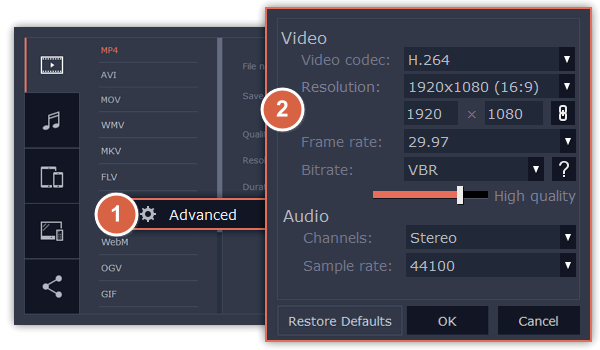
Step 4: Select quality (optional)
If your project is heavy on small details and filters, you can select High or Highest quality to export the finished video with a higher bitrate. This will increase the output file size but will preserve better quality. For most other projects, Good quality will provide a nice result at a small file size.

Step 5: Choose a destination folder
Name your file and choose a destination folder.
In the 'Save to' field, enter the folder where you would like to store the file. By default, this will be the directory for saving output videos specified in the preferences. To set a different folder, click the Browse button and choose the folder in the Finder window, or enter the path manually into the box. Name your video in the File Name field: the project's name will be filled in for you by default.
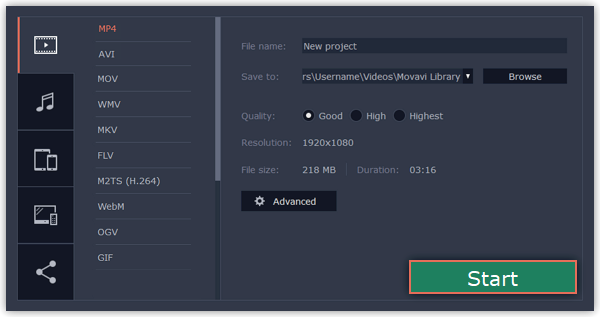
Step 6: Start exporting
Click the Start button to begin processing the video file. This may take up to a few minutes.