
|
|
Movavi Photo Manager
Creating albums
From 'Albums' tab
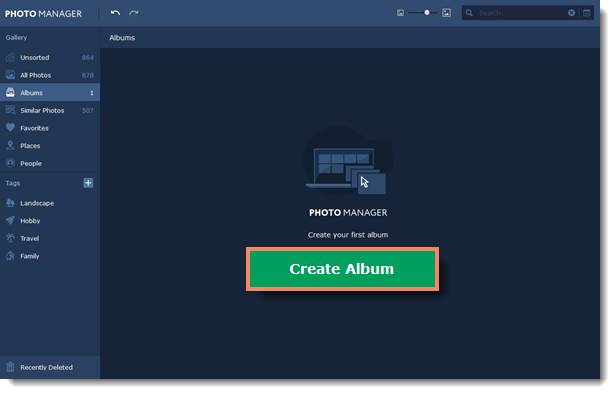
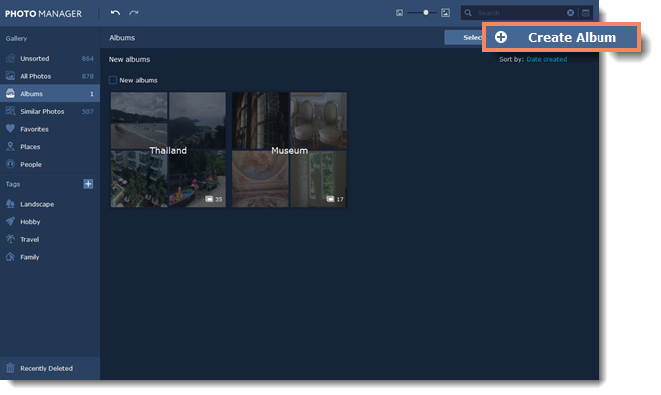
Step 1
If you don't have any albums yet, go to the Albums tab and click Create Album.
If you already have albums, click the Create Albums button in the top right corner.
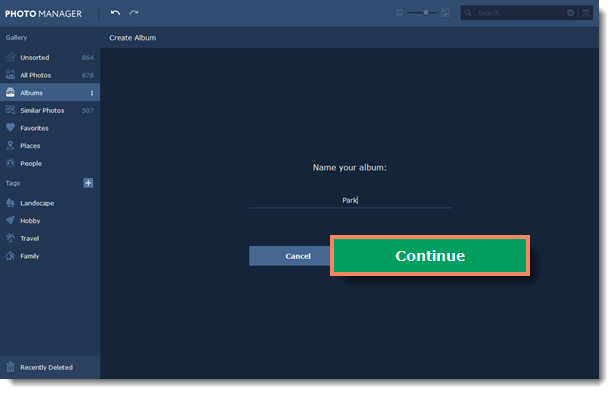
Step 2
Enter a name for your album and click Continue.
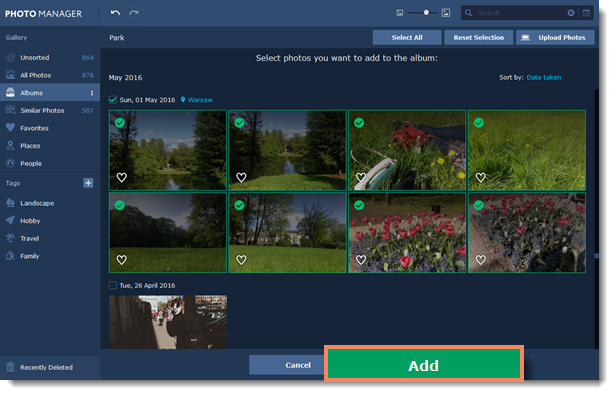
Step 3
On the next screen you can add photos to the new album right away. Select the photos you want to add and click Add.
If you don't want to add photos just yet, click Continue and an empty album will be created.
From 'All Photos' tab
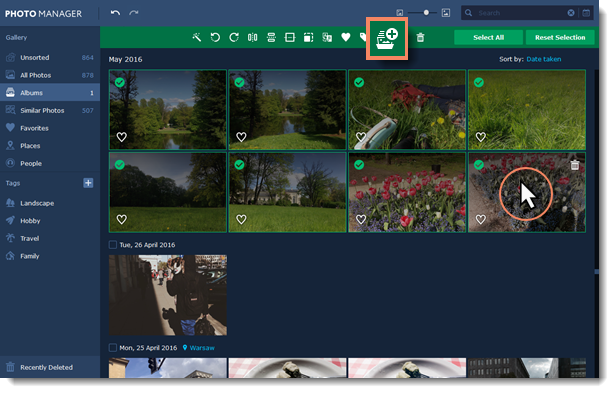
Step 1
Select the photos you want to add to an album by simply clicking on them. Then click the Add to album button on the top panel.
Step 2
You will see a window open where you can choose to add the photos to an existing album or create a new one. Select Create Album and click Add.
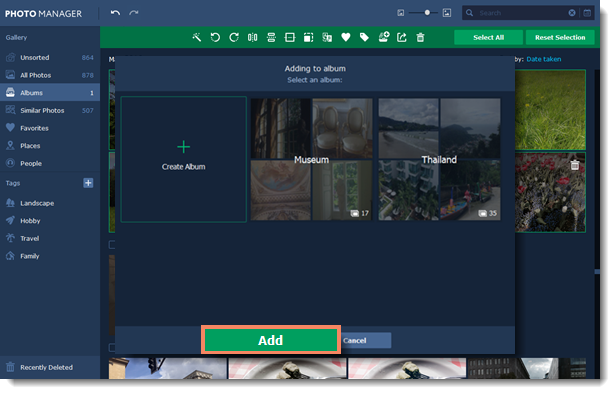
Step 3
Enter a name for your album and click OK. The selected photos will be added to the new album.

