|
|
Choosing a resolution
How to keep the original resolution
If you open the list of presets under Save as, you will see that some presets are marked with a specific resolution size, such as 720p or 1080p. While these resolution sizes can help you easily scale your video if you've captured it using one of the standard sizes, they may not be as effective if you've captured it using a custom capture area size.
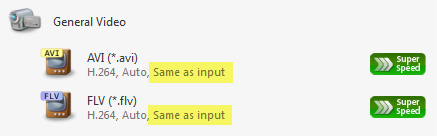
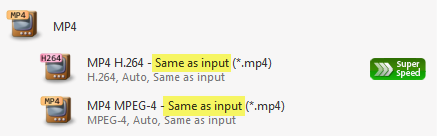
To save your captured video with the original resolution, you will need to either choose a format from the General Video group (located under Video and audio formats), or choose a format preset titled 'Same as input'.
How to avoid black bars
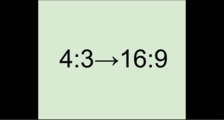
When you save or convert videos with a different aspect ratio (the ratio of the video's width to its height), the output file may come out with black bars around it. This happens because a video of one size needs to be fit inside the new frame without deforming the image itself. Just imaging fitting a rectangle inside a square and vide versa.
To solve this problem, you will need to either save the video without changing the resolution (see above), or change how you want the video to be placed inside the frame. To do that,
1. Choose a resolution size that you want in the preset list. To avoid losing quality, it should closely match the size of the original video either in width or in height.
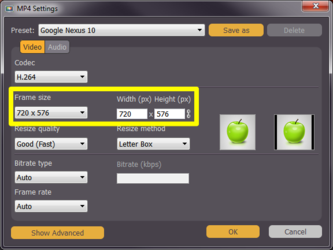
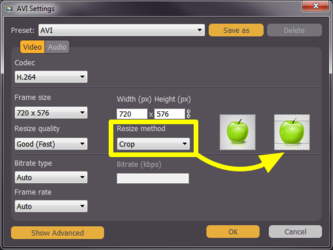
2. Click the cogwheel button  next to the Save as list to open settings for the chosen preset.
3. Find the Resize method list and open it. Here, you can choose the way your video will be fit inside the selected frame size.
Letterbox is the default method that saves videos with the least distortion, but may add black bars in the region around the video.
Stretch will literally stretch the original video to fill the whole screen, however, this may lead to visual distortions.
Crop will scale the video to fit the entire frame on the short side, cropping anything that does not fit. While some parts of the video will be cropped, the objects inside the video will maintain their proportions.
Auto uses a combination of both stretch and crop methods.
Choose the most appropriate resize method depending on the content of your screencast. You can refer to the image in the Settings window for a preview. Click OK to accept the changes and close the window.
Small resolution videos
For best results, choose a resolution size less than or equal to that of the capture area you used. Due to video compression restrictions, If you save your video to a larger resolution, you will not get better quality, but the file size will be considerably larger.
Setting a custom resolution
To set a resolution that is not included in the list of presets:
1. Choose a preset with the necessary format. You can choose any resolution at this point.
2. Next to the Save as list, click the cogwheel button to open the settings for the chosen preset.
3. Enter the necessary frame size in the Width and Height boxes. Note the link button to the right of the Height box:  . By default, the width and height you enter will be adjusted to fit the selected proportions. Click the link button to disable proportion constraining.
Please note that if you want to savmule videos for a mobile device, some devices may not support the new custom resolution. For best compatibility, use the same aspect ratio and a smaller frame size than that of the device preset.