|
|
Adding transitions
Transitions are short animations that use geometric shapes and transparency to connect two clips in a creative way.
Add a transition
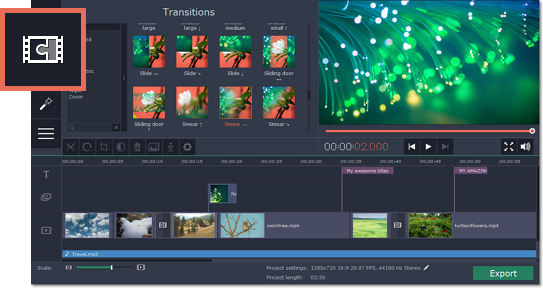
1. Click the Transitions button in the upper left-hand corner of the window to open the list of all transitions.
2. In the list of transitions, pick a style you like and drag-and-drop its icon between two clips on the Timeline.
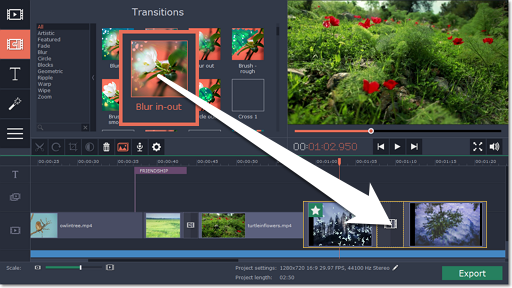
A transition icon will appear between the two clips.


Change transition length
By default, each transition will be set at 2 seconds long. To change the transition length:
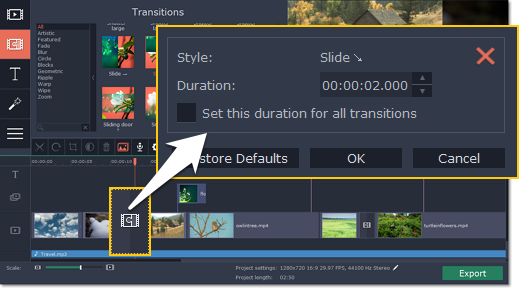
1. Double-click a transition on the Timeline to open transition properties.
2. In the Transition Properties window, enter the new transition length in the Duration field. The format is hours:minutes:seconds:milliseconds. If you want all transitions that are currently in the project to have the same length, select the Set this duration for all transitions option.
3. Click OK to apply the changes.
Add transitions to all clips
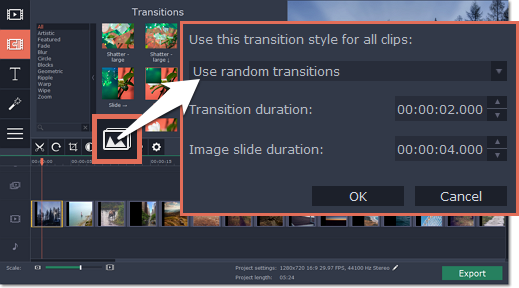
You can automatically add transitions between all clips in your movie in just a few steps:
1. Click the slideshow button on the toolbar. The Create Slideshow dialog box will open.
2. In the Create Slideshow dialog box, select a transition style that you want to use for all clips. If you want to use different transitions, use the Random Transitions option in the list of transitions.
3. In the Transition duration box, enter the length that you want to set for all transitions. A transition cannot be longer than the shortest clip in your project.
4. Click OK to accept the changes.
Remove a transition
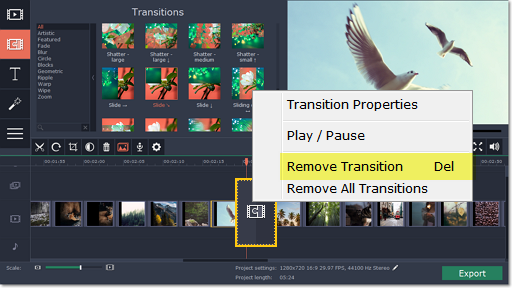
To remove a transition from your movie or slideshow, right-click the transition on the Timeline and choose Remove Transition from the pop-up menu. If you want to delete all the transitions in your project, choose Remove All Transitions.
