|
|
In this guide, you will learn how to turn your photo albums into awesome slideshows complete with music and transitions. Creating a slideshow is easy as 1-2-3 using the built-in Slideshow Wizard. Follow the instructions below to open the wizard and start making your own slideshow.
Open the Video Editor
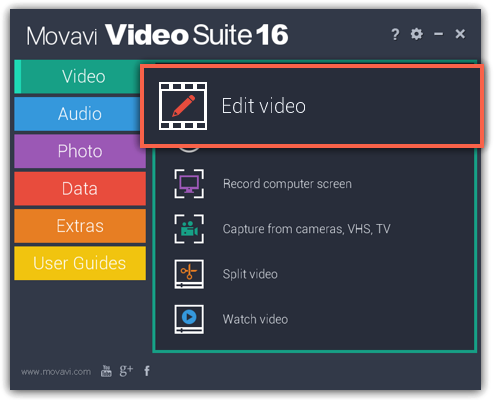
Open Movavi Video Suite and click Edit video in the Video tab to launch the video editing module.
Create a new slideshow
-
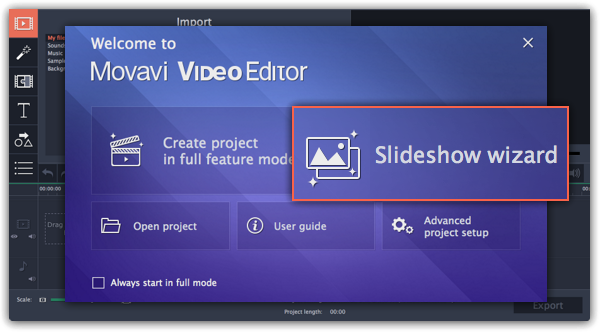
On the welcome screen, click Slideshow wizard to open the three-step slideshow wizard.
-
Or open the File menu and choose New Slideshow.
Step 1: Add photos
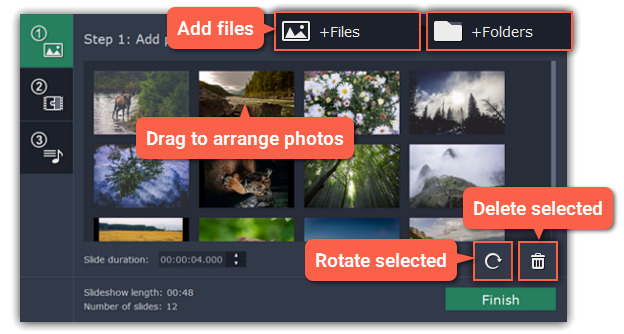
Click +Files and +Folders to add photos to your slideshow. Organize and rotate your photos.
Step 2: Add transitions
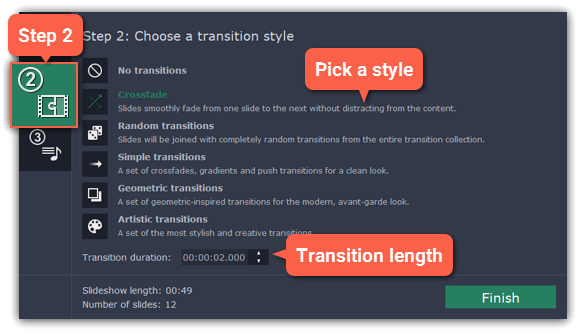
Click the Step 2 button to go to the next step and choose a transition style you like.
Step 3: Add music
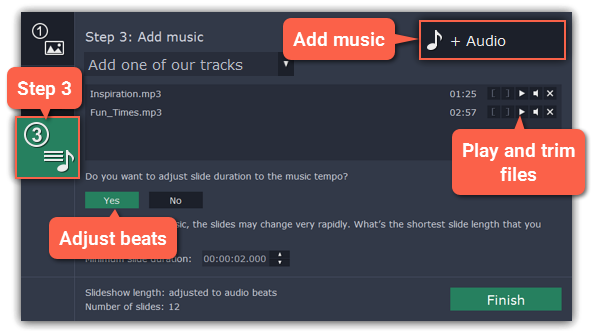
Click the Step 3 button to go to the next step and click +Audio to add some music. Then, trim the music as you see fit and set up music beats.
Step 4: Add titles and effects
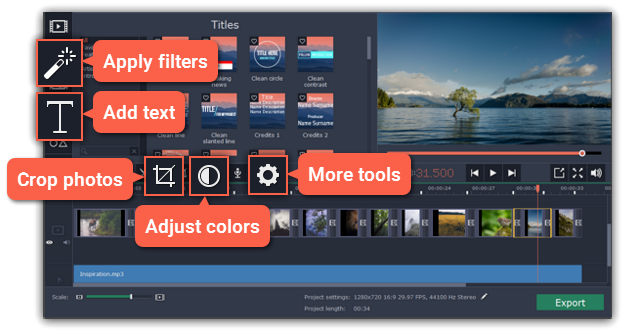
Click Finish to generate your slideshow. Now you can add some finishing touches like filters, titles and special effects.
Learn more:
Step 5: Save your slideshow
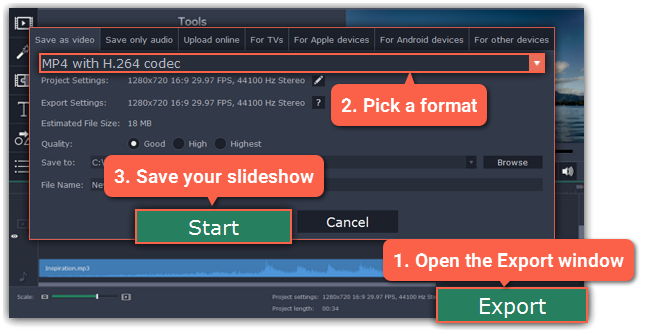
When you're done, click Export in the bottom right-hand corner of the window.
-
To save the slideshow as a video file, pick a video format and click Start.
-
If you want to share the video straight to YouTube, switch to the Upload online tab. There, sign in to your YouTube account, fill in the information and click Start to save and upload the video.
Learn more:


