|
|
Step 5: Slideshow preview
On this tab preview the slideshow and make some adjustments in it.
Step 1: Switch to the Preview tab
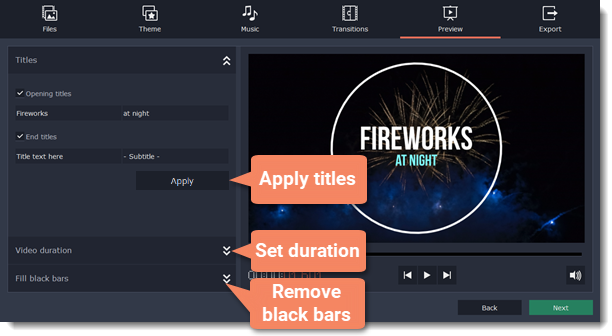
On the top of the Slideshow Wizard switch to the Preview tab.

Step 2: Make adjustments
Titles
Titles will help you add text to the slideshow. Opening titles appear at the beginning of your video, end titles finish it. Default titles that go with the "No theme" option allow adding two lines of text. Themes include titles of different form, so their design and space available for text differ.
Video length
By default, the video will be just as long as the background audio. To change the length, deselect the Fit to music length option and use the slider to set how long you want the video to be. If you opt for a shorter video, some clips may not appear in the end result.
Black bars removal
If the resolution of the images in your slideshow differ from the project's resolution, black bars will appear on the sides of the frame. You can remove them by checking the Fit to frame option – the image resolution will be automatically fitted to the frame size.
Volume balance
The volume balance slider determines what kind of sounds you can hear in the video. Move the slider to the left side to hear more of the video sounds (such as speech and ambient sounds), or move the slider to the right to make the video's sound quieter and raise the background music volume.
Step 3: Watch the final video
Watch your slideshow in the player window. Use Play/Pause and the rewind buttons or the rewind slider above. If you want to make changes in your video, you can go back to previous tabs and add more files or delete them, change the audio track or the transitions style.
Next step: Saving slideshow


