|
|
In this guide, you will learn how to turn your photo albums into awesome slideshows complete with music and transitions. Creating a slideshow is easy as 1-2-3 using the built-in Slideshow Wizard. Follow the instructions below to open the wizard and start making your own slideshow.
Create a new slideshow
-
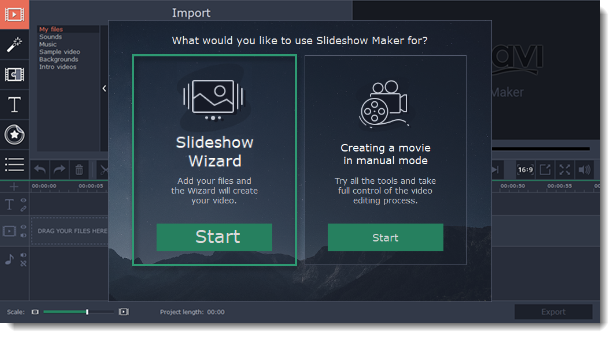
On the welcome screen, click Slideshow wizard to open the six-step slideshow wizard.
-
Or open the File menu and choose New Slideshow.
Step 1: Add files
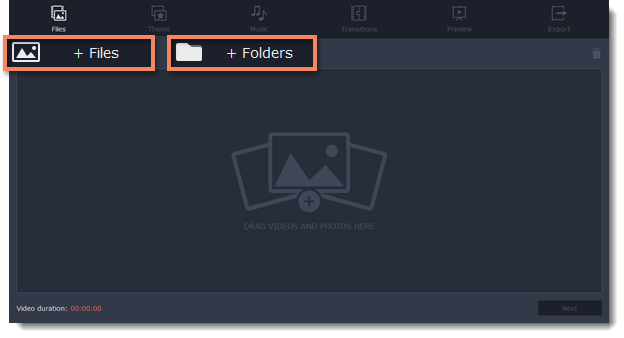
On the Files tab of the Wizard, add the videos and photos that you want to see in your video.
-
Click +Files to add several files from one folder,
-
Click +Folders to add the entire contents of one or more folders,
-
Or drag and drop the files onto the Wizard window.
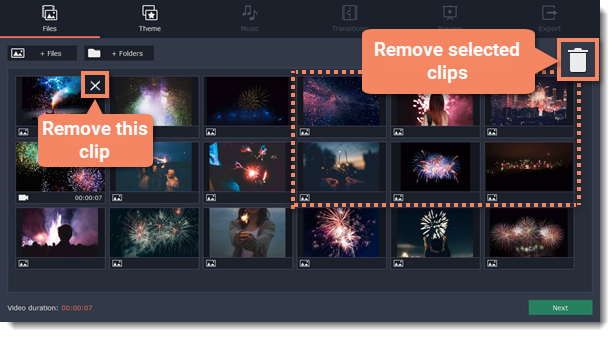
The files you've added will appear below. You may need to wait a couple minutes for all the files to load.
-
To change the order of the files, simply drag their thumbnails with your mouse.
-
To remove files from the video, click the cross icon
 in the upper right-hand corner of each file, or select the files you want to delete and click the Bin button above the list.
Step 2: Choose a theme
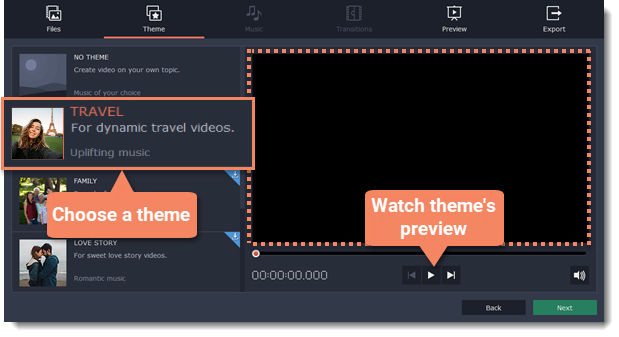
Click Next or the Theme tab at the top to proceed to the next step. You can choose a preset of transitions, titles and music on a number of themes and jump straight to the Preview step. To add music and transitions of your choice, click No theme and then proceed to the next step.
Step 3: Add music
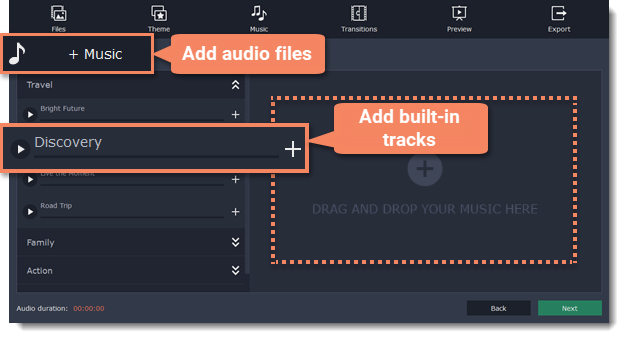
Click Next or the Music tab at the top to proceed to the next step. Here you can choose music to play along with the video. You can add your own audio files or use any of the provided audio clips listed in the left-hand column. These audio tracks are royalty-free so you can upload these videos to YouTube and other services.
-
To use one of the built-in tracks, click the + button.
-
To add your own audio file, click the +Music button at the top and select the audio track, or simply drag the file onto the Wizard window.
Step 4: Add transitions
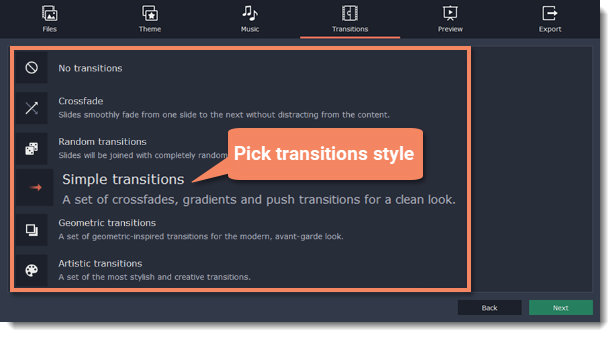
Click Next or the Transitions tab to move to the next step. Choose among the given types of transitions.
Step 5: Preview and adjust your video
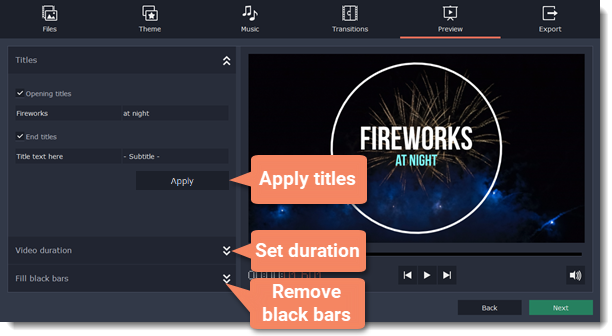
You're almost done! Click Next or the Preview tab at the top to proceed. If you've added a lot of videos, you may have to wait up to a couple minutes while the Wizard does its magic. You can then preview the video and make some adjustments to get it just right.
Video length
By default, the video will be just as long as the background audio. To change the length, deselect the Fit to music length option and use the slider to set how long you want the video to be. If you opt for a shorter video, some clips may not appear in the end result.
Black bars removal
If the files in your slideshow are of different resolution than the project
If the resolution of the project and the files in your slideshow are different, black bars will appear. You can remove them by checking the Fit to frame option – the image resolution will be automatically fitted to the frame size.
Volume balance
The volume balance slider determines what kind of sounds you can hear in the video. Move the slider to the left side to hear more of the video sounds (such as speech and ambient sounds), or move the slider to the right to make the video's sound quieter and raise the background music volume.
Step 6: Save your slideshow
When you're done, click Export in the bottom right-hand corner of the window.
-
To save the slideshow as a video file, pick a video format and click Start.
-
If you want to share the video straight to YouTube or Google Drive, switch to the Share on the web tab. There, sign in to your YouTube or Google Drive account, fill in the information and click Start to save and upload the video.
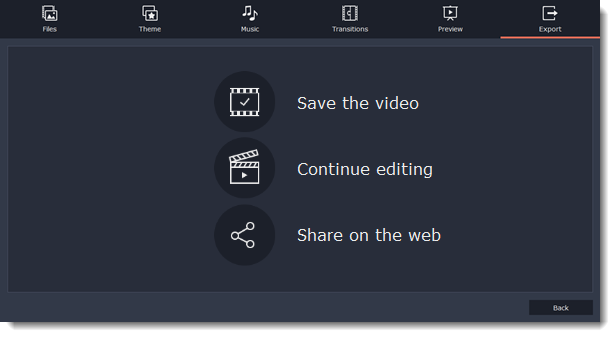
Save the video – choose this option to save the result as a video file.
Continue editing – this will close the wizard and let you add finishing touches in full mode. After you're finished, you can always click the big green Export button at the bottom to save the result.
Share on the web – choose this option to save a video file and upload it to YouTube or Google Drive right away.
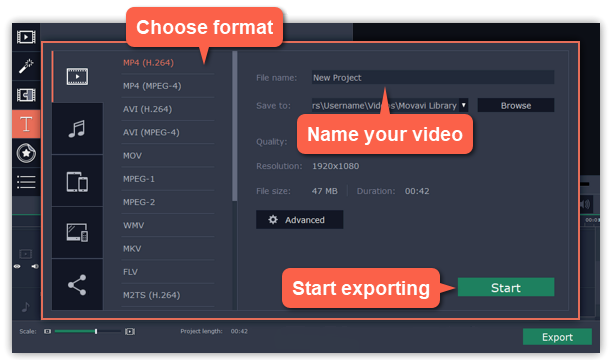
To save the video, name your project, chose the format and a destination folder where you want to save your video. If you want to upload your video to YouTube or Google Drive, sign in your account and fill in the information about the video. Then click Start and wait a few moments until your video is available on the service.
Learn more:


