
|
|
Editing screenshots
How to annotate screenshots with Movavi Screen Capture Pro
Step 1: Open the screenshot editor
1. On the Movavi Screen Capture Pro launcher, click Edit files to open the screenshot editor window.
Hint: Or click the Save and edit button when taking a screenshot to make it open in the editor straight away.
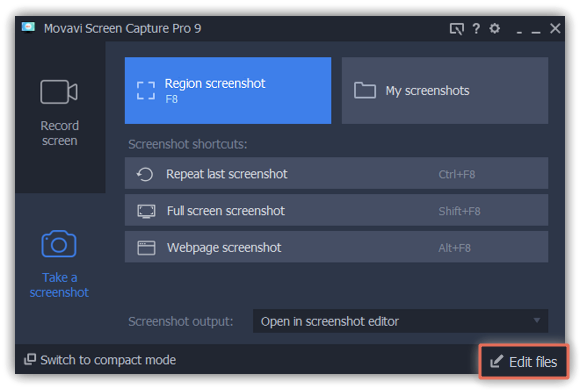
2. On the Recent panel at the bottom, click the screenshot that you want to edit.
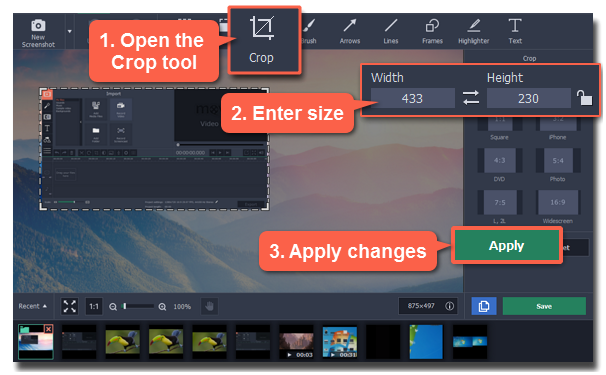
Step 2: Crop the screenshot
1. At the top of the screenshot editor window, click Crop to open the cropping tool.
2. A frame will appear around the image. Select the part of the image that you want to keep:
-
Drag the frame's borders to resize the frame, and drag by the center of the frame to move it.
-
If you need a specific size, enter it into the width and height boxes on the right.
-
If you need to lock the frame's proportions, click the lock icon to the right of the size boxes.
3. Click Apply to cut off the selected parts.
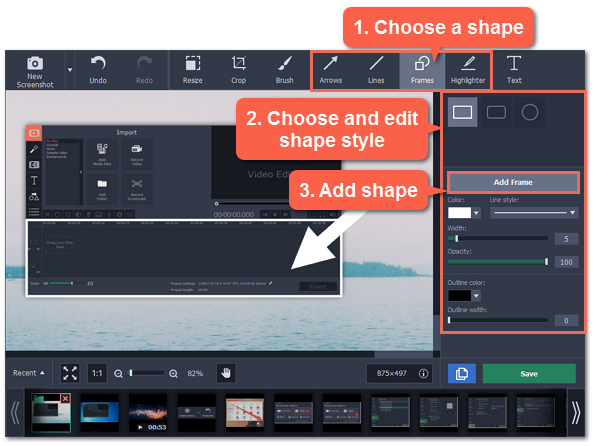
Step 3: Add shapes
1. At the top of the window, choose a shape tool that you want to use: Arrows, Lines, Frames, or Highlighter.
2. On the right, choose the style that you want to use: tapered or straight arrows, rectangle or ellipsis, etc. Here, you can also choose the color, width, and outline for the shape.
3. Click the Add Arrow / Add Line / Add Frame / Add Highlight button to place the selected shape on the image.
4. On the image, move the shape with your mouse to place it where you want:
-
Drag the arrow circle on the shape
 to change its size.
 -
To remove a shape, select the shape and click the
 button or press the Delete key.
 -
To rotate frames and highlights, drag the green circle at the top
 left or right.
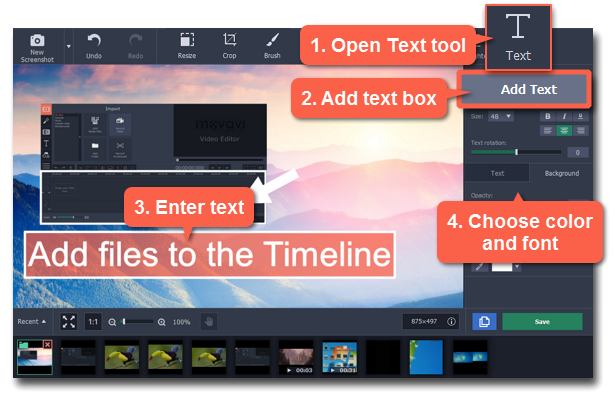
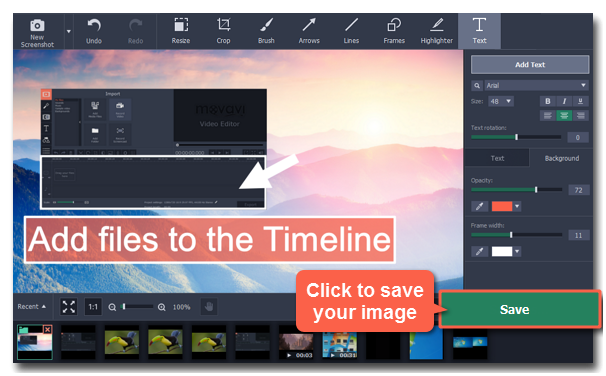
Step 4: Add text
1. At the top of the window, click the Text button to open the text tool.
2. Click Add Text on the right to create a text box on the image.
3. Double-click the text box and enter your text.
4. On the right, choose the font, style, size, and color of the text. Switch to the Background tab to choose the color of the background.
5. To move the text box, drag it with your mouse.
-
To rotate or resize the text, drag the arrow circle or use the Text rotation slider on the right.
-
To remove a text box, select it and click the button or press the Delete key.
Step 5: Save the image
When you're done editing the image, click Save to save the finished screenshot.
If you are using the trial version, you will not be able to save edited screenshots. To remove the trial limitations, buy an activation key and use it to activate the program.
