
|
|
Taking screenshots
Capturing screenshots with Movavi Screen Capture Pro
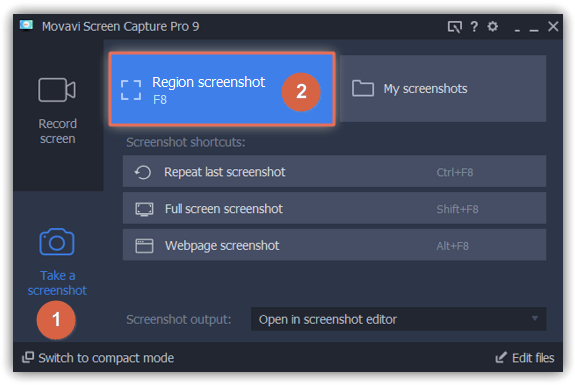
Step 1: On the Take a screenshot tab in the Movavi Screen Capture Pro launcher, click Region screenshot.
Step 2: Your cursor will turn into a crosshair. Select the part of the screen that you want to capture:
-
To capture a window or a window frame, hold your mouse pointer over the window and click after a frame appears around it.
-
To capture a part of the screen, hold the left mouse button and drag diagonally to draw a rectangle.
-
To capture the entire screen, click on any empty area of your desktop.
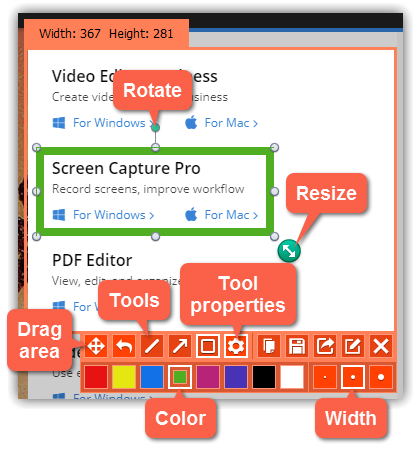
Step 3 (optional): A frame will appear over the selected area. You can now edit your screenshot:
-
Select a tool you want to add to your screenshot: Line
 , Arrow
  or Frame
  . Hold the left mouse button and drag to draw a shape.
 -
Click Tool Properties
 to change color and width of your shape.
 -
Drag by the green arrow circle
 or the white circles on the edges to resize the element; rotate by dragging the green circle left or right:
-
If you need to move the capture area, click the Drag-area mode
 button.
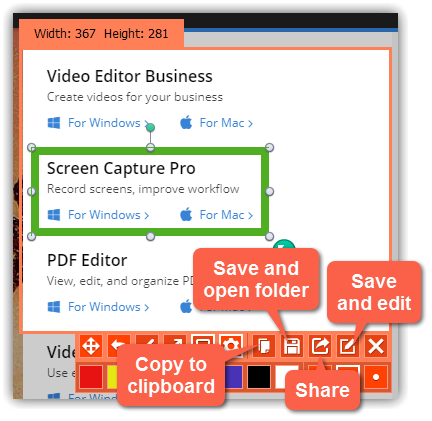
Step 4: Choose what you want to do with your screenshot:
-
Click the copy
 button to copy the image to clipboard without saving the screenshot to a file.
 -
Click the save
 button to save the image file and open its containing folder.
 -
Click the share
 button to share the image to Google Drive.
 -
Click the edit
 button to save the image file and open it for editing.
Where are the screenshots stored?
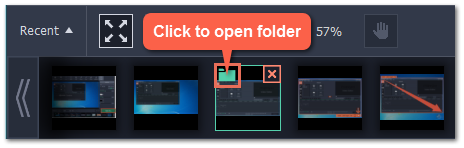
By default, the screenshots are stored in the "\Videos\Movavi Screen Capture Pro\Screenshots" folder of your user. You can change where the files are saved in the Files section of the Preferences. To open the screenshot's location, click the folder icon on its thumbnail at the bottom of the editor window.
Learn more: Editing screenshots
