
|
|
Adding media files
To begin working on your video project, you will first need to add some media files to the Editor.
Open the Import tab
The Import tab contains options for opening and creating media. To open it, click the Import button in the upper left-hand corner of the Video Editor window.
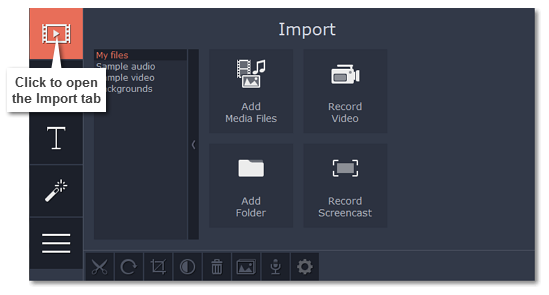
The Import tab is the first one you see when you open Movavi Video Editor.
Adding video, photo, and audio files
If the media you want to use is stored in a file, use the buttons in the My files section or drag-and-drop media files straight from Windows Explorer onto the Timeline to add them to the project.
-
To add one or several files from a single folder, click Add Media Files and choose the files you want to use.
-
To add the contents of an entire folder, click Add Folder and select the folders you want to import.
 Recording videoYou can also record video from your webcam, record clips from a TV tuner, or import files from a digital camera.1. Click the Record Video button on the Import tab. The Video Capture module will open.2. In the Video Capture window, set up your video and audio capture devices.3. Click Start Capture to record the video.When you're done, click Back to editing to import the recordings into the project.
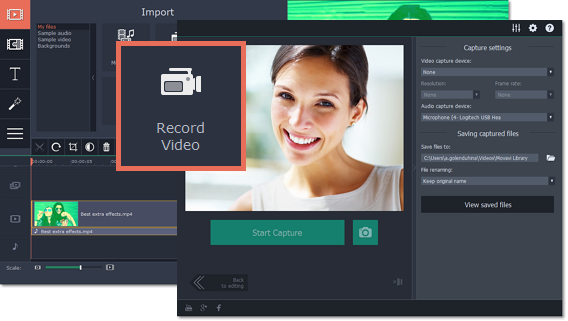 Using stock mediaIf your project is missing cool footage, music, or backgrounds, use the free stock clips included with the Video Editor.Sample audio1. On the Import tab, click the Sample audio section to open the free stock audio collection.2. Click on an audio clip to preview it.3. Once you've picked a clip you like, drag it onto the audio track of the Timeline.To find more songs for your project, click Download more and subscribe to AudioBlocks.com — a stock audio bank where you can find thousands of songs, themes and audio samples.Stock video1. On the Import tab, go to the Sample video section to open the free video collection.2. Click on a clip to preview it.3. Once you've picked a clip you like, drag it onto the video track of the Timeline.If you can't find the right clip, click Download more and subscribe to VideoBlocks.com — a stock video collection with thousands of royalty-free videos, footage clips and animations.Backgrounds1. On the Import tab, go to the Backgrounds section to open the free stock background collection.2. Pick a background you like and drag it onto the video track of the Timeline.For more backgrounds, click Download more and subscribe to GraphicStock.com. Here you can find backgrounds, illustrations, vector graphics and design elements for every project.Capturing screen activityTo record video tutorials, Skype calls, webinars and any screen activity, you can upgrade to Movavi Video Suite and use the Screen Capture module to record anything that's happening on your screen. After you've installed the program, you can use the Record Screencast button to open the Screen Capture module and start recording your screen.Arranging files on the TimelineOnce you've added the files, they will appear on the Timeline at the bottom of the Video Editor window. The Timeline allows you to arrange the clips in the order you want. The clips' position relative to the time markers at the top of the Timeline determines when it will appear in the finished video. To reorder the clips, select the clips you want to move and then click and drag them to the new position on the Timeline.
 Moving a clip on the Timeline
See also:
