|
|
Working with video and images
After you've added some files to the project, it's time to edit them and create a beautiful video.
Using the Timeline
When you add files to your project, they appear on the Timeline in the bottom part of the window. The Timeline allows you to view the relative length of each clip along a time scale, and make several clips play simultaneously. All videos, pictures and the transitions between them are located on the video track of the Timeline. To change the order in which they are played, simply drag-and-drop the clips to the necessary position.
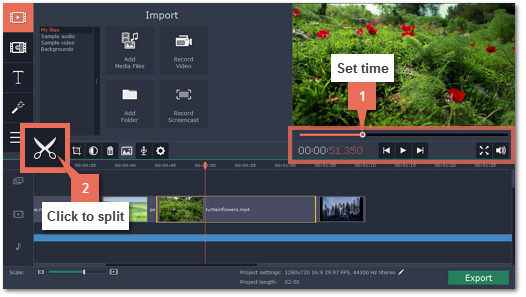
Cut and split video
On the Timeline, select the clip that you want to cut and move the position marker onto the moment where you want to split the clip. Then, click the scissors button on the toolbar to split the clip into two parts.
If you want to cut out a part of the video, repeat the steps to cut the unwanted fragment at the beginning and at the end, turning it into a separate clip on the Timeline. Then, select this fragment and press the Delete key on your keyboard. The unwanted fragment will disappear, and the remaining clips will move up the Timeline to fill in the blank space.
Add filters
To apply an artistic filter to your clip, simply open the Filters tab and drag a filter you like onto a clip.

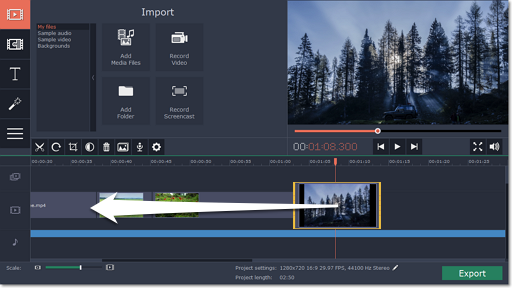
Picture in picture and overlays
To overlay one video or image on top of another, select the clip you want to show on top and drag it up, towards the top of the Timeline to create an extra overlay track. Then, double-click the upper clip to set up where the overlay will be shown on the video.


Picture and picture, side by side overlay modes.
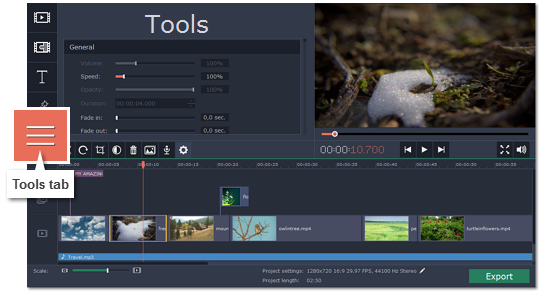
Using the editing Tools
The Tools tab also has other tools and special effects that you can use on your videos and images. To use the tools, select a clip on the Timeline and open the Tools tab. There, click on the tool you need and select the necessary options.