|
|
Creating and managing projects
A project keeps all the work on your video or slideshow. You can save the project and continue your work later or restore your work if you need to edit something after you've finished it. A new project is created automatically when you start working on a video.
Creating a new project
1. On launching the Video Editor, you can start making a video right away.
2. To start a new project while working on another project, select Create New Project or Create Quick Video from the File menu.
Saving projects
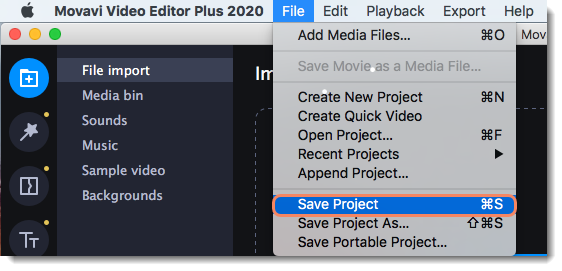
1. Select Save Project from the File menu or pres ⌘+S on your keyboard.
2. Name your project. All projects are stored in the "/Movies/Movavi Video Editor/Projects" subfolder in your user folder.
3. Click Save.
You can later open the project file and continue working on it. To avoid losing your editing progress, be sure to occasionally save your project. To save a project, click Save Project in the File menu.

Your project will be saved to your computer as an *.mepx file. You can open it later to continue editing your video.
Viewing videos
Project files cannot be viewed in a regular video player. They can only be opened with Movavi Video Editor Plus. To view the final video in a player, you need to convert your project to a common video format.
Opening projects
1. Select Open Project from the File menu.
2. Find the project file, select it, and click Open.
You can also open projects in other ways:
A. Find your project in File Explorer and drag it to the Video Editor window or double-click it.
B. On the File Import tab, click Add Files and select your project.
Restoring a project from an autosaved file
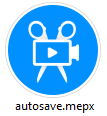
If your computer malfunctions and you cannot save the project, some of your work may be restored using an "autosave" file. Rename the "autosave.mepx" file and open it in Video Editor to continue working on your project.

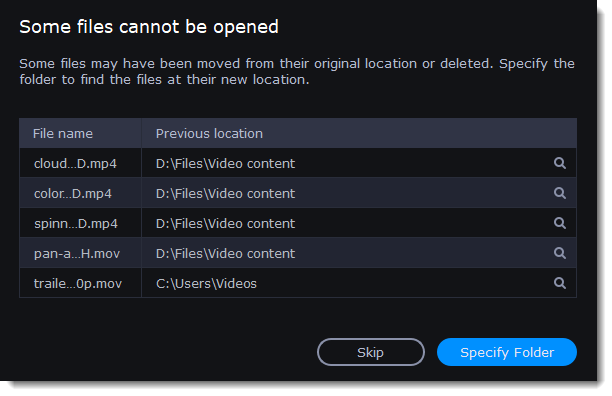
When you open a recent project, you may see a message saying that a file is missing from the project. This may happen if one or more files used in the project have been moved or deleted from your computer. In this case, click Specify Folder in the message box to specify the new location of the missing files or click Skip to open the project without the missing files. You can also click the magnifying glass icon  to specify the new location of a single file. We recommend copying all the files to your computer before editing.


