
|
|
Quick Start
In this mode, you can use all the tools that the Video Editor has to offer and create professional-looking videos without complicated software.
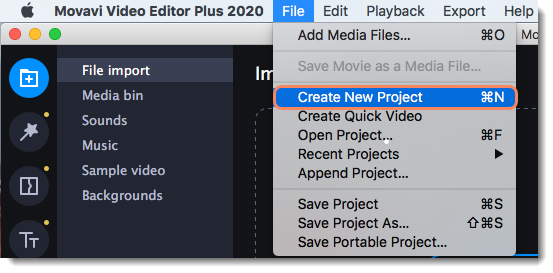
1. To start creating a project, just add files to the Timeline. If you want to start another project, select Create New Project in the File menu.
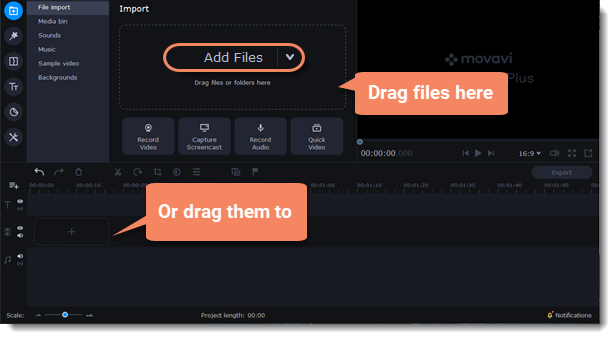
2. Click Add Files or drag and drop your files to the import area to start working on them.
3. Change the clip layout on the Timeline, crop images, or cut videos using the toolbar.

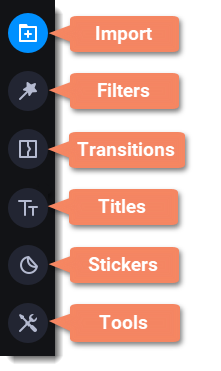
4. Add effects, transitions, titles, and more by clicking the icons on the left-hand sidebar.
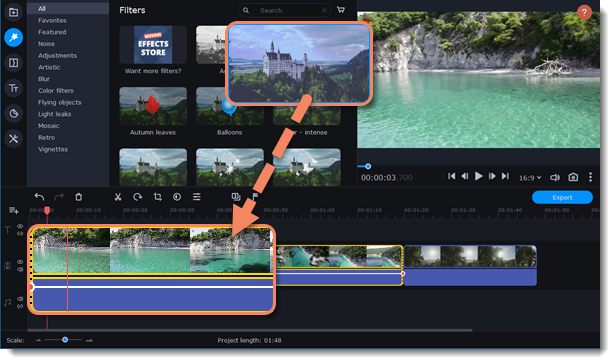
5. To add filters and transitions to the project, drag them to the Timeline.
6. Save your video:
-
Click the Export button.
-
Choose a file format.
-
Name the video, select a folder to save it to, and set the quality.
-
Click Start and wait until the processing is finished.

