
|
|
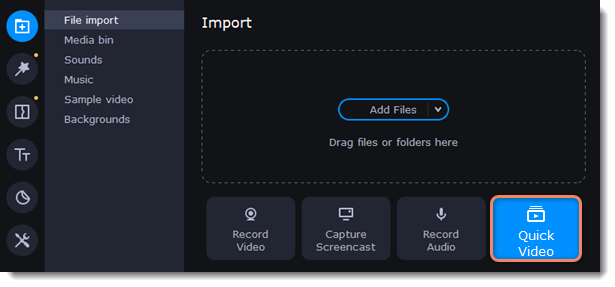
Quick Video mode
You can use the Montage Wizard to automatically build a video for you in minutes. All you need to do is provide the Wizard with some video clips or photos, choose a music track, and let the Wizard cut and build the video for you. You can also use the Montage Wizard to make slideshows.
-
Click Quick Video to open the Wizard.
-
On the Files tab, click
 or drag and drop your files over the window. To remove files, click the
  in the upper right-hand corner of each file, or select the files you want to delete and click Delete Selected on the bottom panel.
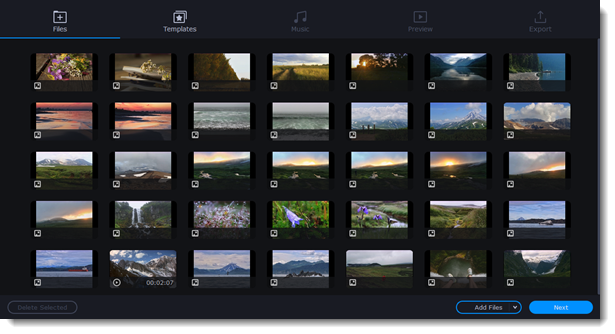
-
Switch to the Templates tab or click Next.
-
Choose a theme or a transition template.No transitions template does not add any transitions to your video, but your pictures will still have a Pan and Zoom effect applied by default.Transitions template puts some kind of smooth transitions between the slides.Theme template uses the sample music tracks, a set of different transitions for each of the themes and various title styles.
-
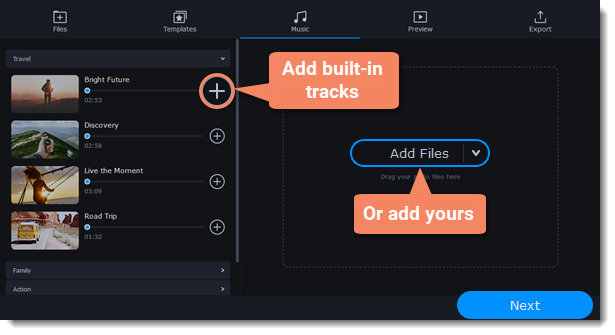
Switch to the Music tab or click Next.
-
Add music. Choose from the built-in tracks* or add music of your own. You can also add more than one track.*The audio tracks are royalty-free so you can upload these videos to YouTube and other services.
-
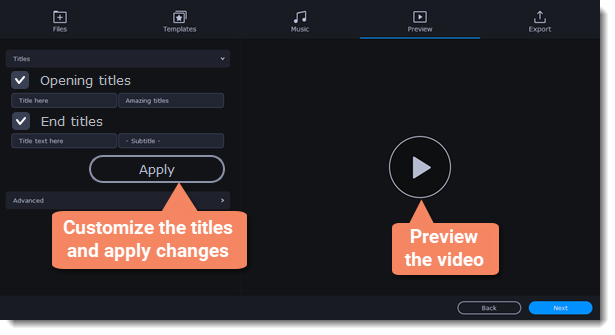
Switch to the Preview tab or click Next.
-
Customize the opening and ending titles, change text and click Apply.
-
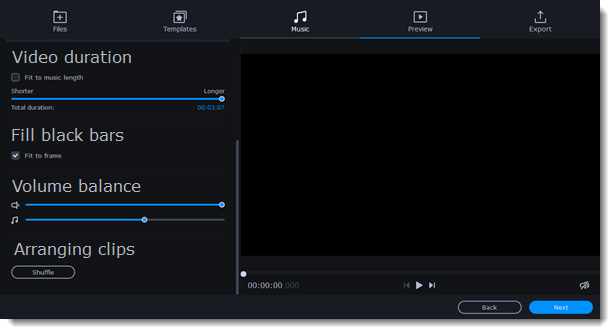
Under the Advanced tab make other necessary changes.
-
Video durationYou can set your video to be the same length as the audio by selecting the Fit to music length option or use the slider to set how long you want the video to be. If you opt for a shorter video, some clips may not appear in the end result.
-
Fill black bars
If the resolution of the project and the files you've added to the video are different, black bars will appear. You can remove them by checking the Fit to frame option – the image resolution will be automatically fitted to the frame size.
-
Volume balance
By bringing the upper slider to the right end you will turn the volume of the added video up to maximum. And by bringing the bottom slider to the right end, the volume of the background audio track will have its maximum volume.
-
Arranging clipsIf you have a lot of pictures and want to change their order in the video, click the Shuffle button. The Wizard automatically mixes your files and puts them in a different order.
 Tip: You can also set a desired order of appearance of your files by returning to the Files tab and dragging the file icons in a desired order.10. Watch the finished video in the player on the Preview tab and switch to the Export tab.11. Select what you want to do next with your video:
 -
Save the video – save the video to your disk.
-
Continue editing – add final touches to your video by adding effects, more titles, animation and more.
-
Upload online – save the video to your disk and upload it to YouTube, Vimeo, Google Drive or Movavi Cloud.
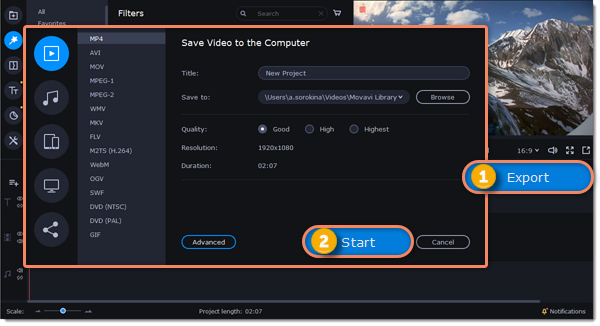
12. To save the video, choose a video format and pick a folder to save the video file.
If you're uploading the video to YouTube, sign in with your YouTube account and fill in the details about your video. Then click Start to begin saving the video.
Learn more:
