|
|
Recording video
Follow the steps below to record video from a camera that's connected to your computer.
1. Connect the camera you want to capture from to the computer. Make sure that the system recognizes the device and that it is working correctly.
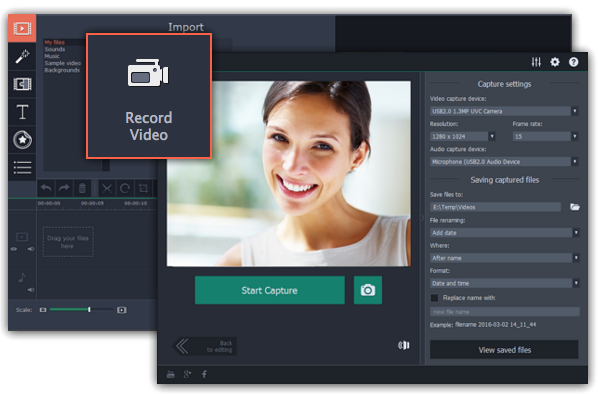
2. On the Import tab of the Video Editor, click Record Video. The recording module will open in a separate window.

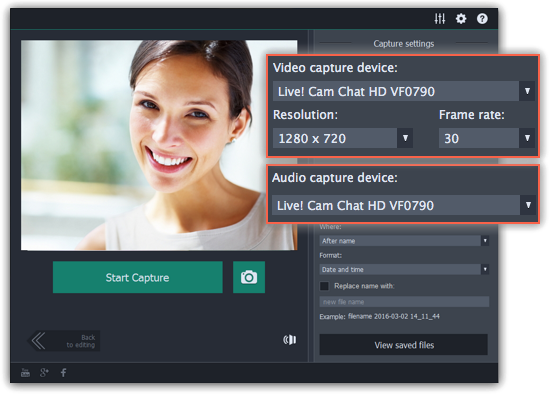
3. In the Video capture device box, choose the camera you want to use for capture. Then, select the resolution and frame rate. A larger resolution will be able to retain better quality, however, the video file size will be larger. A higher frame rate is necessary for recording motion, while static scenes can be captured with a lower frame rate.
4. In the Audio capture device box, choose the microphone that you want to record the sound with.

5. By default, the recordings will be saved to your Movavi Library folder. If you want to save them somewhere else, click the folder button  under 'Save files to' and choose a different location.
6. If you want to batch rename the files, choose a renaming option from the 'File renaming' box and set up the new file name template.
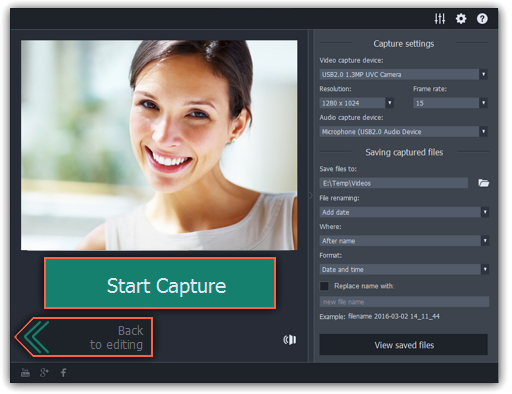
7. Click Start Capture to begin recording the video. During capture, you can take snapshots using the camera button  on the right.
8. To finish the recording, click Stop Capture. If you need to record more videos, repeat steps 7 and 8.
9. When you're done, click Back to editing at the bottom of the window. The captured files will be added to your project's Timeline. Also, they are saved to disk in case you want to use them later.


