
|
|
Quick start guide
Jump to:
Creating project | Adding files | Cutting clips | Editing clips | Filters | Titles | Transitions | Saving the video
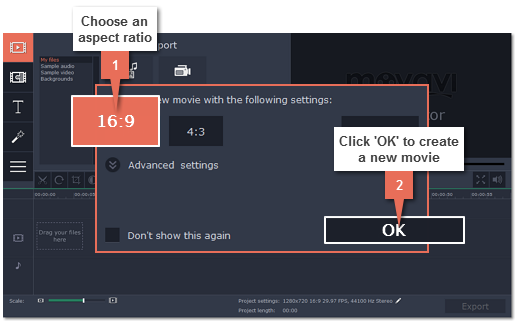
When you open Movavi Video Editor, you will be asked to choose an aspect ratio for your new movie. Choose an aspect ratio closest to that of the videos and photos you intend on using. You will be able to change this later.
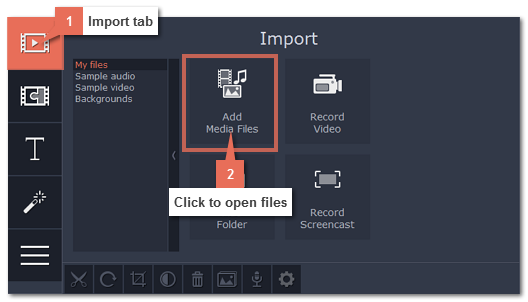
On the Import tab of the Video Editor, click Add Media Files to choose the video, audio, and image files you'll be using.
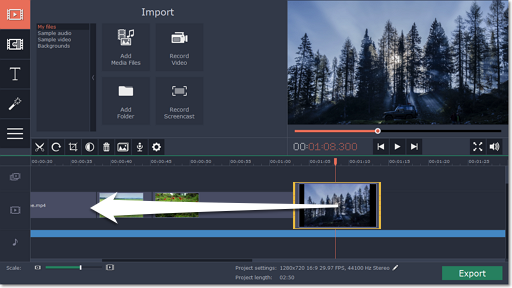
When you open the files, they will be placed on the Timeline: the videos and photos on the video track, and the audio clips on the audio track. To rearrange the clips, simply drag them to the necessary position with the mouse.
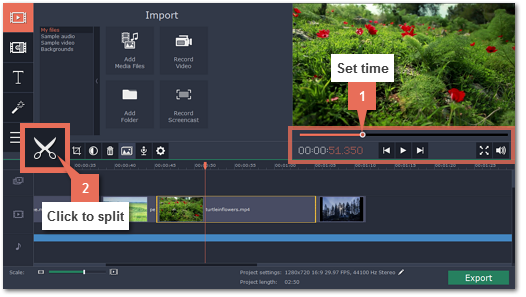
1. Select the clip that you want to split*.
2. Move the position marker onto the moment where you want to cut the clip. You can move the position marker both in the player or on the Timeline.
3. Click the scissors button on the toolbar to split the video into two parts.
|
* Note that if you select a video clip, its audio track will also be cut, unless you move it to a separate audio track. Learn how to work with audio on the Timeline
|
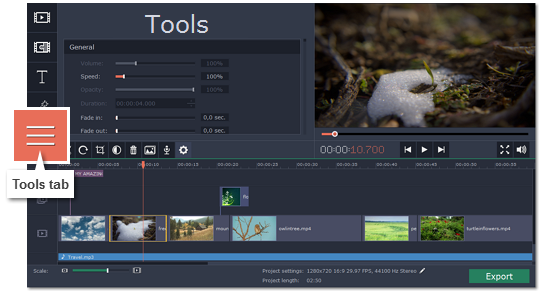
Select the clip you want to edit, and click the Tools button on the left to see clip editing options. Here, you can edit each clip's speed and volume, as well as rotate, crop, and adjust the videos.
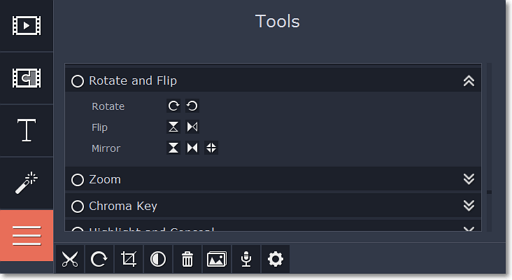
Rotating clips:
1. Click Rotate and Flip to open the rotation options.
2. Click the arrows to rotate the selected clip 90° clockwise  or counterclockwise
  .
.
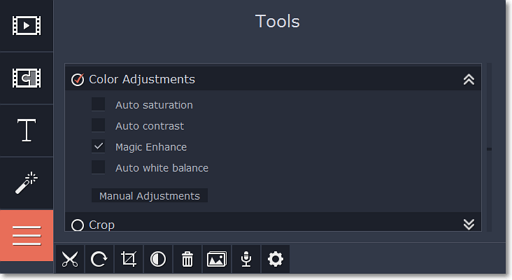
Enhancing photos and videos:
Auto adjustments can help you enhance your videos and photos in one click, making them more vibrant.
1. On the Tools tab, click Color Adjustments to open the adjustments for the selected clip.
2. Select the auto adjustments that you want to use. Magic Enhance will instantly fix the clip's brightness and contrast. These enhancements are fully automatic.
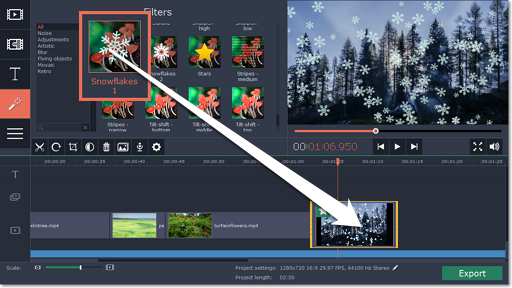
Filters can help you change the colors in your photos and videos or add an artistic touch. To apply a filter:
1. Click the Filters button to open the filter library. To preview a filter effect, click on its thumbnail.
2. Drag the filter's thumbnail down onto a clip on the Timeline to apply it. A star icon will appear on the clip.
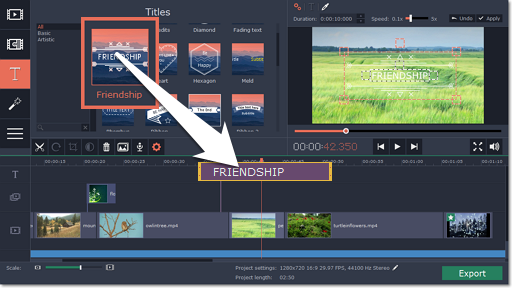
1. Click the Titles button to open the titles collection. To preview a title style, click on its thumbnail.
2. Drag the titles you like onto the top of the Timeline. The title track will appear. Place the titles where you want them to appear relative to the other clips.
3. To change the text and edit the title style, double-click the titles clip you've just placed. The title properties panel will appear in the player, where you can edit and move the text.
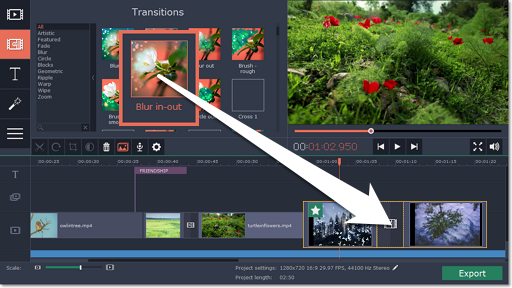
1. Switch to the Transitions tab, where you can choose animations to smoothly join the clips.
2. Drag-and-drop a transition icon in between two clips on the Timeline.
Make sure to save your work once in a while: choose Save from the File menu to save the slideshow project so that you can access it later.
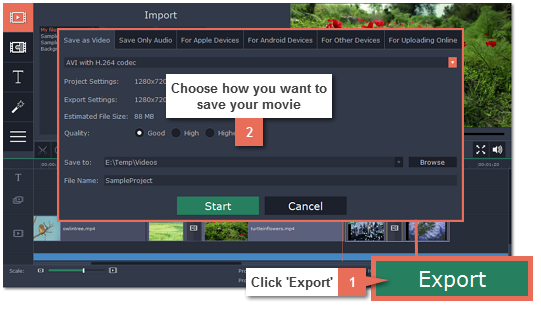
When you're done with the slideshow, click the Export button to open the exporting options. In the Export window, choose a format you want to save the video in, and name your slideshow. Finally, click Start to begin processing the video. Your slideshow will be ready in a few minutes.
Having trouble with something? E-mail us and we'll help you out! Our e-mail: support@movavi.com
