|
|
Recording Skype calls
When you record audio or video calls using Skype™ or a similar program, it is important that you record both ends of the conversation. To do that, you will need to record input from your microphone or webcam, as well as the audio from your speakers. Follow the steps below to record Skype calls with audio.
Step 1: Select capture area
-
Launch the Skype application and make sure it is on screen.
-
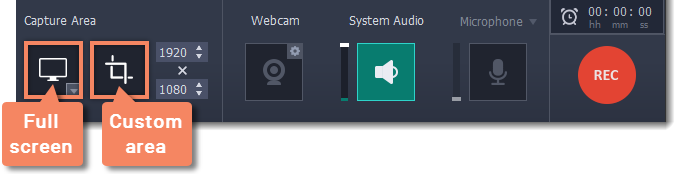
On the recording panel, click the Select capture area button.
-
Your cursor will turn into a crosshair. Draw a rectangle inside the Skype window where your call video will be.
Step 2: Set up the sound
-
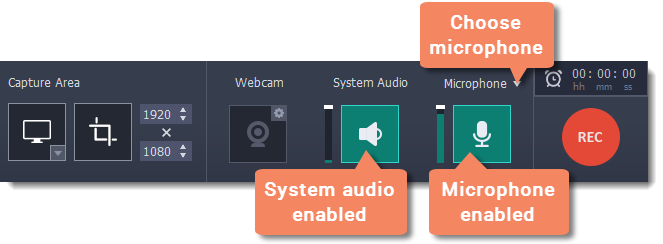
Click the speaker button under System Audio to enable recording sounds on your computer, including the call from the other end. The button appears green when enabled.
-
Click the Microphone button to enable recording from a microphone. If you have more than one microphone, click Microphone and choose the one you want to use for the recording.
-
Use the sliders to the left of each button to set the necessary volume levels for the call and for your microphone.
Tip: if you're recording a video call, you do not need to enable webcam recording in Movavi Screen Recorder, because Skype is already recording your webcam.
Step 3: Record your call
-
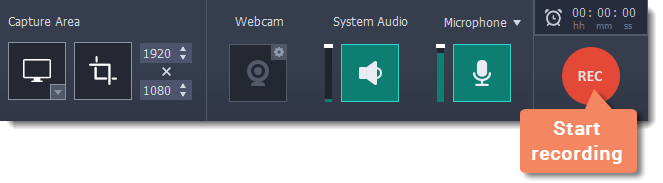
Start your call in the Skype window.
-
Click REC on the Movavi Screen Recorder panel to begin recording.
-
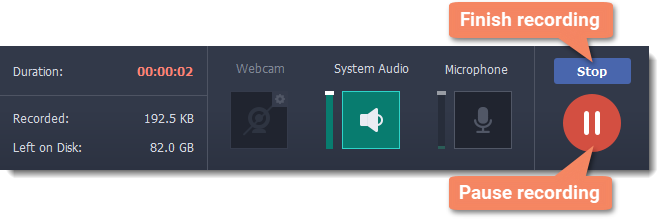
When you finish your call, press
 or click the Stop button on the recording panel to finish recording. The Video Editor window will open, and your recording will be added to the timeline automatically.