
|
|
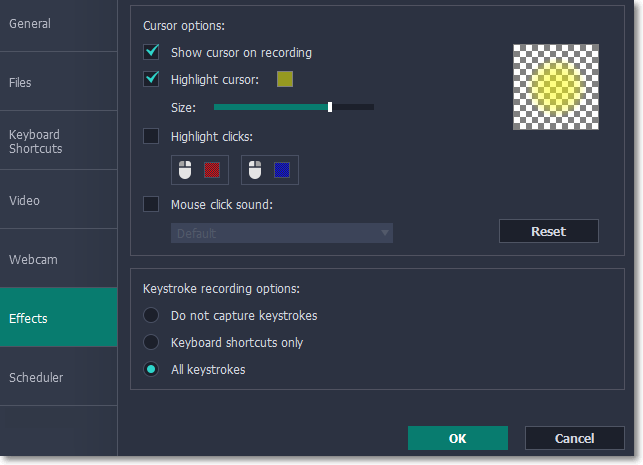
Mouse cursor effects
Using mouse effects, you can use the mouse as a pointer and show your viewers where to click.
Step 1: Open the mouse cursor options
-
Click the Settings menu and choose Preferences.
-
In the Preferences window, switch to the Effects tab.
Learn more: Effects options
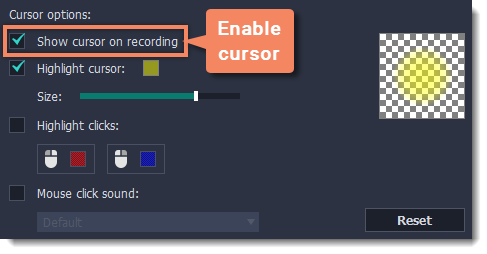
Step 2: Enable the cursor
Select Show cursor on recording. This will make the cursor visible on recordings. To make the cursor invisible, disable this option.
Step 3: Highlight cursor actions (optional)
To make the cursor visible even better, you can highlight it or enable a special effect for clicks.
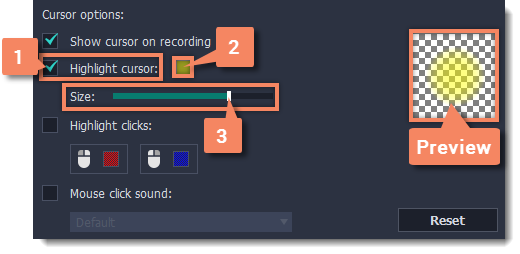
Highlight cursor
A semi-transparent circle will appear around the cursor, making it easier to track. 
-
Select the Highlight cursor option.
-
(optional) The default highlight is yellow. To change the highlight color, click the square on the right and pick the new color.
-
(optional) Use the Size slider to make the highlight smaller or larger. The cursor itself will remain the standard size.
Hover your mouse over the square on the right to preview the highlight.
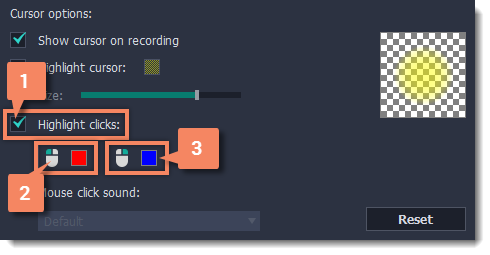
Highlight clicks
Concentric circles will appear for every click, color-coded for two mouse buttons. 
-
Select the Highlight clicks option.
-
(optional) Click the left square to set the color for the left mouse button.
-
(optional) Click the right square to set the color for the right mouse button.
Mouse click sound
A clicking sound will play whenever you click the mouse.
-
Enable the Mouse click sound option.
-
(optional) The default clicking sound has already been selected for you. If you want to use your own sound, open the drop-down box and choose Add sound. Then, open the sound file that you want to use.
You can use WAV, MP3, AIFF, and AU files.
