
|
|
Recording video from screen
Launch Screen Recorder
-
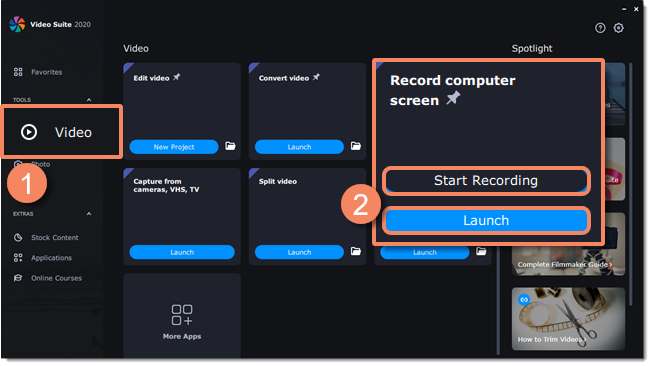
Open Movavi Video Suite and click Video on the Tools.
-
Then click Launch on the Record computer screen tab to launch the screen capture module. Here you can set up the capture area.
-
If you want to start recording right away, click Start Recording on the Record computer screen tab. If you launch the program for the first time, it will record full screen by default. If you have recorded something before, the program will start recording the last selected area.
Step 2: Set up the capture area
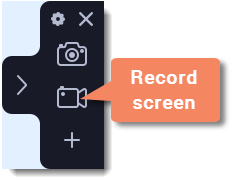
1. Click the camera  button on the control panel or press F10. The area selection tool will start.
2. Select the part of the screen that you want to record:
-
Click and drag on the screen to select the capture area.
-
To record a window or a window panel, hover your mouse pointer over it and click once a frame appears around it.
-
To record the full screen, press Space or click in any part of your screen (make sure no windows are selected!).To adjust the area, use the orange markers on the frame to drag it or put the exact size in pixels on the panel above.

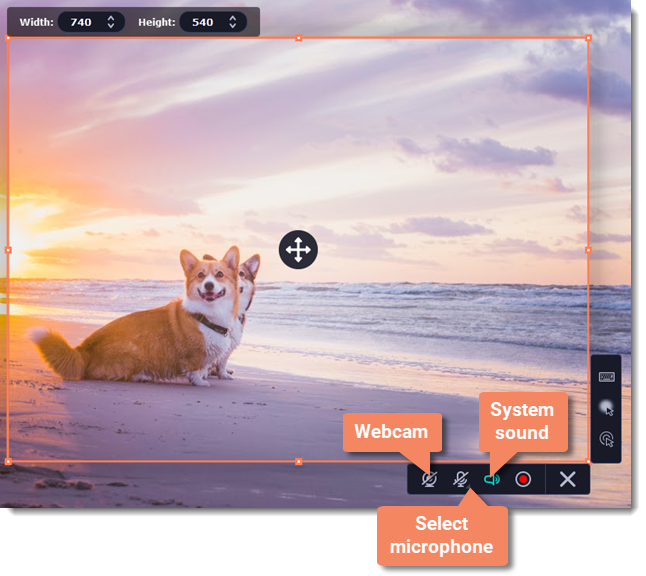
Step 3: Set up the sound and webcam
By default, only the system sound recording is on. To enable webcam and microphone recording, click the corresponding icons:
If you have more than one microphone connected, select the one you need from a list next to the mic icon.
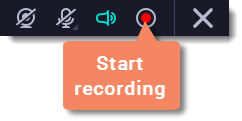
Step 4: Start recording
When you're ready to begin, click the REC button. You will be given a 3-second countdown before the recording begins.
Use these keyboard shortcuts to control the recording process:
F9 - pause the recording
F8 - take a snapshot of the capture area
F10 - end capture and save the recording
Tip: these are the default hotkeys. You can change them in the Keyboard Shortcuts section of the Preferences.
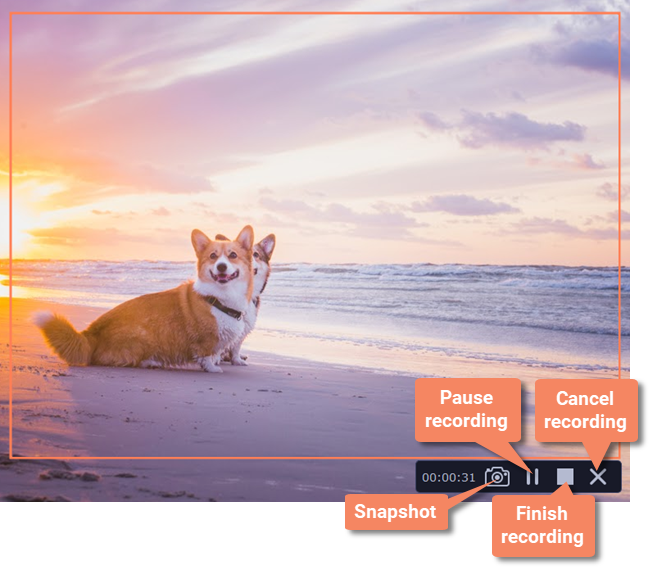
When you're ready to finish your recording, click Stop on the recording panel or use the F10 keyboard shortcut .
Step 5: Edit the recording (optional)
When you finish recording, the capture editing window will open. Your video is ready and saved in MKV format, but you can preview it, edit, or save it in a different format.
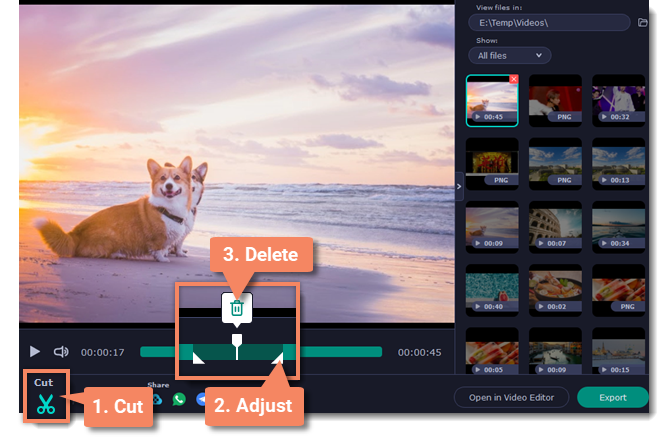
Cutting the recording
To cut out a fragment:
1. Place the position marker around the unwanted fragment and click the scissors icon.
2. Move the cut markers to adjust the fragment exactly as you want.
3. Click the trash can button.
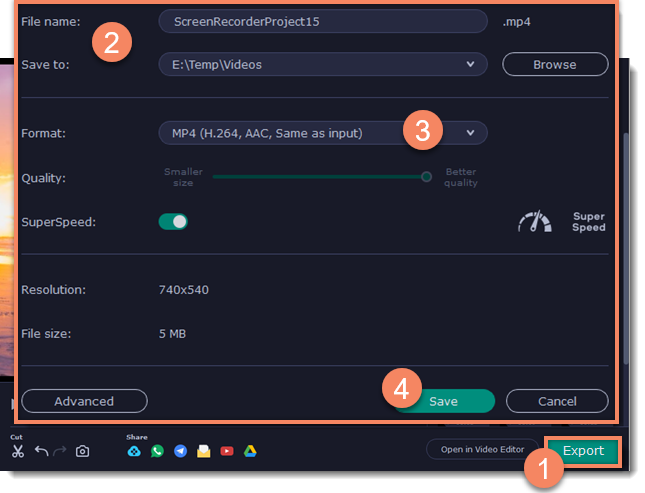
Saving the edited recording
To save the trimmed version, or to change the format of your recording:
1. Click the Export button. The output options will open.
2. Choose a name and location for saving the video.
3. Choose a format for saving your video.
4. Click Save to start processing your recording.
Frequently asked questions
I get a codec activation message when I try to start recording
When you first start using Movavi Video Suite, you need to activate the codecs you are using. Simply click Activate in the message box to start using these codecs and continue with your capture. This process is free of charge and does not collect any personal information.
